

Sharpening your images in Photoshop CC 2019: From Capture to Output.
There are three stages of sharpening;
- Raw Capture Sharpening
– Compensating for flaws in digital cameras - Creative Sharpening
– Optional, if you so desire - Output Sharpening for either screen or print
– Compensating for dot gain (ink spreading on paper)
What is image sharpening?
Image sharpening is the act of increasing contrast at the edges in our images to give us the illusion that our photos are sharper than when they first came out of the camera. Those in the pre-press world have always lived with the motto that “sharpening is the very last step” in the process of preparing an image for print. (See the section on “Output Sharpening for Print” later in this article). That was so true back in the days of film camera captures where we would have to scan the photo itself as opposed to digital capture. With digital capture we have to compensate for the actual process of what is going on in the camera itself.
Whenever we sharpen our images, we should always be viewing our images at 100%. This way we have one image pixel for one screen pixel. Anything less than 1:1 we may not be able to reliably predict the outcome.
Adobe Camera Raw sharpens only the luminosity of the images and not the colour in our images. When we increase contrast in a colour image, we are also increasing the saturation in the colours which is not ideal in the sharpening process. Adobe Camera Raw sharpens only the grey scale component of our images, leaving the colour alone – Photoshop can do this as well.
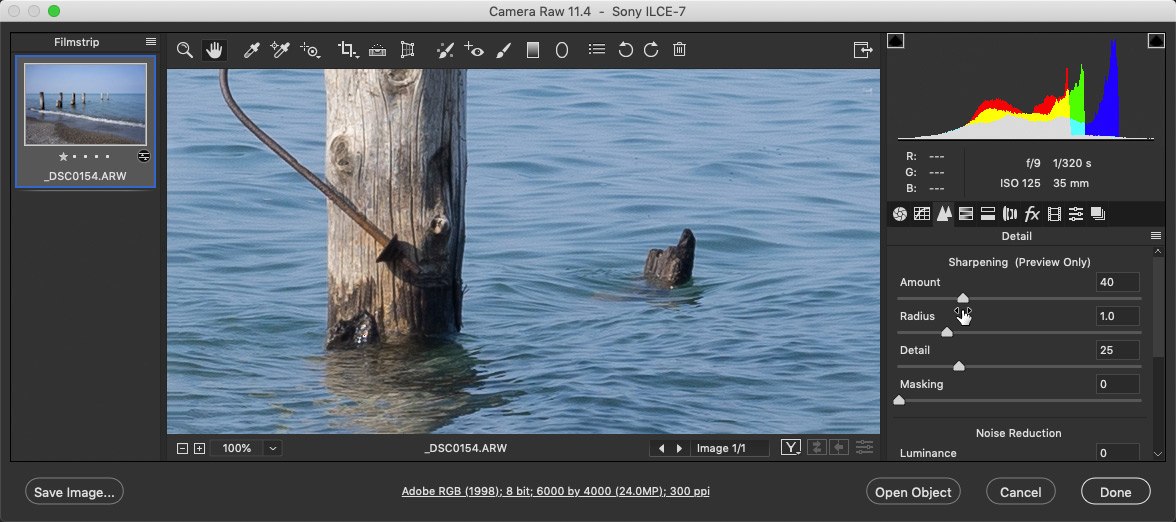
By default, sharpening is being applied as you can see in the first image in this article.
Raw Capture Sharpening:
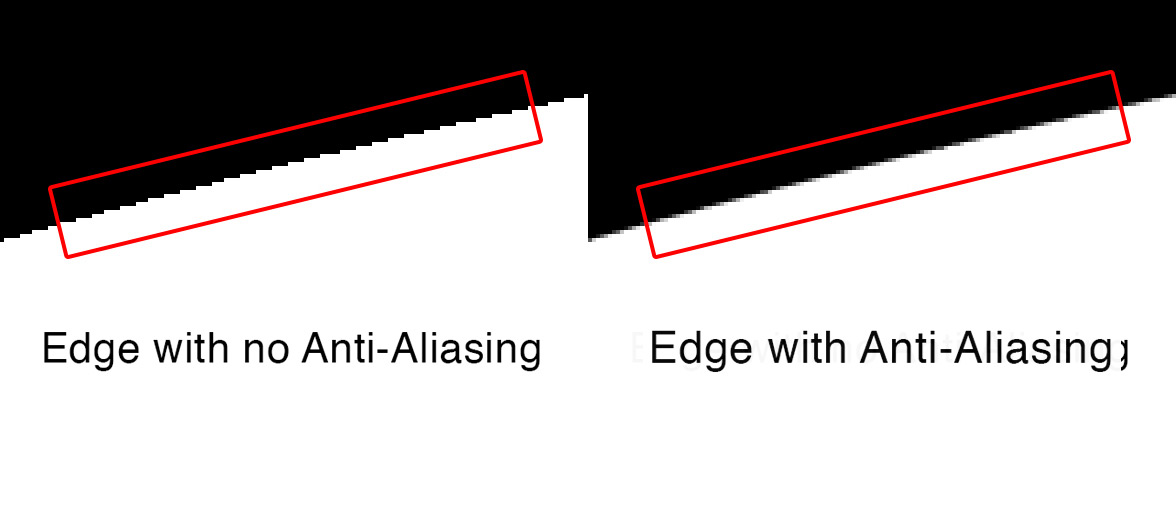
The reason we need to sharpen our RAW files is to compensate for the anti-alias filter on our digital camera sensors. The reason for this filter is to smooth out the rough edges. These rough edges are visible to us because all camera generated images are made up of square pixels.
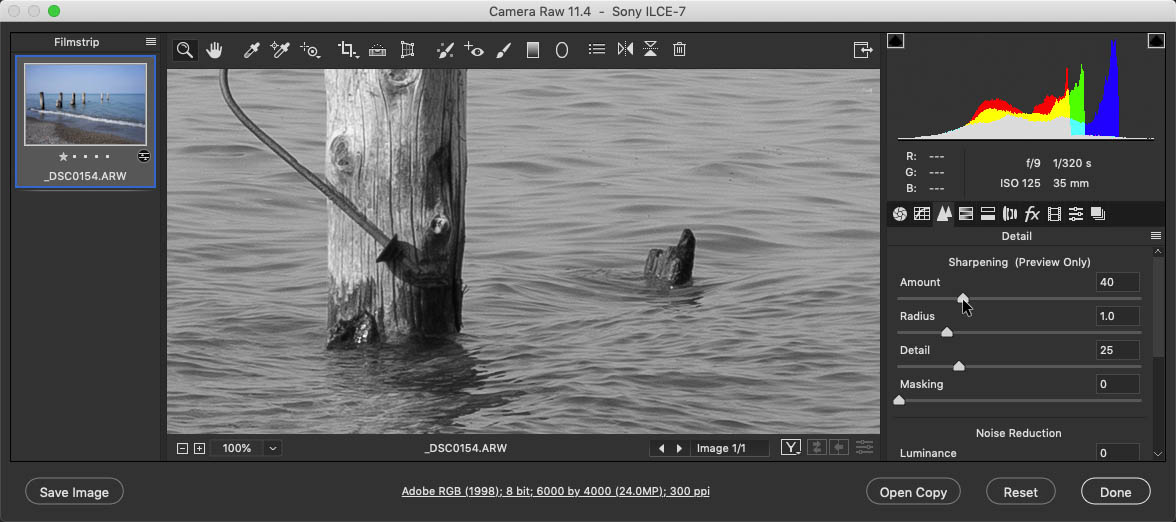
Holding down the Option/Alt key while adjusting the Amount slider will display the image in black & white so we can see the sharpening effects without the distraction of the colour in our image.
The Amount slider is similar to the volume control on your radio. The higher the amount, the more obvious the effect is being applied.

The above image shows what your image looks like when holding down the Option/Aly key when using the slider to increase or decrease the radius which is commonly seen as the halos around edges you see so often.
Rule of thumb is; if you increase the Amount value, reduce the Radius value. The smallest Radius value for print is 0.3
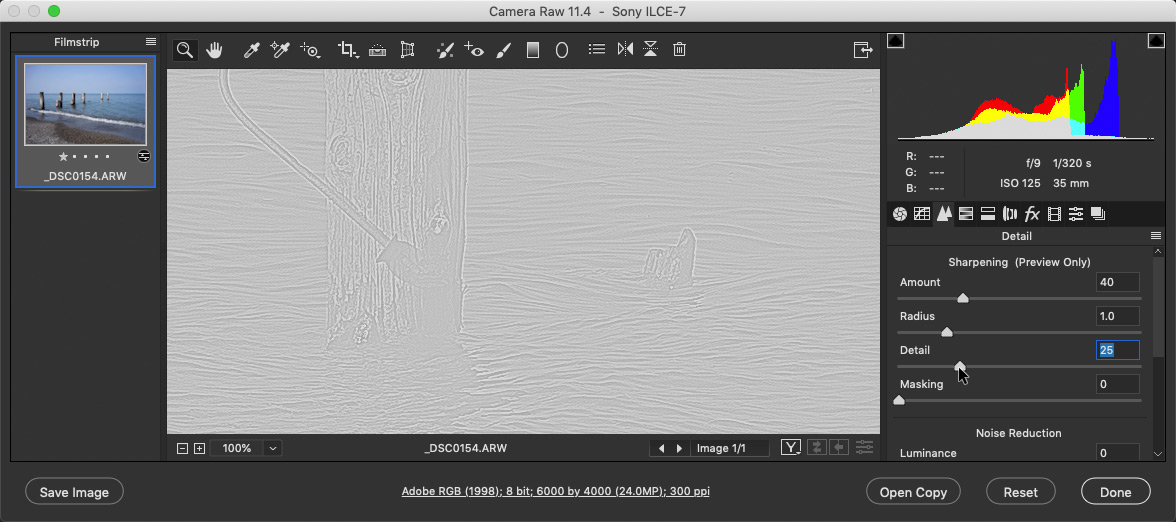
The Detail slider effects the little details in your image. Depending on your camera and sensor and the image itself you will adjust this value to either make those little details more obvious or less obvious. I have used the value of 15 for most of my Nikon cameras. If you use one of FujiFilms X series cameras, you may want to reduce this even more.
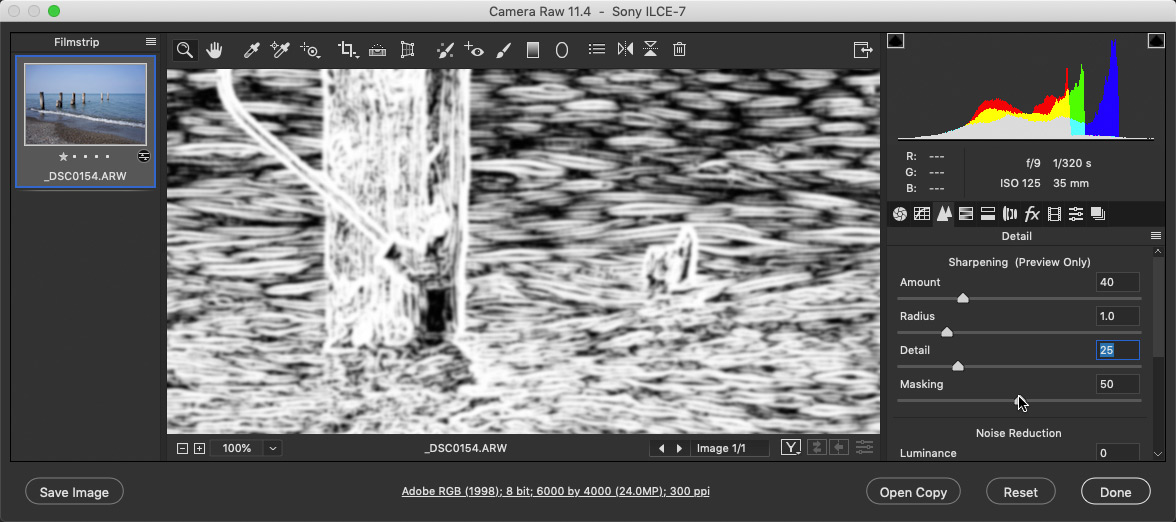
Masking in Adobe Camera Raw is similar to masks in Photoshop itself. White reveals all and black conceals all. Levels of grey would represent levels of transparency. In the image above I have moved the slider half way. All of the white areas will reveal the effects of what the three sliders above (Amount, Radius & Details) show. Black essentially blocks the sharpening amount completely and where you see grey (Transparency), depending on the level of grey, creates a transition between what is sharpened and what is not.
Imagine a round object such as a soccer ball; in order to make it appear as a round object instead of a round object (or an object with a curved edge) with harsh stair stepping, we need to smooth that transition to take the edge off. That is the purpose of the anti-alias filter in front of our camera sensors.
 NOTE: Today there are more and more mirror-less camera manufacturers producing camera sensors which do not have this anti alias filter in front of the camera’s sensor. Now logic would suggest that if there is no anti alias filter in front of the sensor, then there is no real need to sharpen in the RAW processor. In my examples here, I used Adobe Camera Raw which is accessible via either Adobe Photoshop or Adobe Bridge.
I am in the beginning stages of testing out this theory and will get back to you when I am done.
Creative Sharpening:
This step is optional. An example of creative sharpening would be if you wanted to make some part of an image stand out a little more, you could duplicate the Background Layer (for example)
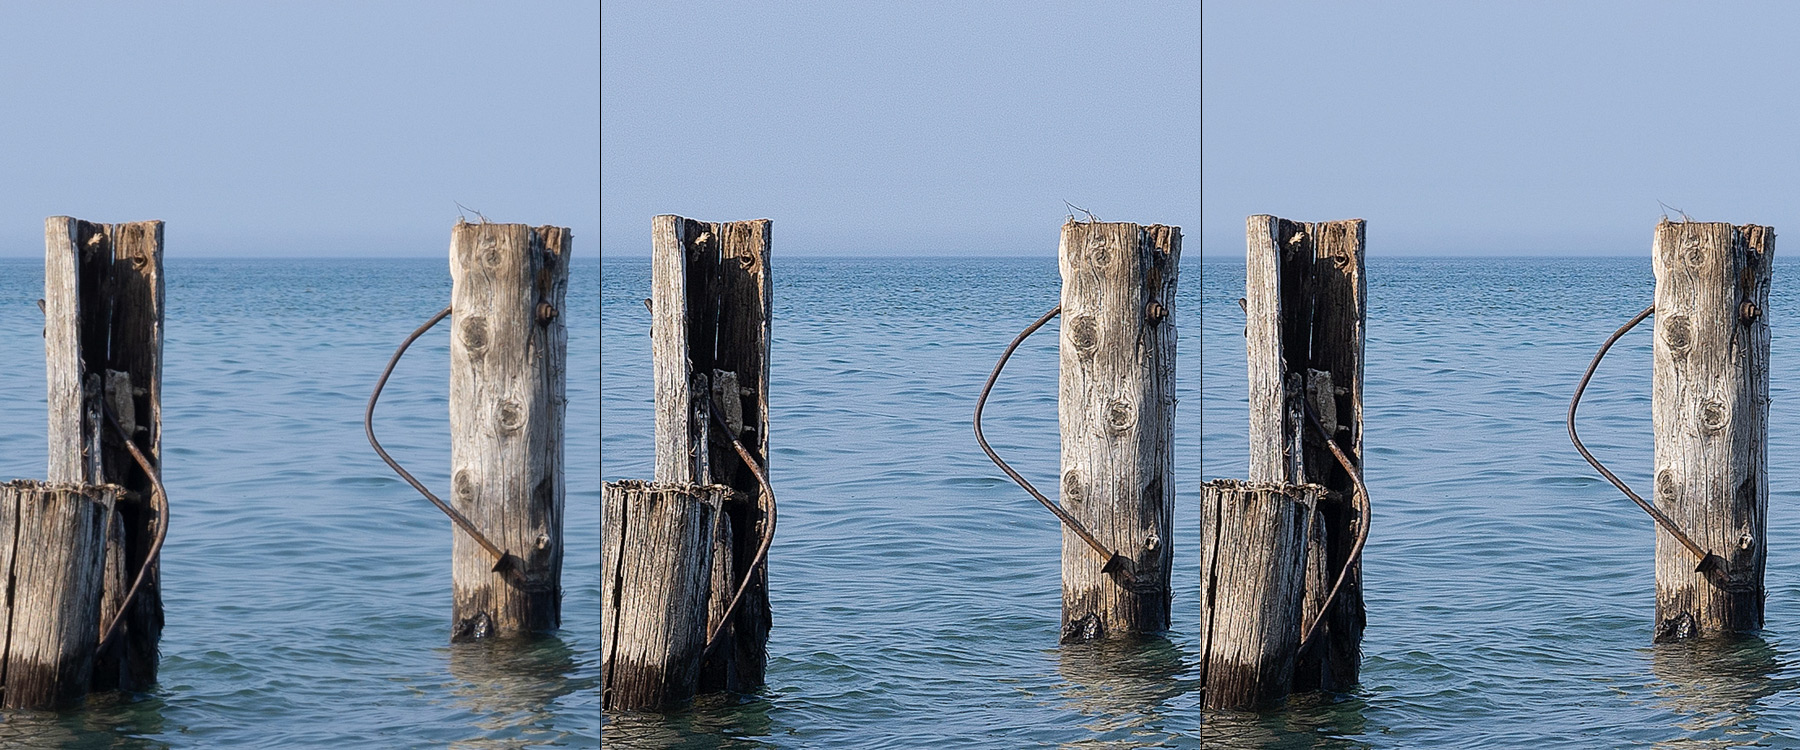
Original Image — Over Sharpened Image — Sky protected
in Photoshop and apply the Sharpen Filter to this layer. Add a White Layer Mask to this Sharpen Layer and then grab a paint brush, set the foreground colour to black and reduce the opacity of this paint brush to say, 30%, and start brushing the sky area to protect it from the effects of sharpening. I hope you can see this in the sky area in the image above.
In the case of the above image, I over sharpened the image to demonstrate this point. Then I masked away the sky. so just the water and the pier structures were sharpened.
Output Sharpening for Screen Display:
Everything mentioned above applies here but to a lesser degree, even significantly lesser degree. The reason we need to sharpen of screen display is this; the size of the image of screen display is much smaller that the image we would use for print. When we take a full size image that our camera produces and make it suitable for social media for example, Photoshop has to throw away some of the pixels (or a lot of pixels) in the process and then Photoshop has to put it all back together using re-sampling algorithms – it essence it has to re-map all of the good remaining pixels to our image look great in this smaller size. During this process, our image gets softer and therefore we need to compensate for this softening by sharpening our image just a little. By how much? I would suggest starting with Unsharp Mask’s original defaults of:
Amount – 50% ; Radius – 1.0 ; Threshold – 0
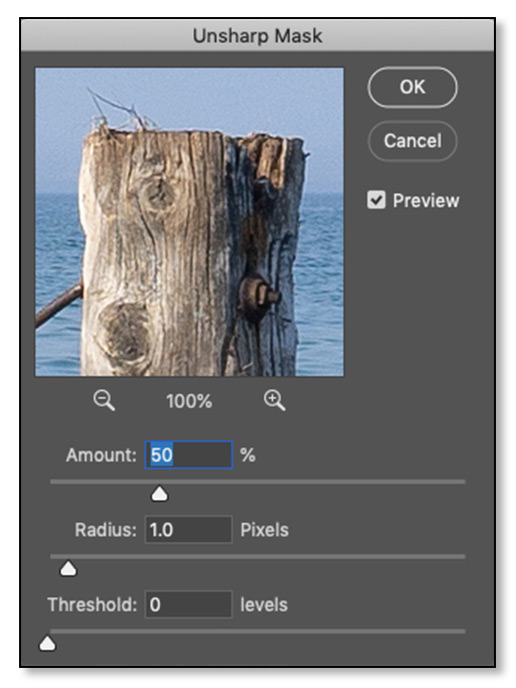
Then try other amounts to see what looks best for your specific camera make and model.
Output Sharpening for Print:
This step is as critical as the first round of sharpening and its purpose is to compensate for dot gain or spread. I know, “what the duck is that?”. Yes, I said Duck. Dot Gain is a printing term and it refers to how absorbent the paper is when ink is applied. For example, newsprint is very absorbent and the ink will spread wide and far. On the other hand, glossy photo paper is not so absorbent and there is not so much “spread” going on. We need to compensate for this effect by sharpening our images (as the very last step in our workflow) increasing the contrast at the edges to attempt to stop the ink from spreading. We are trying to build a wall of sorts, stopping the dark side from crossing over to the light side at these edges. Too much and it looks bad, but done correctly, it makes our images look great.
Steps for sharpening for prints in the approximate 8×10 size.
We are going to create an action of this sharpening routine because there are about 10 steps in the process and we do not want to repeat all of these steps every time we want to make a print.
This action is going to include a step that saves the sharpened file(s) in a dedicated folder in your Documents Folder. We will name this dedicated folder “Images for Print”.
Step 1: Create this folder and name it.
Step 2: Open up a high-resolution image file taken with your camera.
Step 3: Open up the Actions Panel by going to the Window menu and choosing Actions.
Step 4: In the Actions Panel, click on the contextual menu icon in the upper right corner and choose New Set … and in the resulting dialog box name this set “Post Production”.
Step 5: In the Actions Panel, click on the contextual menu icon in the upper right corner and choose New Action … and in the resulting dialog box name this action “Sharpen for Print”.
We are now ready to begin recording our action
Step 6: Duplicate the Background layer by going to the Layer menu and choosing Duplicate Layer … and click OK. (We don’t have to give this new layer a name).
Step 7: Go to the Filter menu and choose Sharpen > Unsharp Mask.
Step 8: Set the Amount to 320, the Radius to 0.6 and the Threshold to 4 and click OK.
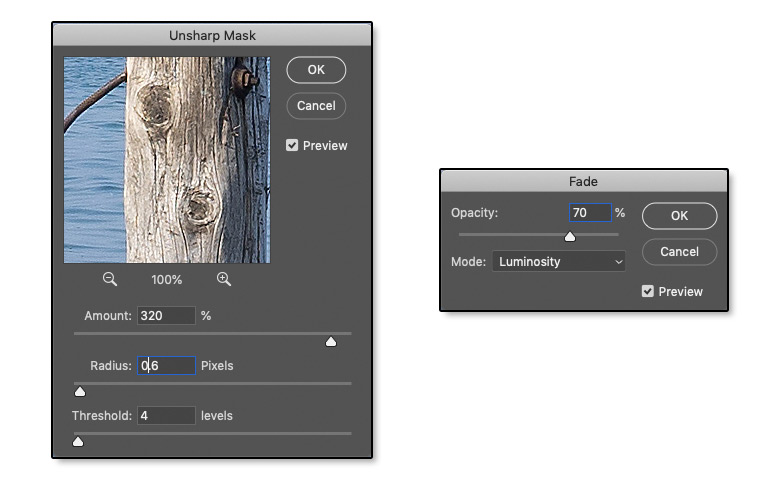
Step 9: Go to the Edit menu and choose Fade Unsharp Mask … and set the Opacity to 70 % and the Blend Mode to Luminosity and click OK.
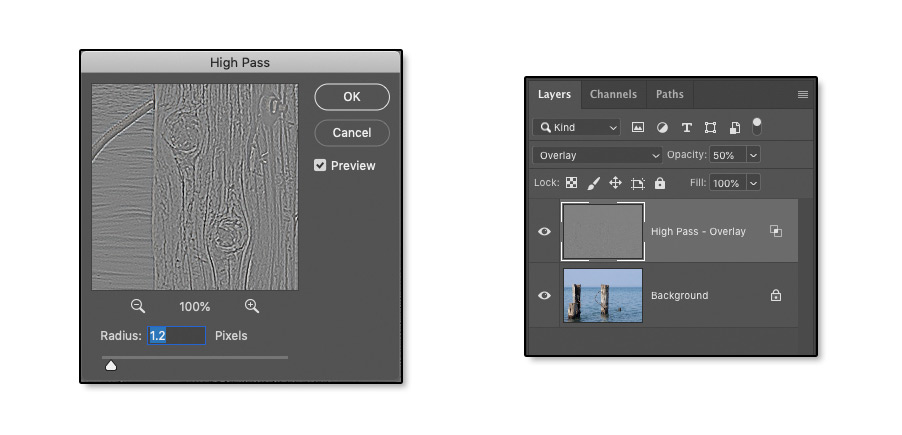
Step 10: Go to the Filter menu and choose Other > High Pass … and set the Radius to 1.2 and click OK.
Step 11: In the Layer menu change this layer’s blend mode to Overlay and reduce the opacity to 50%.
 Step 12: Double-Click just to the right of this layer’s name in the Layer’s Panel to open up the Layer Styles dialog box in the Blend Mode Options category. Towards the bottom is an area named “Blend-If” and there are two gradients with sliders – they are named “This Layer” and “Underlying Layer”. We are only concerned with the “This Layer” which is the sharpening layer.
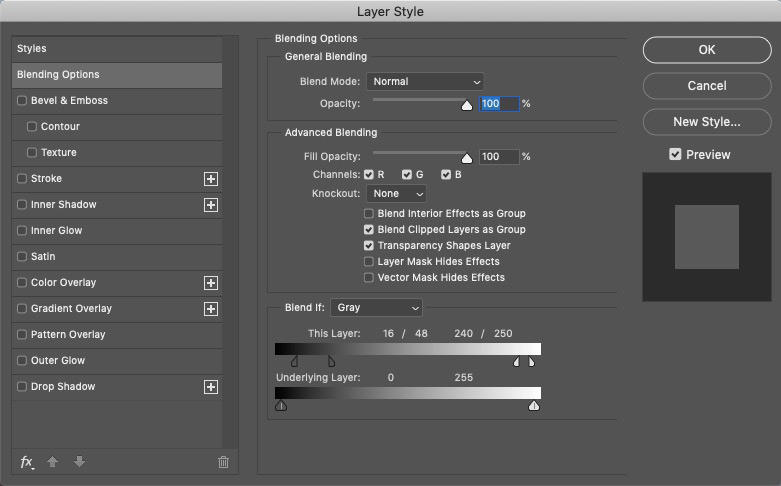
Move the Shadow Slider to the right to about 16. Now hold the Option/Alt and click to the right of this slider and the triangle slider will split in half. Move the right half to about 48. Now move the Highlight Slider to the left to about 250. Now hold down the Options/Alt key and click to the left of this slider to split it and move the left half to about 240.
Step 13: Make a Merged Composite at the top of the layer stack by going to the Layer menu and while holding down the Option/Alt key, choose Merge Visible.
Step 14: Flatten the image by going layer > Flatten Image.
Step 15: Do a File Save As … and choose TIF and the file format and the location to that folder we created in the Documents folder before we began this action.
Step 16: Close the image by going File > Close.
Step 17: Stop recording.
Now test your action on a different image to verify that all is good.
About the Author:
John Warren is an award winning Photoshop Instructor and Professional Photographer living and working in the Greater Toronto Area and is on the faculty at Humber College.


Great piece! Thanks John for your time and effort sharing these sharpening tips!