

I know lots of photographers hate to go outside in the cold and snow. Winter is a time for water drops, still life, studio portraits and other “indoor photo projects”. One of my favourite winter ventures is scanning, restoring and printing old photos. Also, I seem to be getting a lot of customer requests for fixing old photos.
I normally use an Epson Perfection V600 Photo Scanner. It’s a versatile and easy-to-use unit that scans prints, film and negatives.
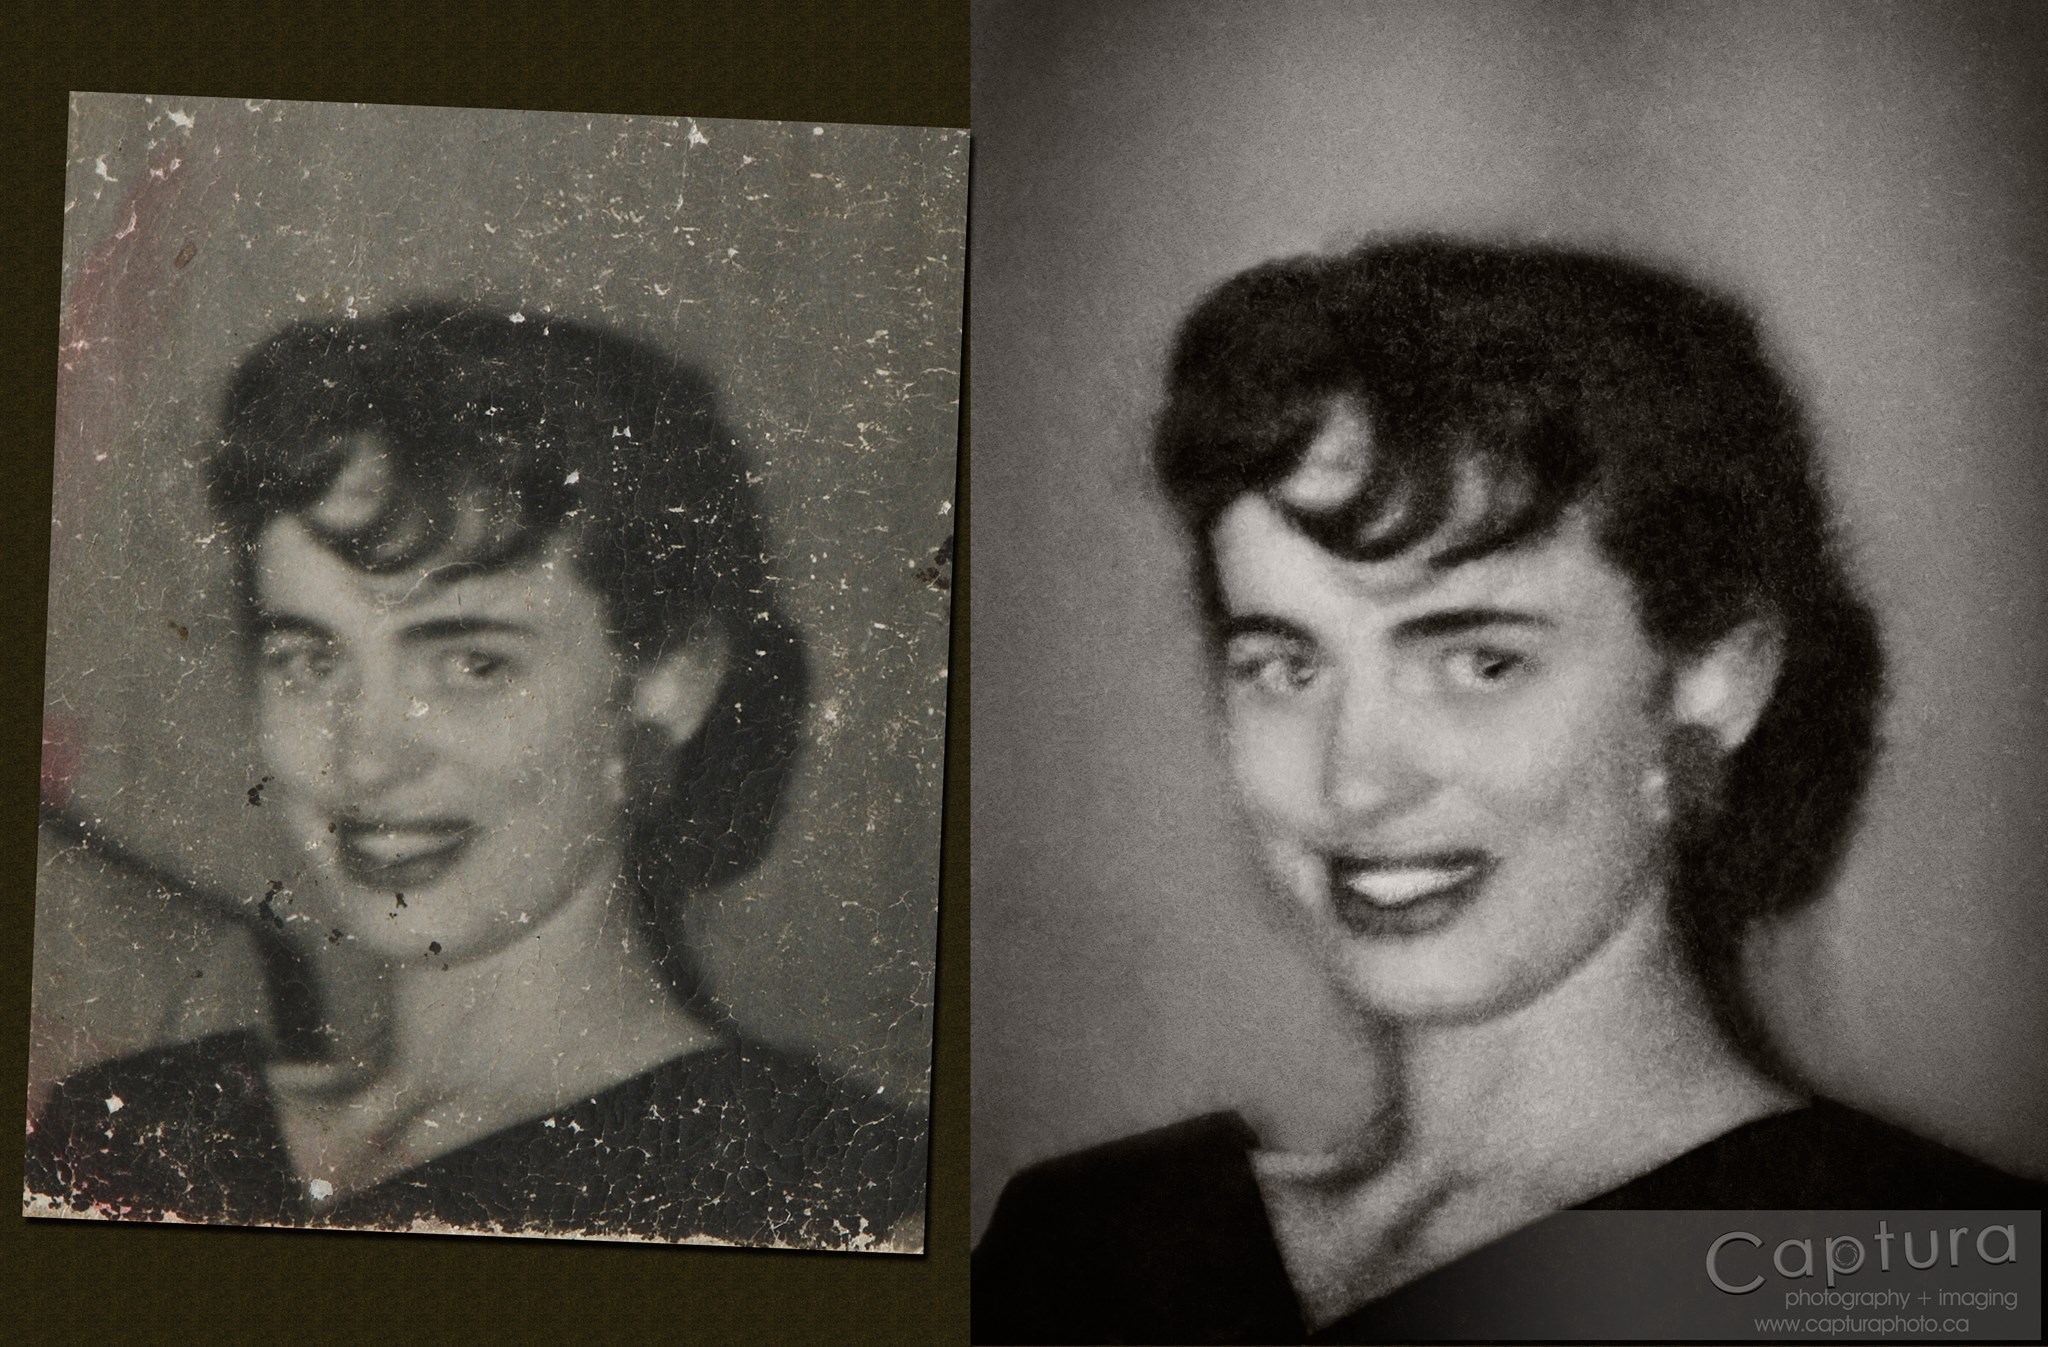
Most of my restoration projects involve old photos – the tiny image of a young Aunt Doris was in my uncle’s wallet for over 60 years.
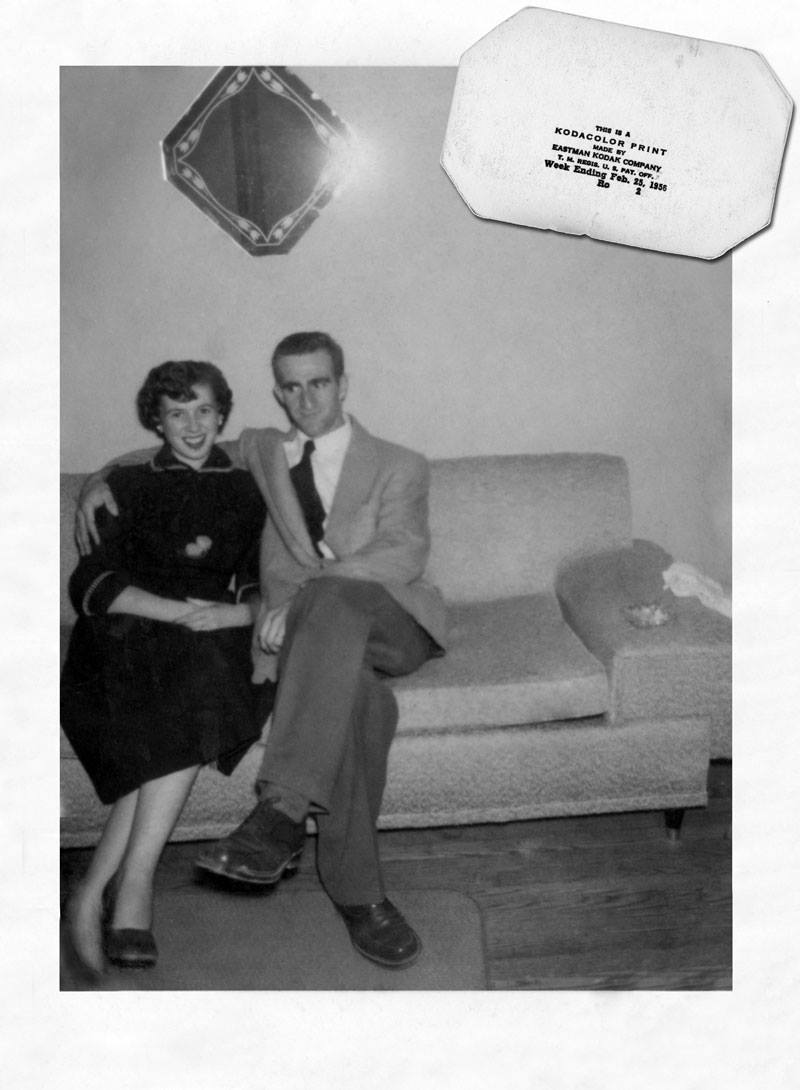
This image of my in-laws had a stamp on the back – I copied and restored it separately. 1956 was a good year for portraits.
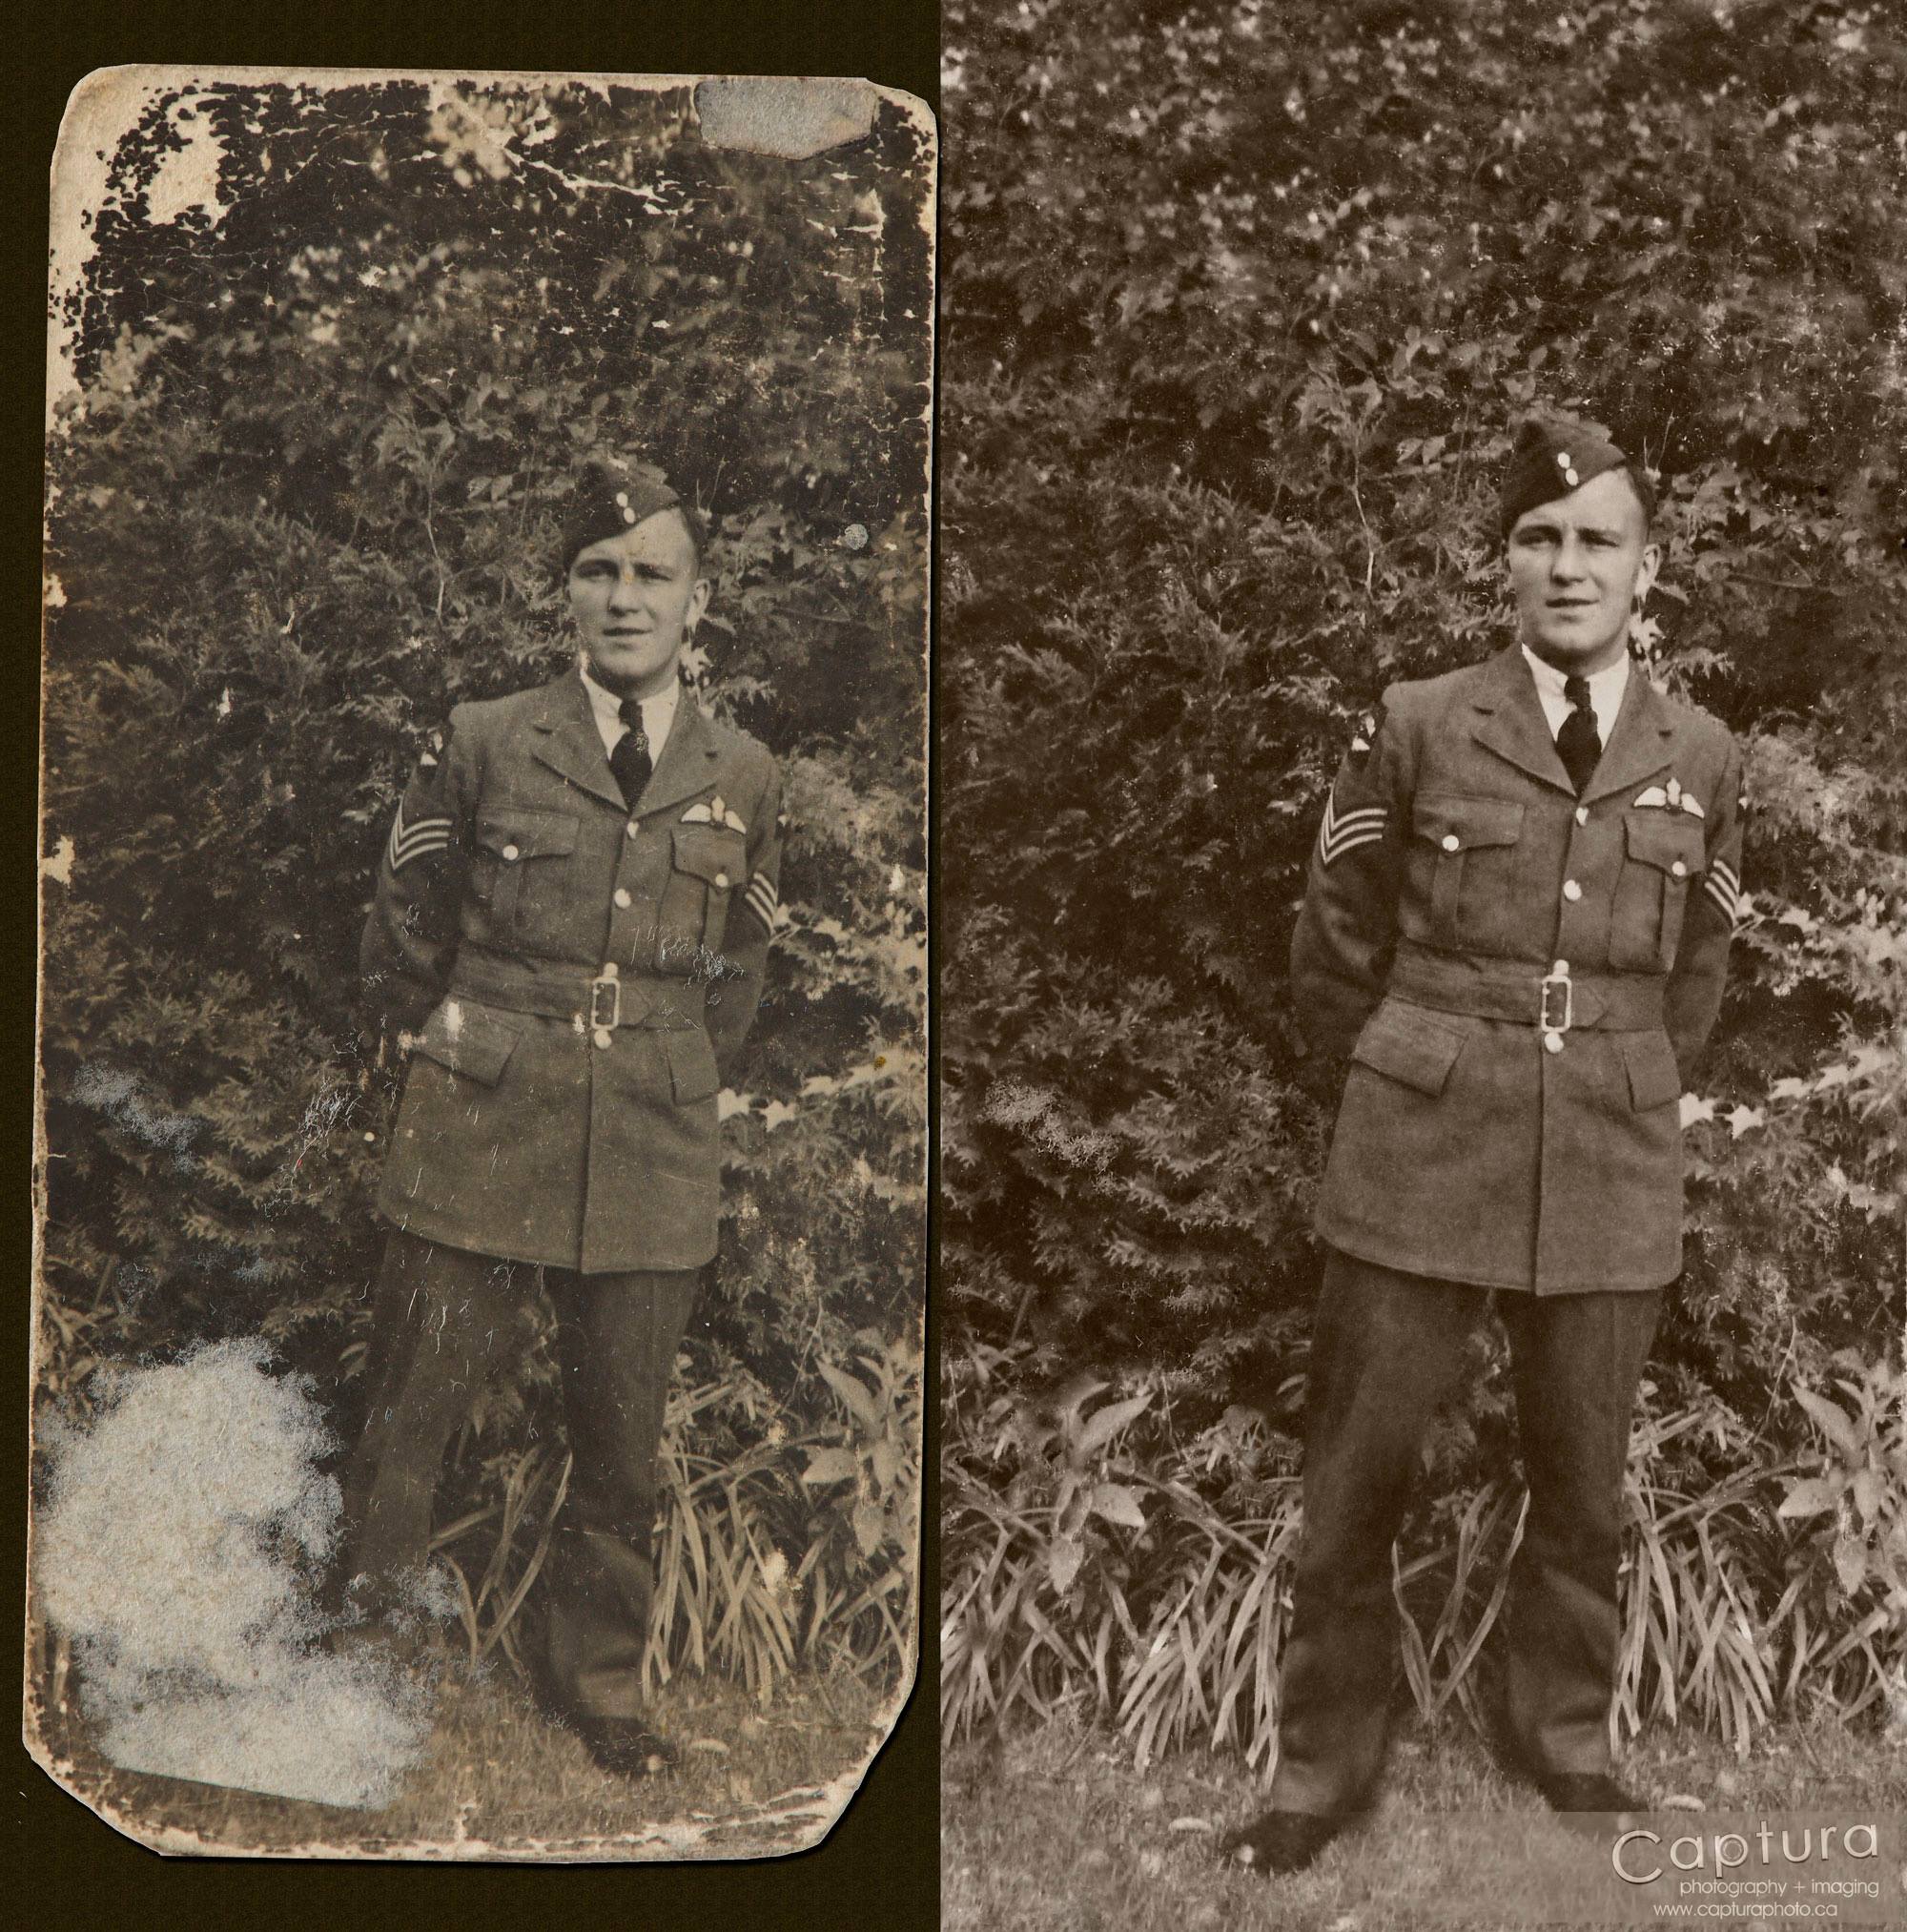
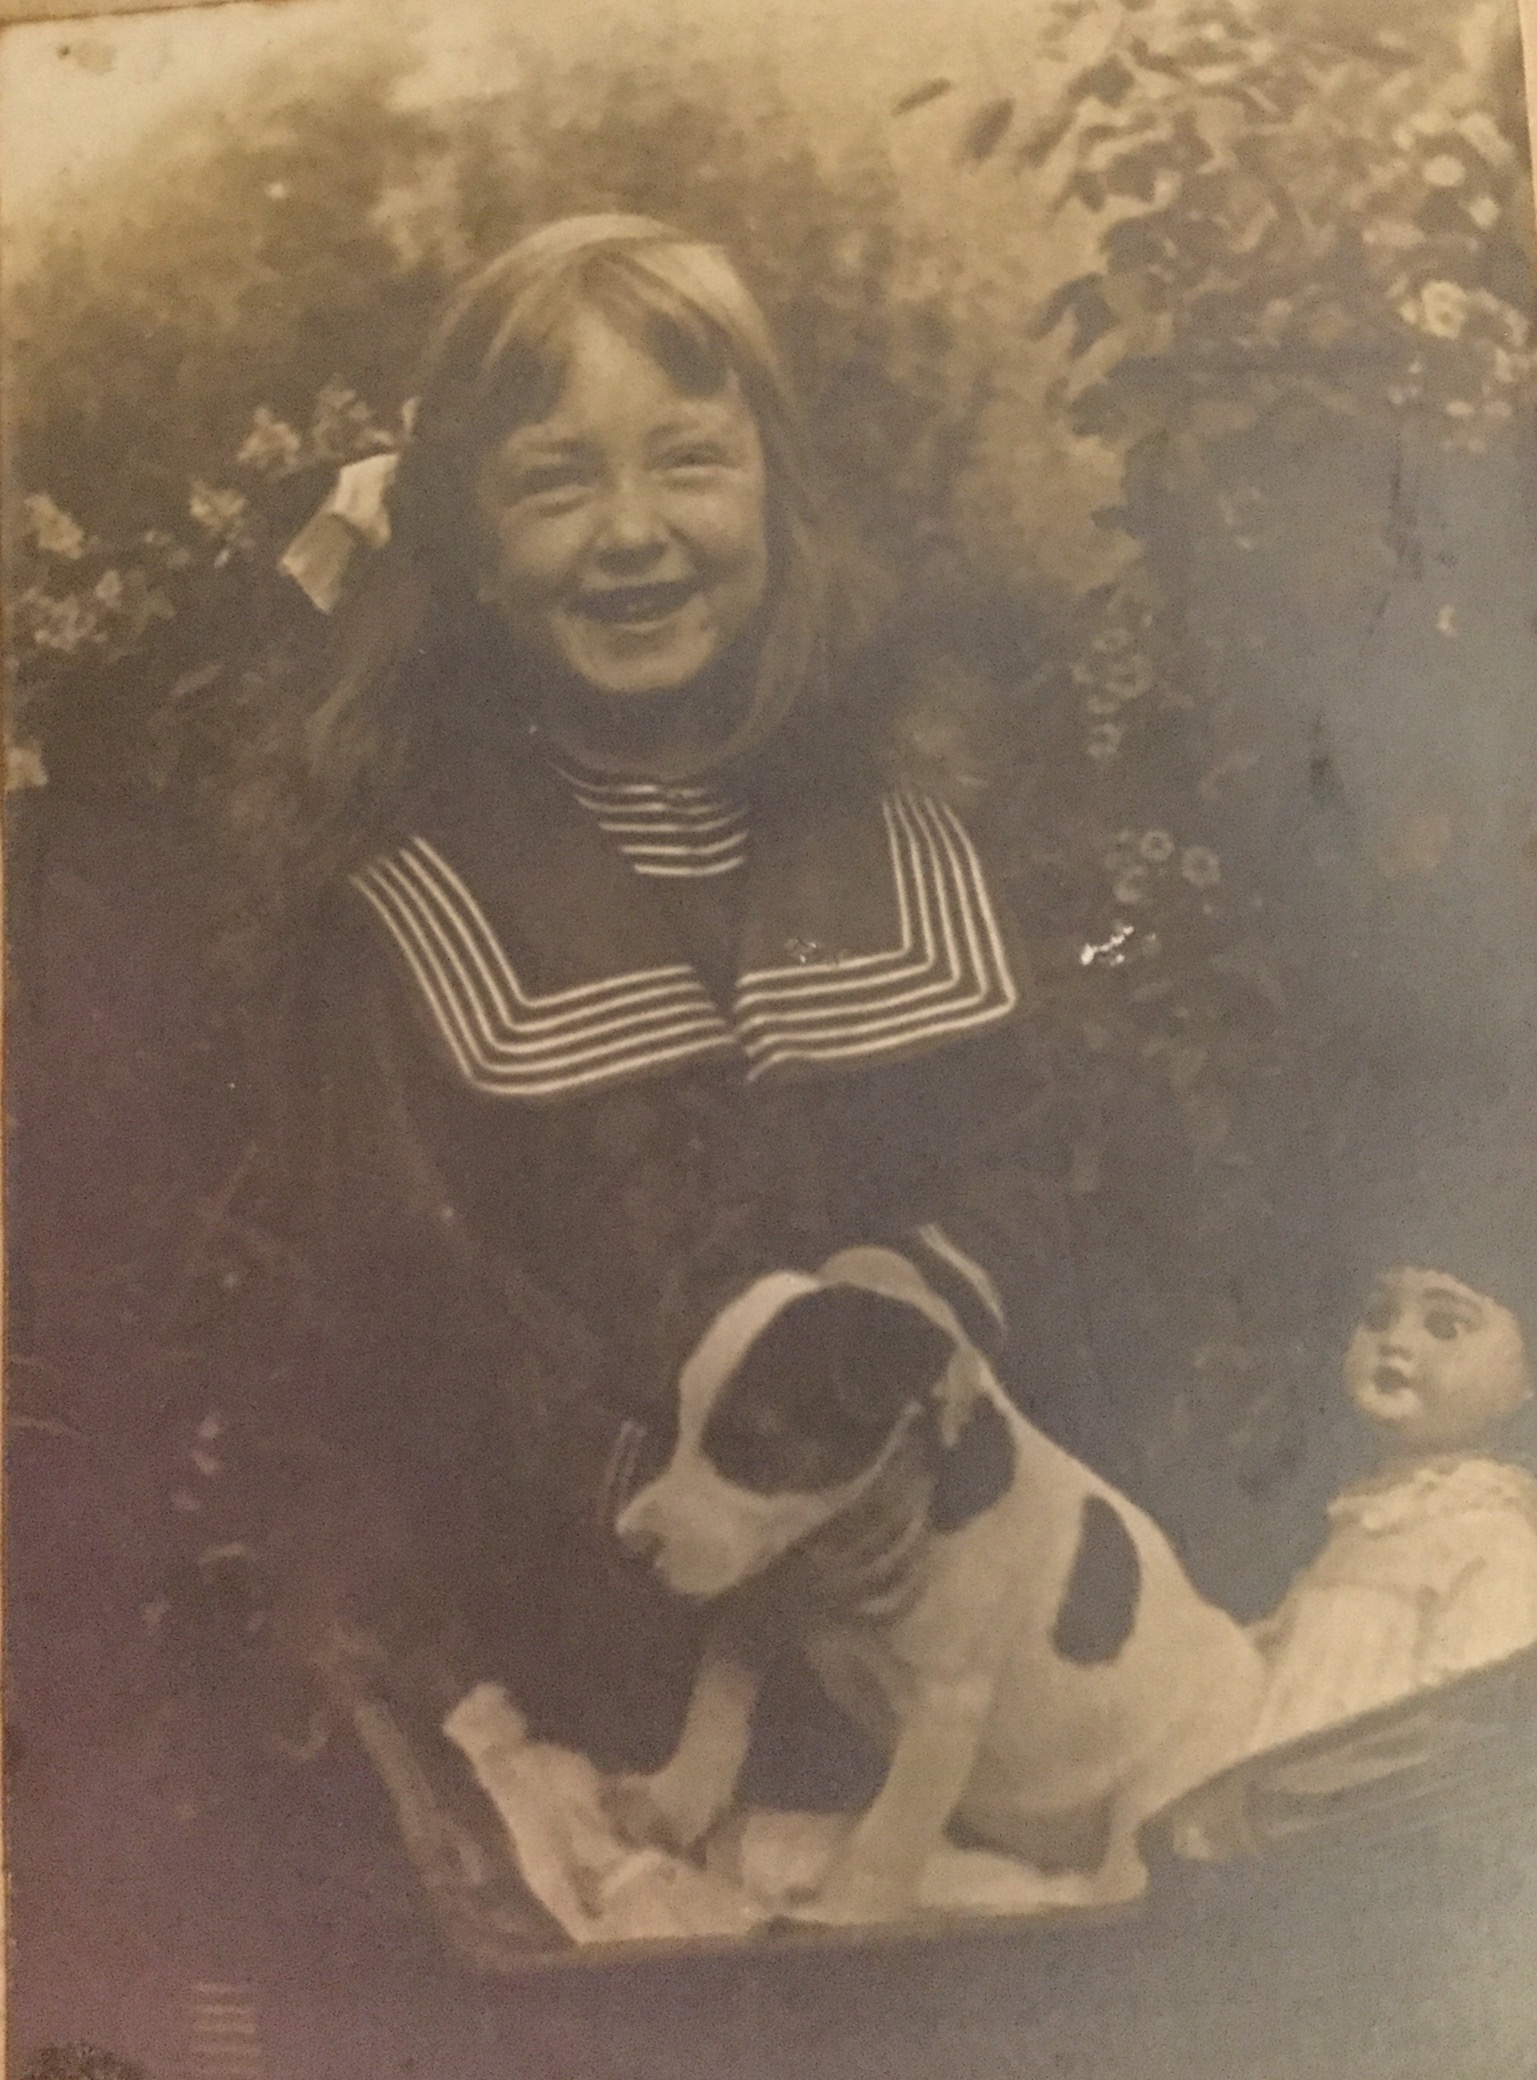
Restoring old images lets us reconnect with the past, whether it’s a photo of loved ones from generations ago or a fun day from our own youth. Many times, all we have left are the feelings and emotions from the past – and a few badly worn photos. As I work to restore and recover an image, whether I know the person or not, the photo tells a story of that moment in time. A subtle innocent grin from a soldier returning from war, the shy smile of a beautiful young lady or the joy of a little girl with her puppy – every photo lets us in on that moment that can never be repeated. The power of a photograph is on full display. Let’s treat it with the respect it deserves.
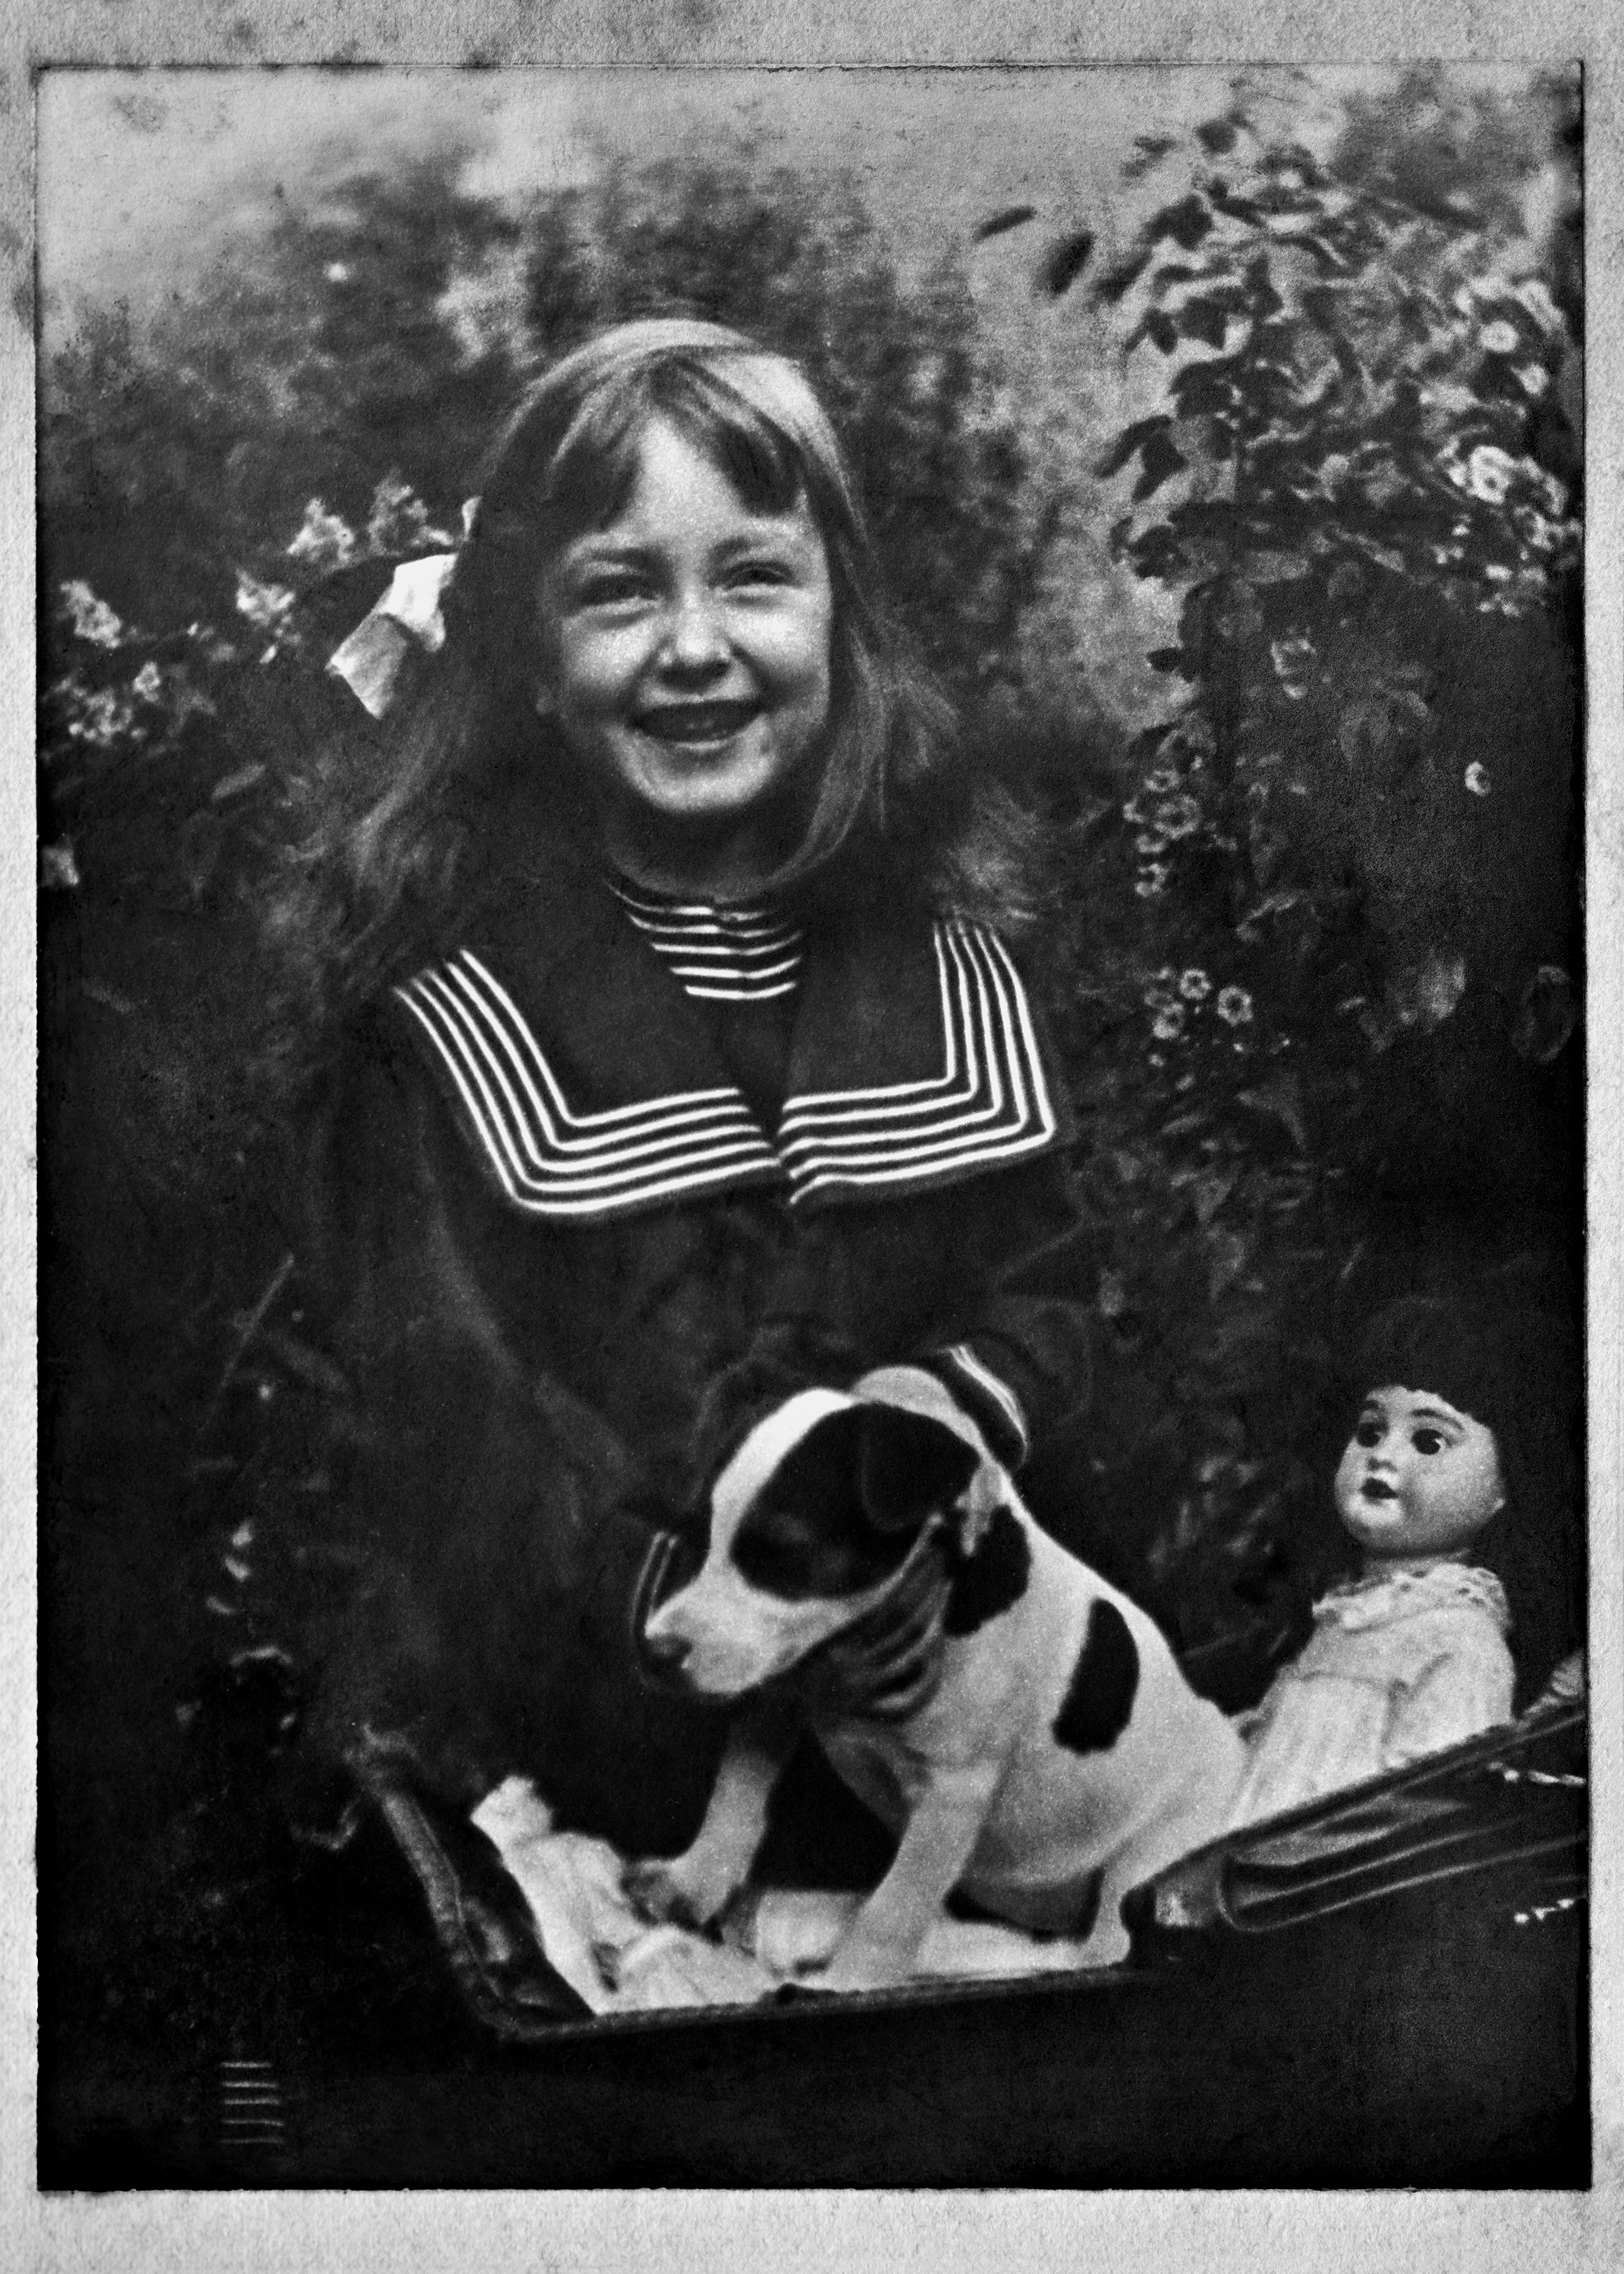
One of the most challenging jobs I’ve had was this old Gelatin DOP (silver bromide) print. It was taken in Birmingham, England around 1910 – over 100 years old! Unfortunately, everyone connected with this photo is no longer here to ask about it. This lady, my client’s grandmother, passed away when she was 22.
The photo was badly degraded. Silver bromide prints naturally decay under light and this was one of the worse decays I had seen. You cannot, and I can’t express this enough, CANNOT scan a silver bromide print – especially one that is silvering as badly as this. There is a very high chance that the bright light from your scanner will further devastate the print. Also, it should not be subjected to any constant light sources. They really should be protected from all light.
I used my studio lights for this image. Any direct light would shine badly off the silver. While setting up my lights, I used a small mirror in place of the print so as not to damage the print.
The mirror was placed on the floor, on top of a sheet of white plexiglass. I bounced the lights off my white ceiling with the softboxes angled away from the print. I could see in the mirror how the light would act – as long as I didn’t have direct light on the mirror, I knew the print would be fine. I used the centre diffusion of my Aurora Lite Disk 5-in-1 reflector above the mirror to soften the light further.
My Nikon D810 with a Tamron 90mm Macro G2, was mounted on a Vanguard Alta Pro 2+ 264CT tripod. This tripod has a horizontal centre column, so I could place my camera directly over the print. I carefully placed the print in the middle of the plexiglass and took an exposure.
I always shoot tethered to CaptureOne using a Tether Tools USB cable, a Tether Block Arca to secure the cable that also acts as a tripod plate and a JerkStopper to prevent damage to my computer if I pull too hard on the cable. The main reason for tethering is to use CaptureOne’s Live View feature so I can properly focus – I don’t rely on autofocus for something this critical.
Will the light from strobes damage the silver bromide print? They could, especially at full power. I was using broncolor Siros L monolights with 60x60cm softboxes – highly regarded for their accurate colour and consistent power output.
To limit the amount of light that could affect the print, I used “Speed” mode to ensure very fast flash durations, as low power as I could, and set the strobes to fire 4 times each exposure. Camera settings were f/8, ISO 64 and four second exposure time. I rotated each light every second to ensure an even spread of light. This was a LOT of work.
I took three sequences of images. I imported all three images into Photoshop CC and masked the layers until I had a consistently exposed photo. The merged photo was tweaked with some Curve and Level adjustments and Dodging & Burning. I cloned and stamped the damaged areas and brushed in some lost detail.
My final step for restoring portraits is PortraitPro (currently Studio 18), which helps bring back some texture to the skin and enhances the eyes and smile. I always make a duplicate of the layer (CTRL/CMD+J) so that I can mask and fade the PortraitPro adjustments.
For printing, I prefer Hahnemühle Photo Rag® 308 with my Epson SureColor P800. Photo Rag® 308 is a 100% cotton inkjet paper with a smooth finish and subtle texture. Most importantly, it is acid and lignin-free for age resistance. Photo Rag® 308 prints will more than likely last much longer than the original print!
If a customer wants a glossier finish, I’ll use Hahnemühle Photo Rag® Pearl or Photo Rag® Satin. These are slightly shinier finishes than Photo Rag® 308 but share the long life and superb reproduction qualities.

About the Author – Will Prentice (www.capturaphoto.ca) is a professional photographer based out of Whitby, Ontario and Brand Specialist – Lighting for Amplis.


Fantastic!!! GREAT work♫♥
Thank you. I really appreciate you taking the time to comment.
WOW! Your client must have been pleased.
What a great outcome but such a lot of work and obviously based on professional knowledge and experience.
I am the recipient of a large number of family photographs, prints and documents and some of the pictures are pre 1900.I know some are what I think of a “tin type”. I will need to do more research. One photo album is a Christmas gift dated 1896.
My plan is to digitize them and identify and catalogue as many as possible. I had not considered that scanning could damage the original so your article may have saved some of my originals.
Thanks, Barry.
It’s good for your soul when people have a reaction to an image you’ve recovered and restored for them. You can’t mask that emotion. I’m grateful I’ve been able to bring that to them.
What an amazing gift you’ve received!! I would store these in a dark, moderate temperature room with very little humidity. The “tin type” are easy to identify – they’re actually printed on metal. Those aren’t normally a problem to scan or photograph, but do your research.
The silver bromide prints are also easy to identify – the silver is incredibly reflective.
Here’s a great resource to help you identify the prints: https://www.loc.gov/rr/print/coll/589_intro.html
Once you know what a print is, you can research how best to scan/digitize it.
A good and useful tutorial. Thank you.
You’re very welcome, Krishna 🙂