Part Two: Creating Develop Profiles in ACR
So, as mentioned in the first part of this article, Adobe has moved the Profile menu options from the Calibration Tab to the Basic Tab. I have always thought that this is something that should be done at the beginning of the editing process and not as an after thought once all of the editing has been done. Recapping from earlier, from the Profile drop down menu we have approximately half dozen options to choose from. If we want more options, all we have to do is either choose Browse from that drop down menu or click once on those four tiny rectangles just to the right of that menu and all of the options are now available to us to choose from.
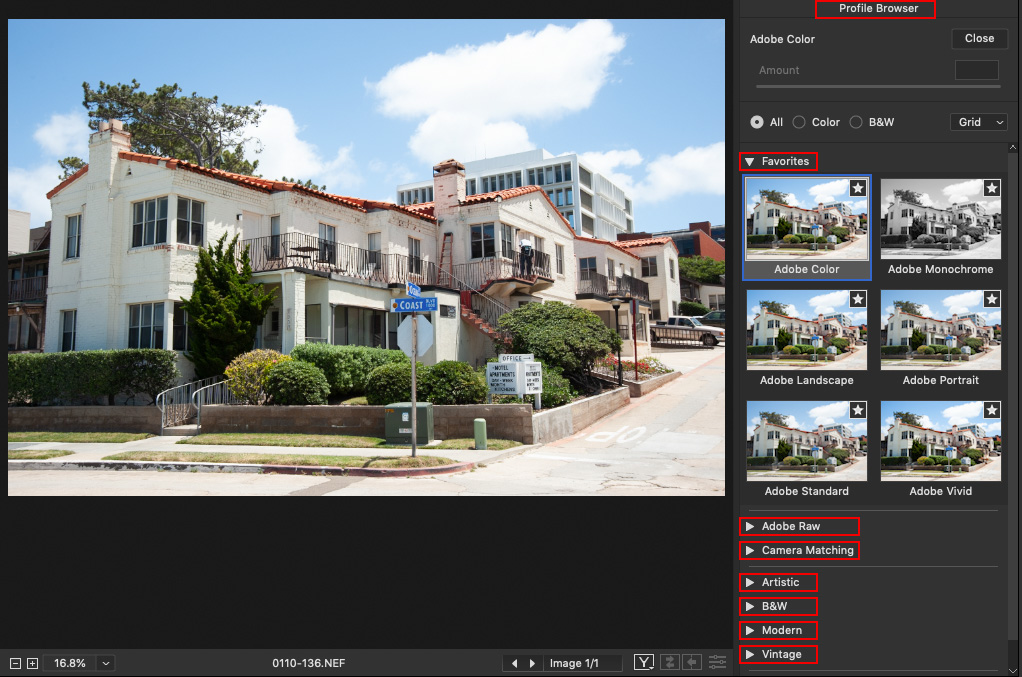
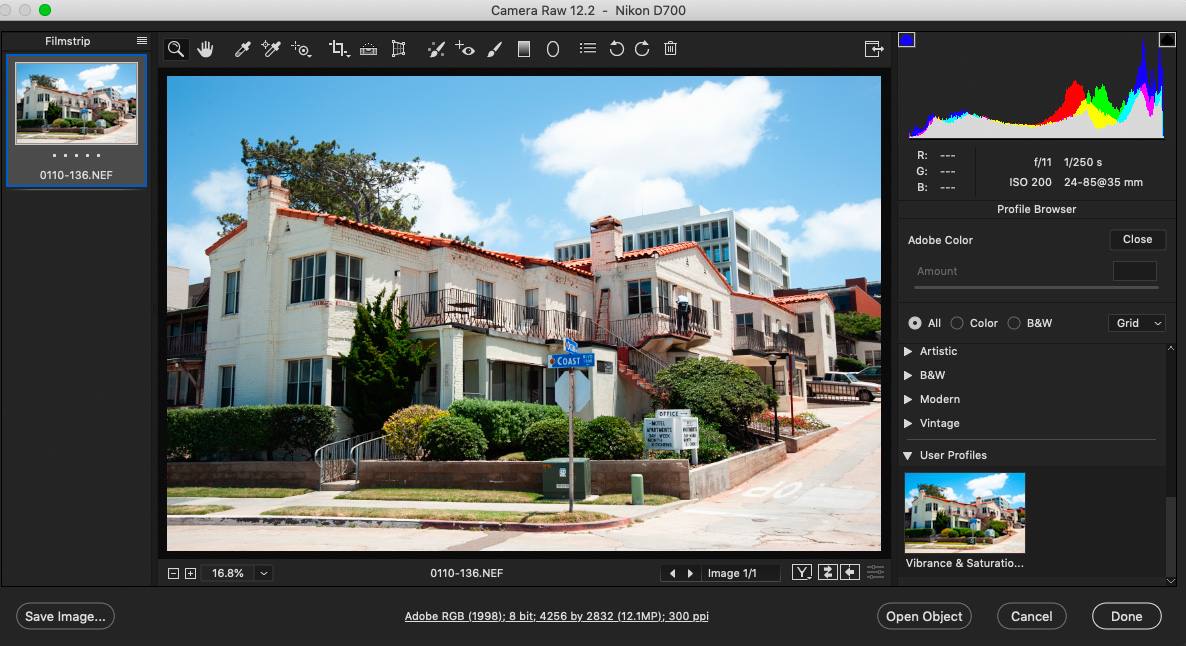
The above screen capture shows that we are in the Profile Browser displaying the first set of thumbnail options, Favorites. Below those thumbnail previews, highlighted in red rectangles are all of the other default groupings of profiles initially supplied to us by Adobe.
By default we are in Grid View but we can easily change this to List View by clicking where is reads Gris View and choosing List View.
The first grouping is our Favorites. Adobe has given us a few in this category by default. If you find that you rarely use any of these, then just click on that Star you see in the upper right corner and it should disappear from view. To add other profiles to your Favorites grouping simply click on Star that appears when you hover over that profile preview thumbnail.
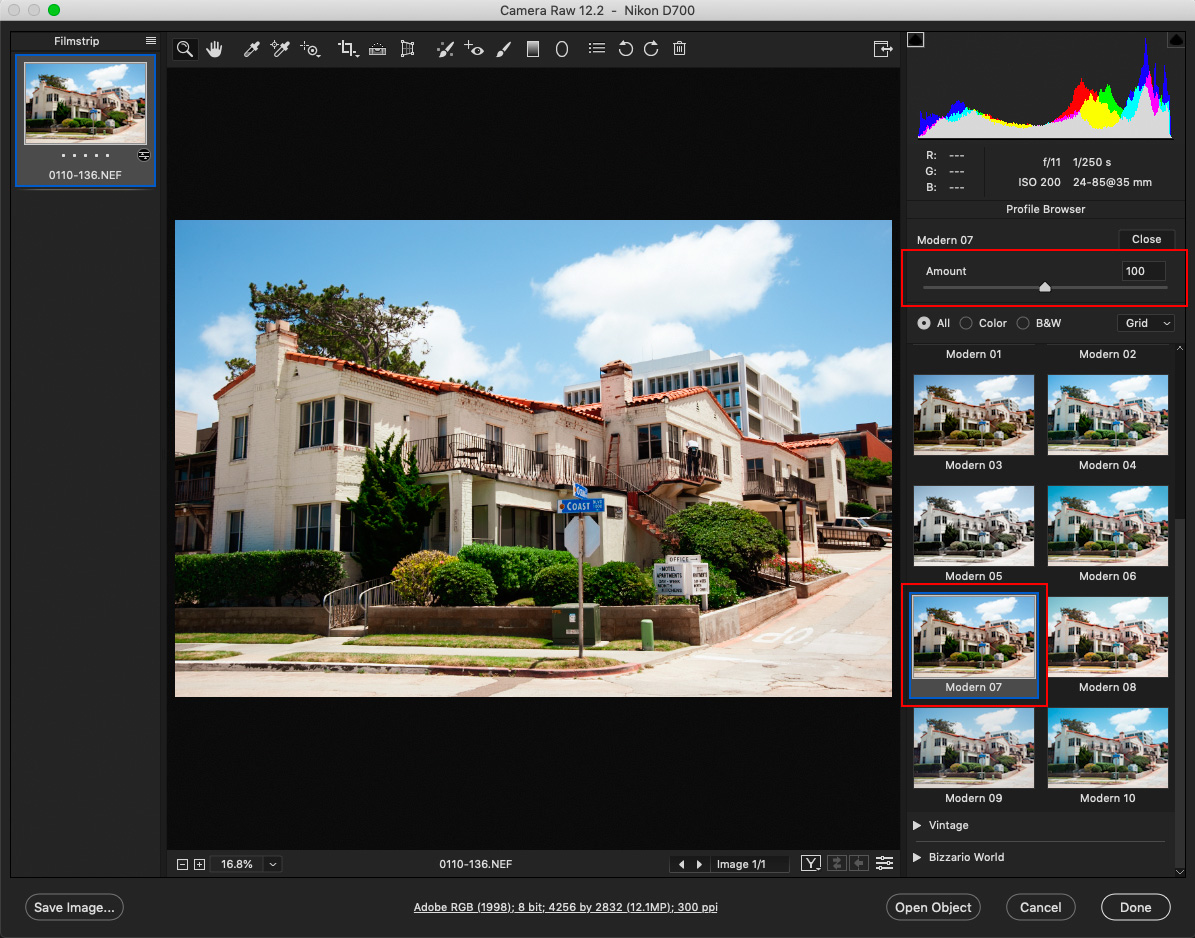
Now when it comes to the next four sets of profiles, Artistic, B&W, Modern & Vintage, you have the option of Amount or opacity depending on how you look at it. There is no Amount slider available in the first three options. Click on any of these profile options and you will notice an Amount slider that defaults to 100 which then allows you to increase or decrease the effect of that profile.
Also notice at the very bottom underneath Vintage, there is another set of profiles “Bizzario World”. This is a custom grouping that I created which contains my own useful and experimental profiles hence the name I gave it. I am just showing you that when you create your own profiles, you can name the profiles and the new grouping they reside in anything you want. In my case, this will get deleted as it is for experimental purposes only.
We will delve into creating your own profiles shortly.
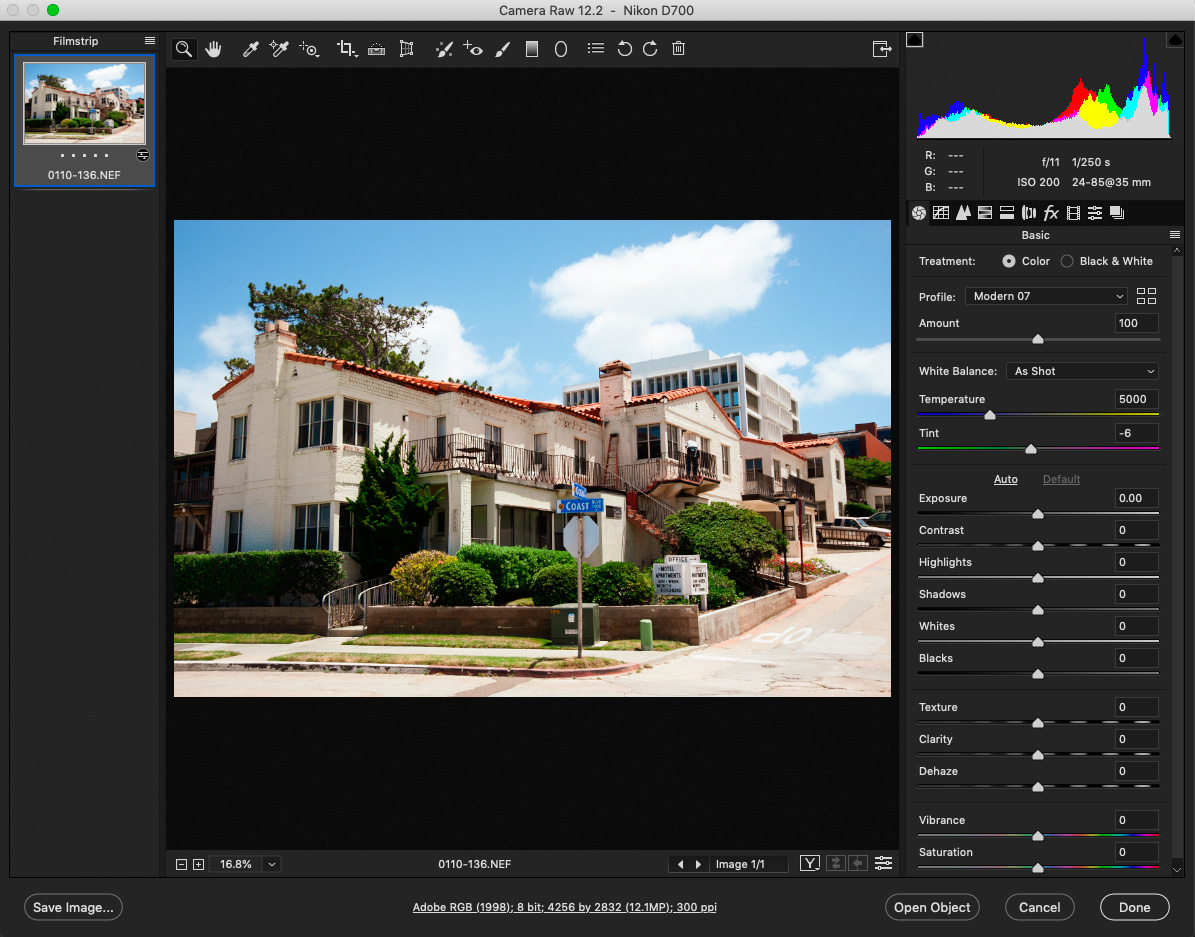
Ulike Presets, notice that none of the Basic Tab Sliders have moved when we choose our Profiles. This allows for much more freedom of expression. Keep an eye out for how Adobe wants us to use Profiles in the future. They may be on to something here … or not.
You can create a Custom Preset that includes not only the slider values but also that newly chosen profile. So select a profile, make some adjustments to the colours like desaturate the Reds a bit, then in the Presets Tab (ACR) or Panel (LR) and click the Create Preset button and make sure you click on the Treatment and Profile check box and also the HSL Adjustments check box, give it a name and click OK.
Ok, so this is all done using the supplied Profiles that come with the software but what about creating your very own Profiles …
This first Custom Profile that I am going to make is going to increase the overall Vibrancy and or Saturation in the image. I plan to name this profile Vibrance & Saturation Boost.
So, open up any RAW file in Adobe Camera Raw and in the Basic Tab, click on the contextual menu icon and from that flout menu choose “Camera Raw Defaults” to make sure that any previous edits are “zeroed out”. Scroll down to the Vibrance and Saturation sliders and enter +30 for each slider.
See image below …

Now that you have done this, go to the Presets Tab and in the lower right corner Option/Alt + click on the “Create New Preset” icon. Holding down the option/alt key brings up a different dialog which allows you to save these settings as a Profile. At the right is the New Profile dialog where we get to name this profile and choose where we want to save it. We can save it in the “User Profiles” group or we can create a brand new group using any name we wish. I am choosing to use the default “User Profiles” group.
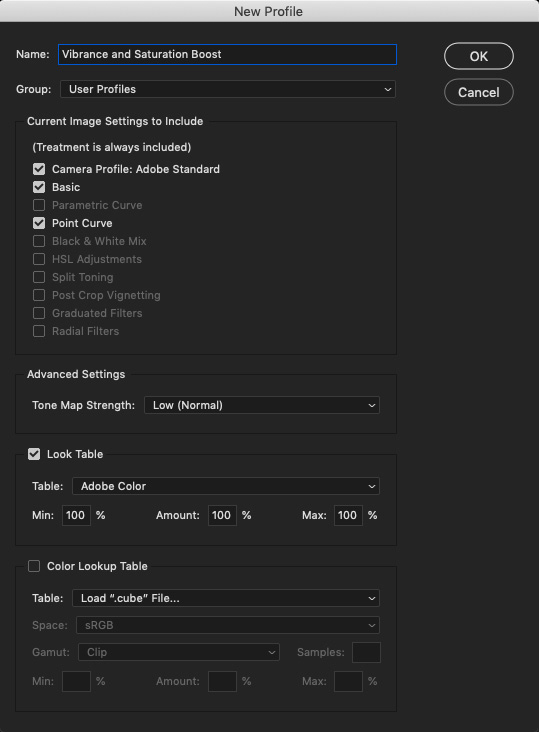
Notice the three check boxes that are checked …
Under the Advanced Settings for Tone Map Strength I will leave it at Low (Normal). I would like to encourage you to try out the other two settings, Medium and High, just to see what they do for your images.
Next we have Look Table and I am going to leave all of these at their default settings.
Table: Adobe Color
The Min: 100% – The Amount: 100% – Max: 100%
These deal with the Amount slider back in the Basic
Tab where you can adjust the strength of the profile.
Leave the Color Lookup Table alone for now.
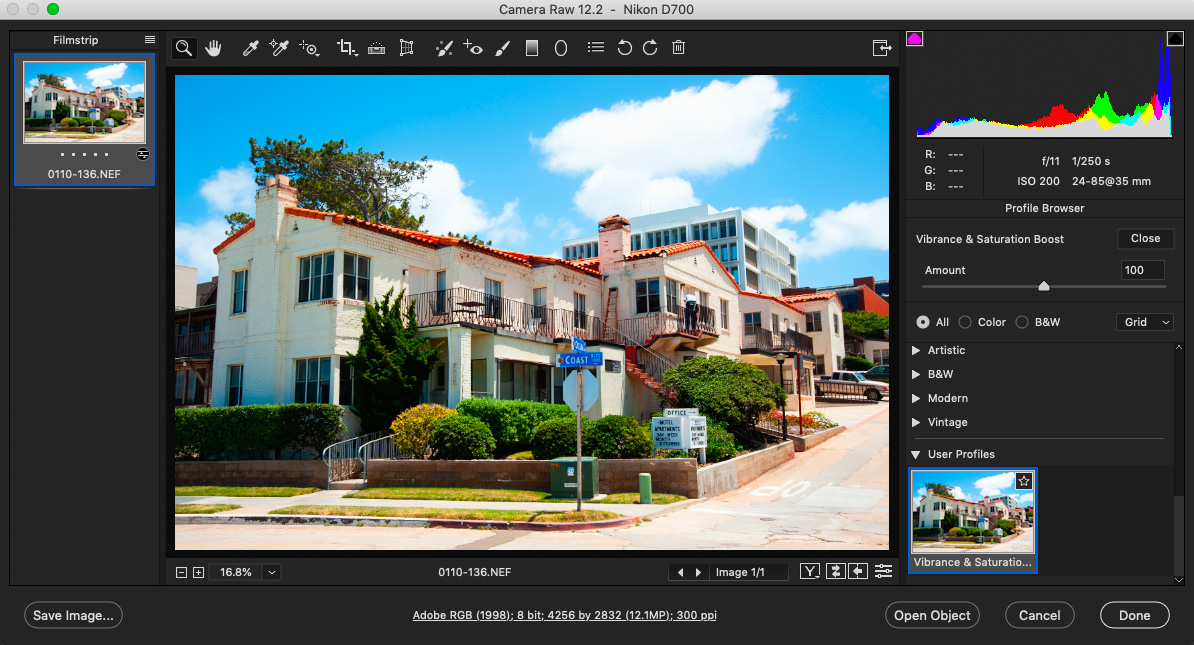
Back in the Basics Tab, I clicked on the Profile Browser icon and scrolled down towards the Botton to find the User Profile group and that is where my newly created “Vibrance & Saturation Boost” profile has been saved.
Clicking on that profile thumbnail preview applies that profile to my image. In the Profile Browser section right under the Histogram you can see the profile name that has been chosen and the Amount slider. Sliding this left or right will either decrease or increase the effects of that profile.
Once we close the Profile Browser, we see the Basic Tab as we normally would. Notice that even though we made adjustments to both the Vibrance and Saturation, this sliders are still set to “zero”.
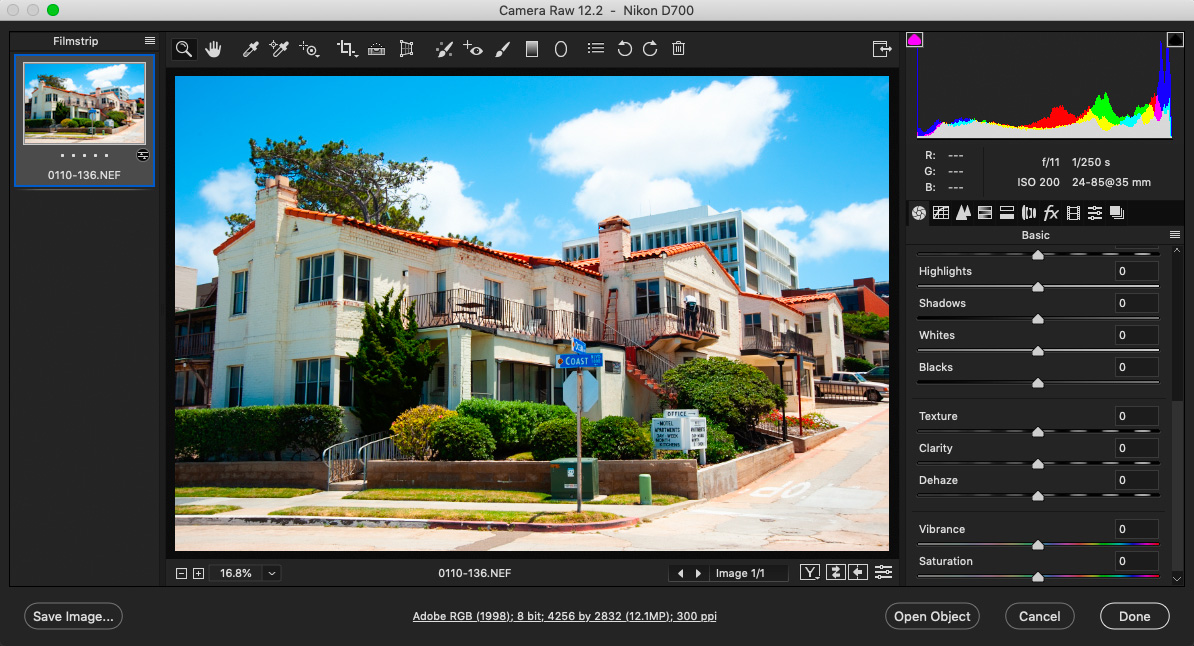
All along we have been using the default, Adobe Standard profile and then made our edit adjustments from that basic profile but now you can choose a different profile as a starting point because that is all any of these profiles are, a starting point, from which to begin your edit process.
This all stems from our software needing to have a default way or method of displaying or method of rendering the colour dynamic range in our images or lack of colour as in the black & white options.
Originally there were only a handful of these profiles to choose from and they were hidden in one of the last ACR tabs, the Calibration Tab. Now they are in the Basics tab where they should be, at least in my humble opinion. There are also some camera manufacturers that are taking advantage of applying certain profiles in camera trying to simulate the look and feel of print film. I look forward to seeing how all this develops in the future. This is something relatively new to still photographers but is something that video shooters have been able to take advantage of for years either in camera or in post.
This concept of applying a certain look to our images is not something new to Photoshop but many users are not aware of this feature. This feature is known as Lookup Tables or LUTs.
When creating our own camera profiles we do have the option of using LUTs as well but I did not discuss this in this tutorial as it is a subject all on its own and will be the topic of a future article.
Until that comes out, I hope you will explore and experiment with these profiles discussed in Part 1 and Part 2 of creating camera profiles in Adobe Camera Raw.
About the Author:
John Warren is an award winning Photoshop Instructor and Professional Photographer living and working in the Greater Toronto Area and is on the faculty at Humber College.