Part One: Using profiles in both ACR and Lightroom
Not sure if you all know this but Adobe Camera Raw, whether invoked by either Photoshop or Adobe Bridge, and the Develop Module in Lightroom are one and the same. They just have different interfaces. So, that being said, whatever functions and features that are in one, are also in the other.
For the rest of this article I will talk about Adobe Camera Raw, until I specifically go into Lightroom.
Now, when you first open a Raw file in ACR and your image is displayed to you, the software needs to have some criteria to display this to you. In other words, how Red should the reds be, how Green should the greens be and how Blue should the blues be. As well as how Black the blacks should be and how White should white be. There needs to be some kind of starting point to display colours and dynamic range. This is where profiles come in.
Your camera has a variety of profiles to choose from when shooting, and ACR has some profiles that determines how your image is displayed to you. Most of us are aware that both our cameras and Raw processing software, ACR in this case, have these profiles but most of us rarely choose anything other than the default chosen by the respective manufacturers.
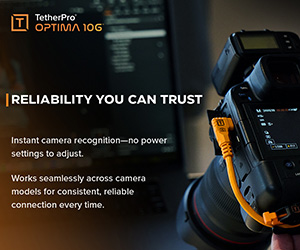
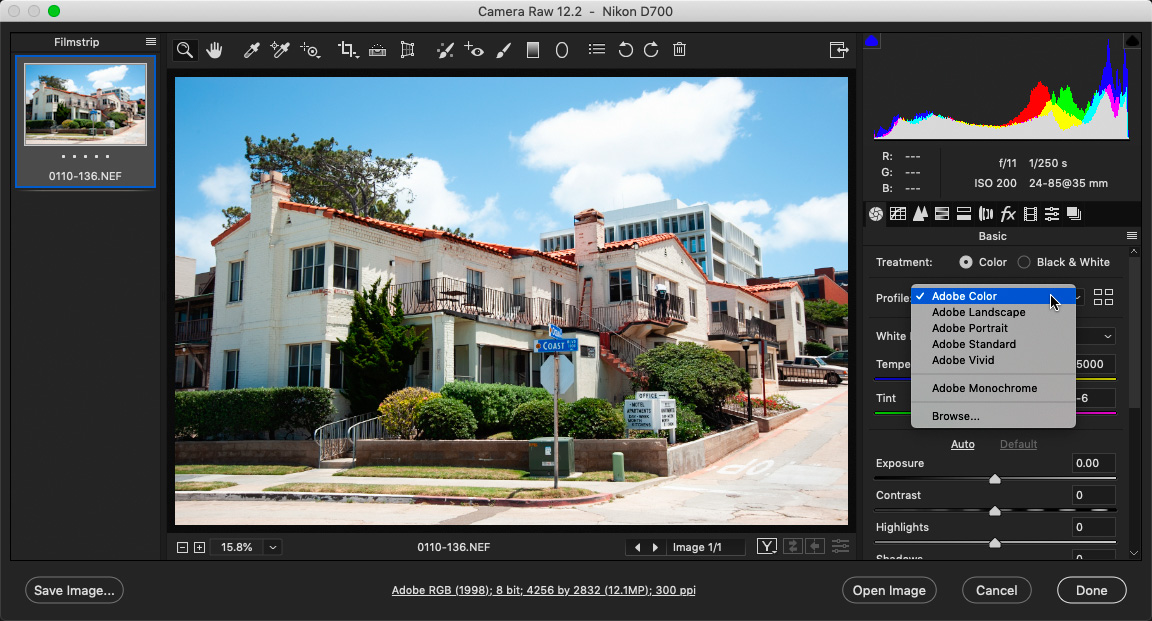
 In the past ACR may have had a half dozen to choose from but recently, CC 2018 and on – could go back a couple of more versions – Adobe has added many, many more profiles to choose from. By default ACR uses something called Adobe Color but if you click on the drop down menu, you will see that you have a few more choices such as Adobe Landscape, Adobe Portrait, Adobe Standard, Adobe Vivid, Adobe Monochrome and Browse. Choosing Browse, opens up a browser of sorts and displays the rest of the supplied profiles. Alternatively you could just click on the four tiny rectangles to the right of this menu to display the rest. To begin with, if you are happy with what the default is showing you, great, but I would like to encourage you to explore these other options. Let’s start off with the ones offered in the drop down menu; Landscape, Portrait, Standard and Vivid. Start off by rolling your cursor over the thumbnail previews. Some effects are very obvious and others less so. If you are shooting portraits, then choosing the Portrait Profile will be kinder to skin tones. If you are shooting landscapes, choosing the Landscape Profile will add colour vibrancy and contrast.
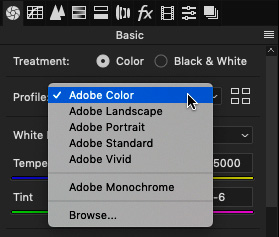
The Profile Browser is divided up into groups; Favourites, Adobe Raw & Camera Matching, Artistic, B&W, Modern and Vintage. If you create your own profiles, then you would have to create a new group. Creating your own profiles will be the subject of the next article.
Favourites, by default are six of the seven original Adobe Raw profiles. The seventh profile is Adobe Neutral. Again, these Favourites are just starting points for your favourites as you explore all of the rest. To make a profile a favourite, just click the star in the upper right corner of that thumbnail preview. To remove it from the Favourites category simply click that same star.
The Adobe Raw group are the default profiles found in the drop down menu.
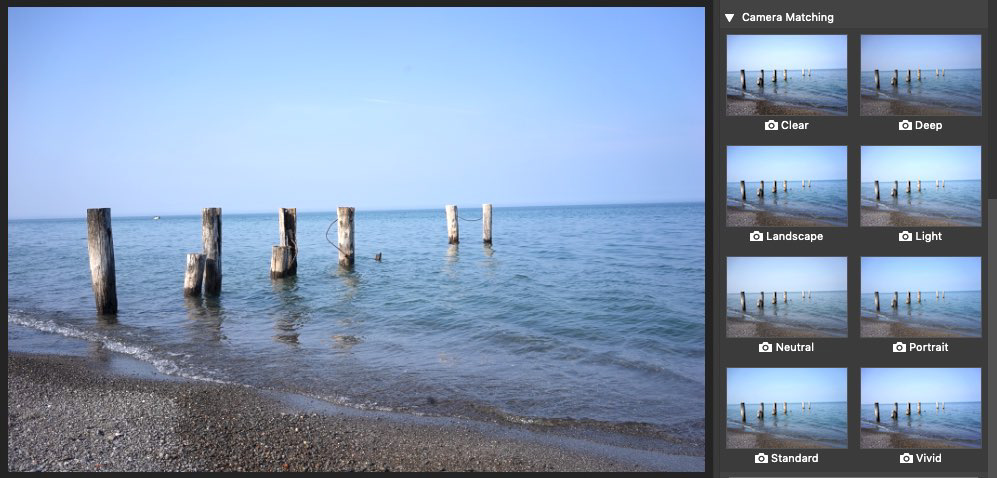
The Camera Matching group of profiles are more specific to your camera manufacturer’s profiles and will have names unique to that manufacturer. Please check these profiles out to see if you like any of these better than what Adobe has as the default. Notice that each camera manufacturer has their own unique names for some of their profiles.
For example, with some older Nikon models and in this case, the Nikon D700, under the Camera Matching group of profiles you will notice that besides the normal profiles like “Landscape”, “Neutral”, “Portrait”, “Vivid” and “Standard”. Notice also these three; “DX2 Mode 1”, “DX2 Mode 2” and “DX2 Mode 3”, which are specific to era that the D700 was in production and earlier.
 Above are the first three Profile Browser options; Favorites, Adobe Raw and Camera Matching.
Here is an example of the camera specific profiles for the Sony A7
The next group, Artistic, B&W, Modern and Vintage are all creative profiles which will invoke a sense
of curiosity and open up your creative juices, as they say. One thing that is completely different with
these creative profiles is the option to either turn down the visual effect or turn things up. These I
believe will invite you to hours of exploration. Once you find one or many of these profiles that you
do like, roll your cursor over the thumbnail and simply click on the star to have them show up in
your favourites.
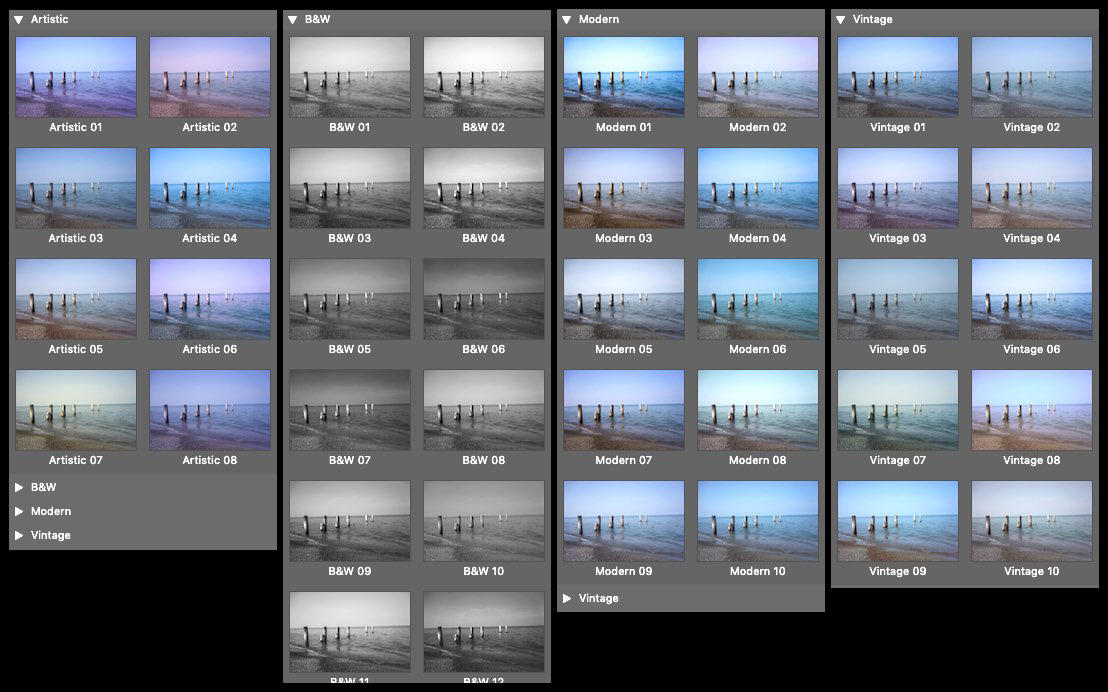
There are more B&W profiles than I am able to show here. You have the 12 shown here and then
you have 5 black & white profiles that simulate what your image would look like if you shot B&W film
using a coloured filter like we did back in the film days. These filters are; Blue, Green, Yellow,
Orange and Red.
Any of the profiles supplied, are just starting points for the journey of editing your images. So
choose the one that best matches your vision and then start editing.
All of this is available in Lightroom Classic CC as well.
These Profiles are different from Presets that we apply during the editing process in that Presets are
created by adjusting the sliders in the various panels and Profiles don’t mess with the sliders to get
the visual effects that you initially see. Once you have chosen a specific Profile, you can go into the
various panels or tabs and make further enhancements.
In the follow up article I will explain the process of creating your own and sharing them with friends
and family or better yet, offer them up for sale in the Internet.
Until next time……
About the Author:
John Warren is an award winning Photoshop Instructor and Professional Photographer living and working in the Greater Toronto Area and is on the faculty at Humber College.