Why is Colour Important with Flash?
Most photographers, after they have added a couple of lenses, will invest in a Flash – also known as a Speedlight – for their camera. There are many advantages to adding a flash to your camera bag. This series of articles will help you choose not only which modifiers you need, but how shape, size, type and colour can affect your photos.
This article concerns Flash Colour – how to balance the colour of light from your flash and recommended settings for your camera to get the best photos, the first time.
I’m using a Cactus RF60 –a fully manual flash with a built-in transceiver – mounted on a lightstand. I chose this flash because its output is consistent – whether on-camera or off-camera – to ensure the same power output. Eneloop AA batteries are used for the same reason. Light is more consistent with good batteries in your flash.
To ensure consistent output, the Cactus V6 Wireless Flash Transceiver is used on camera. A Gossen Digisky light meter is used to ensure that light output is a consistent f5 @ISO200, 1/20s. As you will see, light output is affected by the colour used for correction.
A slower shutter speed is used to highlight how ambient light can affect our images and how vital it is to correct this in camera. The studio is dark and all other light sources are turned off.
The light modifiers used are the Cactus DC60 plastic diffuser, LumiQuest FXtra Gel Holder with Ultra Strap and ROSCO Strobist Collection.
Our lovely model “Queenie” is sitting perfectly square to the camera, with Cactus RF60 camera left and our other colour source – a Metz LED960BC – camera right. This is the bi-colour version of the Metz LED960 – you can adjust colour temperature between 3200°K tungsten to 5600°K daylight. This setup allows us to create perfect split light left and right to really display the effects of each light and how they mix.
If you’re starting to get confused about colour temperature and wondering why it’s so important to photography, check out this great article first.
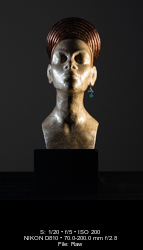
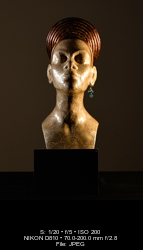
Let’s start with our reference images. These images show what many natural light or available light photographers encounter when using a single light source.
 |
 |
 |
| Raw image | Lightroom Converted JPEG | Camera JPEG |
After metering with a Gossen Digisky light meter, White Balance is left on Auto and the Cactus V6 triggers the Cactus RF-60 camera left:
 |
 |
 |
| RAW image | Lightroom Converted JPEG | Camera JPEG |
If you look closely enough, you can see the light from the Metz LED960 camera right is slightly warmer – not a true Daylight colour – assuming the colour is accurate from the Cactus RF60 camera left. The reason for this is the difference between the light sources – one being LED and the other being flash.
This can be corrected in Lightroom or Photoshop, but what if you’re shooting JPEG only? Let’s take a look at the different white balance settings and they can affect your image.
 |
 |
 |
| WB Incandescent | WB Flourescent | WB Daylight |
 |
 |
 |
| WB Flash | WB Cloudy | WB Shade |
After reviewing the photos, there are two white balance choices you can make: Flash or Cloudy. Either of these settings will result in well-lit images with fairly consistent colour across our subject.
Thankfully, daylight is fairly bright and easy to manage at 5600°K. But what if you have something that’s not so easy?
Tungsten lighting is still popular in many homes and venues. This warm light naturally occurs at what’s known as the “Golden Hour“. It’s easy to identify from the warm tones you get in your images.
So let’s take a look at how Tungsten – or warm light at 3200°K, can affect your images. First, reference images with a Tungsten light source camera right:
 |
 |
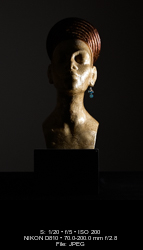 |
| Raw image | Lightroom Converted JPEG | Camera JPEG |
After metering with a Gossen Digisky, White Balance is set to Auto and the Cactus V6 triggers the Cactus RF-60 camera left:
 |
 |
 |
| RAW image | Lightroom Converted JPEG | Camera JPEG |
It’s quite evident in these images there is a noticeable difference in colour between the light from the flash (camera left) and Tungsten light from the LED (camera right).
Correcting this is going to take a fair bit more work in Lightroom, and is even trickier if when shooting JPEG only. There is an easier way in camera to get a better image – let’s take a look at the different white balance settings and how they can affect your image.
 |
 |
 |
| WB Incandescent | WB Flourescent | WB Daylight |
 |
 |
 |
| WB Flash | WB Cloudy | WB Shade |
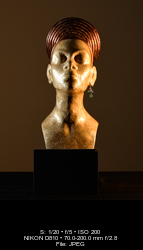
It’s a lot harder to find a usable image here, no matter which white balance setting we choose. The light is very warm and yellow from the Tungsten source; the flash source lacks that punch.
How do we fix this?
Remember those gels and colour correction domes mentioned earlier – they come into play now. Most kits include what are called CTO, or Colour Temperature Orange, gels. These change the light coming from our flash so we can try to match, or at least get closer, to our ambient light.
A key point here: any time you put something – anything – in front of your flash, it reduces the light output from your flash. Some of the better gel systems will tell you how much light is blocked by each gel. This is where your light meter saves you from “chimping” your photos – with your ISO and shutter speed set, you pop the flash to get an aperture reading. By metering each gel, I was able to adjust the power of the Cactus RF60 with my V6 transceiver to ensure a consistent f5 light output no matter which gel I used.
Here’s the results using 1/4-CTO, 1/2-CTO and Full CTO gels in our setup, using the camera’s Auto White Balance:
Again, there’s a difference in colour due to our light sources, but using the CTO gels has brought the light from our flash closer in colour to the light from our LED.
Our previous set of photos, where changing white balance produced different results, suggested we use the Flash or Cloudy WB presets for more even colour, so let’s take a look at how our white balance presets after our images now:
 |
 |
 |
| WB Incandescent | WB Flourescent | WB Daylight |
 |
 |
 |
| WB Flash | WB Cloudy | WB Shade |
Surprisingly, the Auto White Balance produced the nicest image straight from the camera. That just goes to show the power inside these modern marvels. If you have to select a white balance setting, pick Incandescent. This will give you fairly consistent colour across your images.
When shooting RAW, you have a lot of options for colour and corrections. You can select your white balance after the fact, as well as mask either side of your image to perfectly match the colour.
Here is the final image using the 1/2 CTO gel on the flash with some masking and colour correction in Lightroom CC to perfectly balance the warm tones of our subject and achieve a nice overall image.
Great looking images straight from the camera are far easier to achieve when using the right tools. If you’re a natural light photographer having trouble with dark shadows and you’re not sure how to correct for it, use a bit of fill flash and the right colour gel to add light that looks like it belongs to the scene.
Most of these gels can be used in the light modifiers we’ve talked about previously – softboxes and even some of the domes. The Cactus DC60 replaces the soft dome with a coloured dome.
We’ve recently covered light modifier shape, size and colour. Stay tuned for the next article, where we’ll learn about hard light and soft light.

About the Author
Will Prentice (www.capturaphoto.ca) is a professional photographer based out of Whitby, Ontario and Brand Specialist – Lighting for Amplis.


