

Light and Shadow
Light is usually discussed in amounts, or F-Stops, but just as important is the “quality” of the light – is it hard or is it soft? There are many ways to modify or shape light. By understanding the different attributes to light, you can better control light and move from taking photos to creating photographs.
We have a companion video for this article, which may be viewed on YouTube at PHOTONewsTV.
It’s not entirely the light quality we’re looking for, but the shadow and the transition from light to dark. There are many ways to soften light (umbrella, softbox, scrim) or to harden light (beauty dish, flag, barn doors) but we’re going to start with the easiest attribute a photographer can affect – the distance from the light source to the subject. Let’s take a look at how distance changes the quality of your light and shadow.
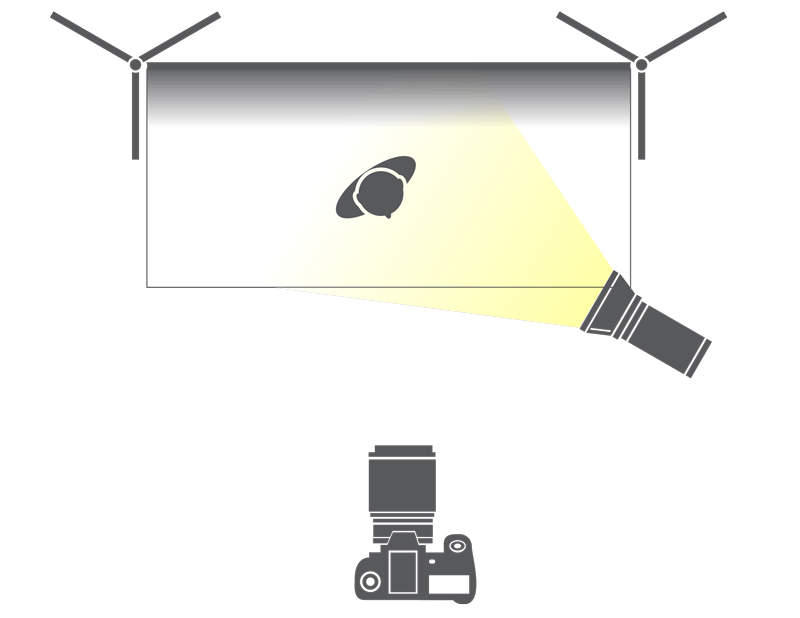
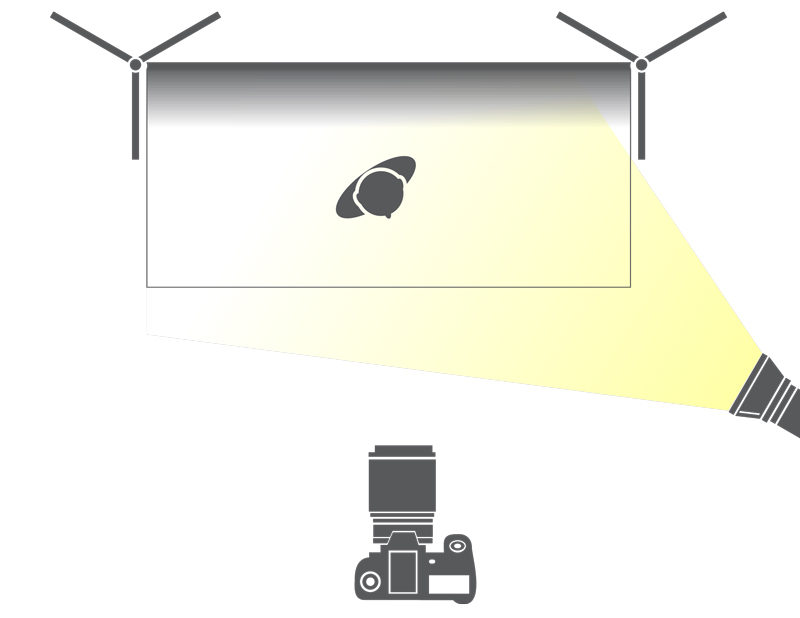
For this demo, I’m using a Broncolor Scoro 3200 S with a single Pulso G head and a standard reflector; Nikon D810 with a Tamron 70-200mm F/2.8 Di VC USD SP and Gossen DigiSky flash meter.
Each shot is metered at F/8, 1/250s at ISO64. I meter with the dome extended, pointed directly back at the Pulso head. The Pulso is about 30 degrees from perpendicular – I chose this angle so we can see the quality of the light coming off the nose – the “loop” shadow as well as the falloff onto the background.
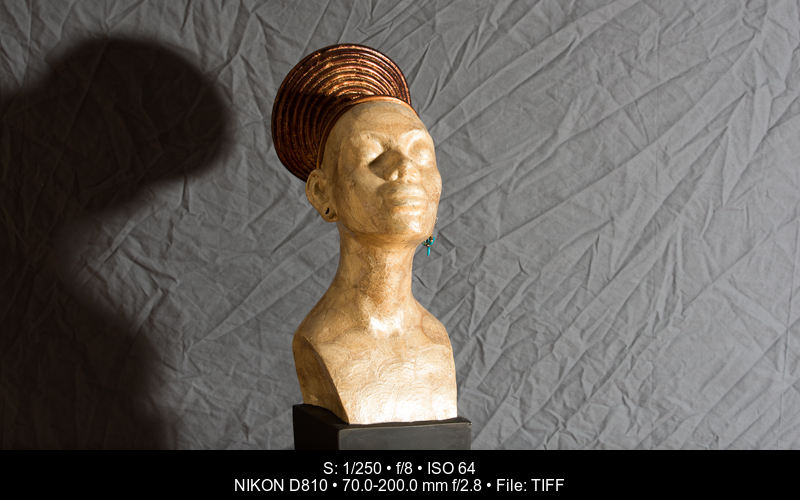
My model, “Queenie”, is positioned about 9 inches in front a grey muslin backdrop.
Let’s start with the light source at 12 inches from the model and metered for F/8. If you look at the shadow cast by the nose down the cheek, as well as the shadow on the background, there are really nice, soft transitions from highlight to shadow. This is what we call “soft light”.
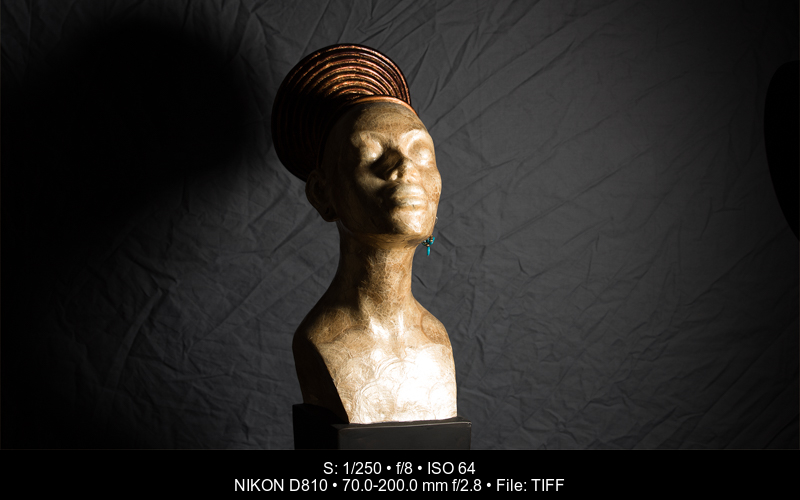

Light source – 1 foot away
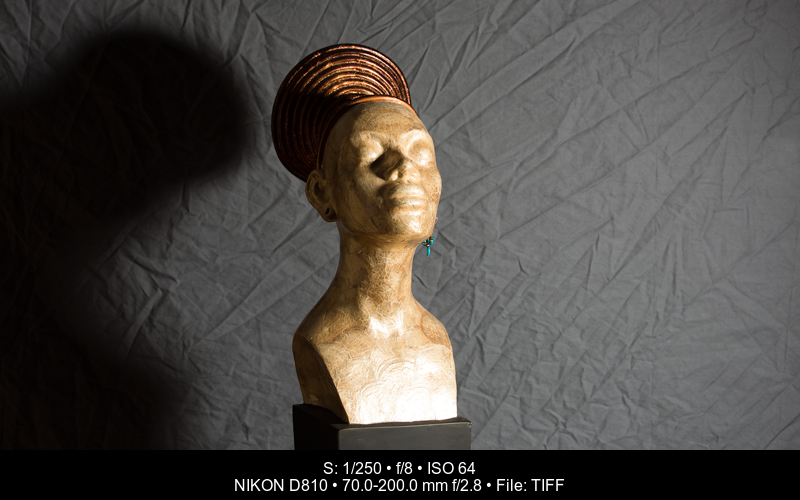
I’ll double the distance between the light and model, and increase the power output of the Scoro S to ensure I still have F/8 – the same amount of light. When you look at the changes, especially side-by-side, the light quality is apparent: the transition between light and shadow is more defined. You can also see there is more light falling on the background, as the reflector size hasn’t changed. The same 7” reflector will spread the light around more, with more falling on the background as well as the far side of the face, filling in some of the shadow.

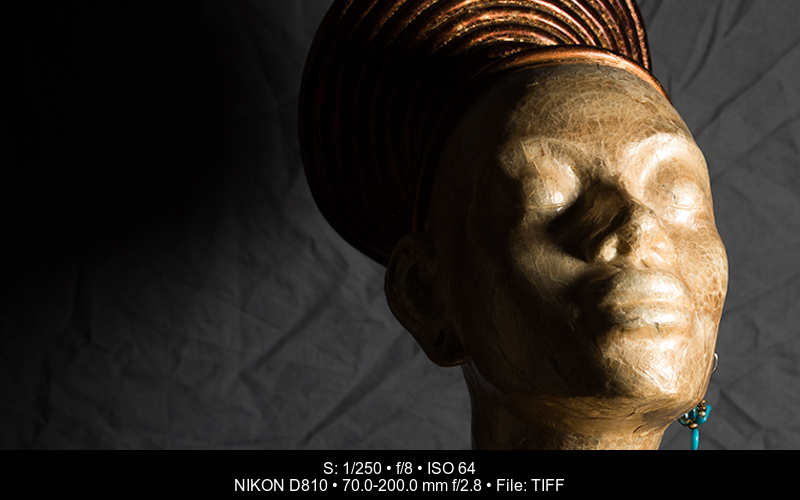
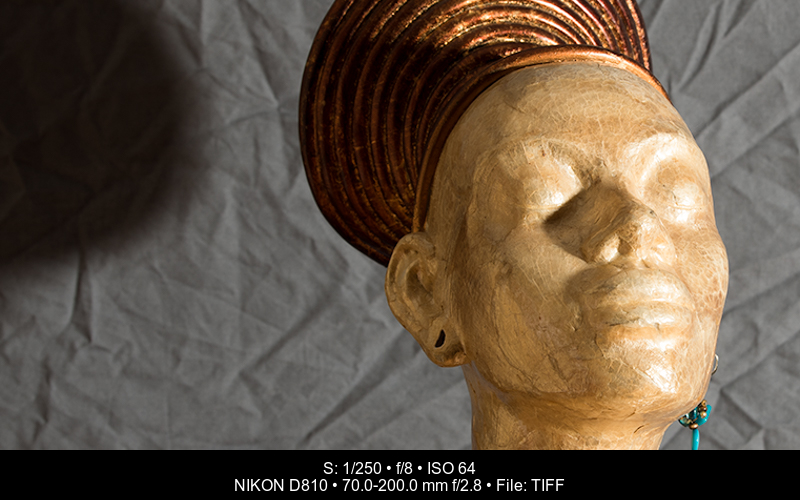
Light source – 3 feet away
Doubling the distance again and increasing the power output for F/8 reveals some fairly hard transitions from light to shadow – creating more sculpting on the face – and the shadow line on the background is very defined. The overall face is lit more as the light pattern hasn’t changed from the reflector, but the quality of the light is drastically different from the first image.
Light source – 6 feet away
What does all this mean and how is it practical? By understanding the quality of light, you, the photographer can create the look you want. And you can create the same look over and over, if that’s the “style” you want.
Want soft shadowing on a face? Move your light close with less power. Want more sculpting and shadow definition? Move your light further away and bring the power up. Don’t like the shadow on the background? A couple of closer lights will help minimize or remove the background shadow.
Next issue, I’ll explain light ratios and how you can better control multiple light sources.
Share your best photos on our PHOTONews Facebook Page and on the PHOTONews Flickr Image Pool.
About the Author
Will Prentice (www.capturaphoto.ca) is a professional photographer based out of Whitby, Ontario and Brand Specialist – Lighting for Amplis.


