Mark Hughes
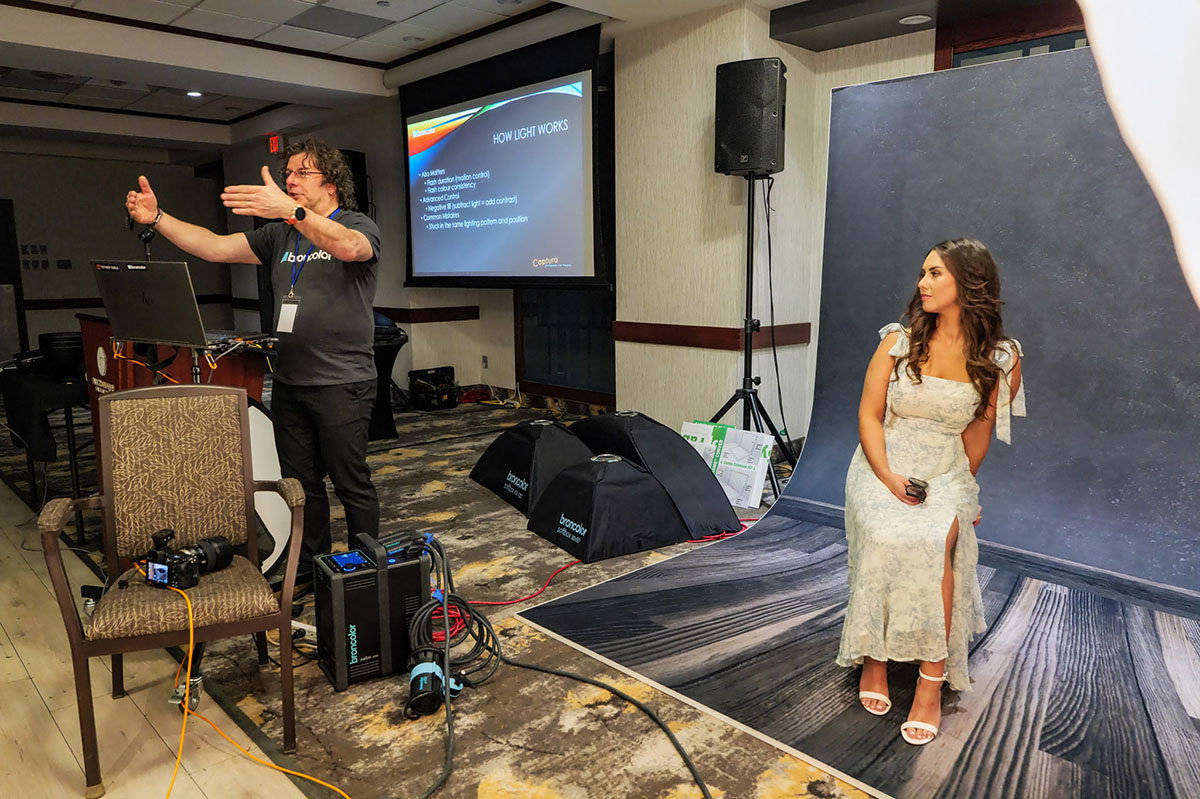
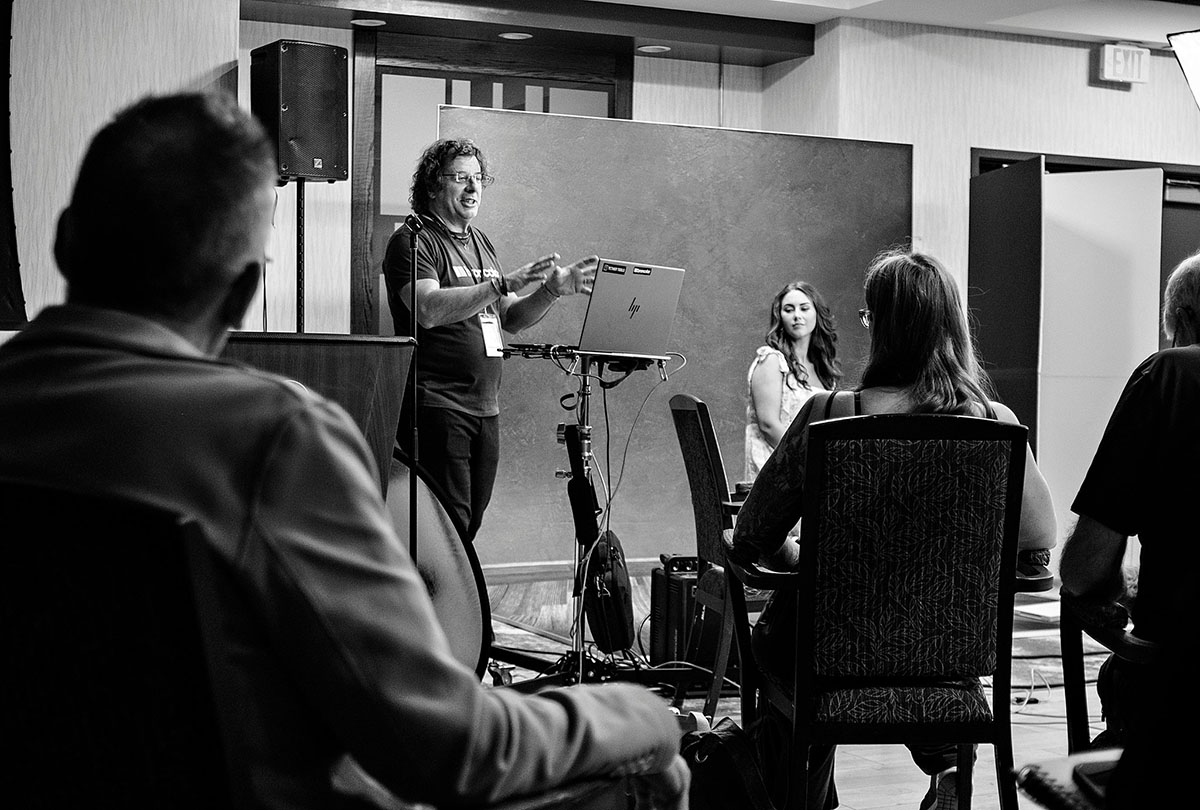
Recently, I had the pleasure (and mild cardio workout) of hosting an advanced portrait lighting workshop presented by broncolor Canada at Canadian Imaging – the annual gathering of the Professional Photographers of Canada where photographers come to learn, connect and occasionally nod confidently at lighting diagrams they’re still decoding internally.
I always enjoy teaching lighting across Canada, but this event is a favourite because it lets us move beyond the usual “put the light here and hope for the best” approach and dig into why things actually work. It’s less about memorizing setups and more about understanding how to build and adapt them without crossing your fingers.
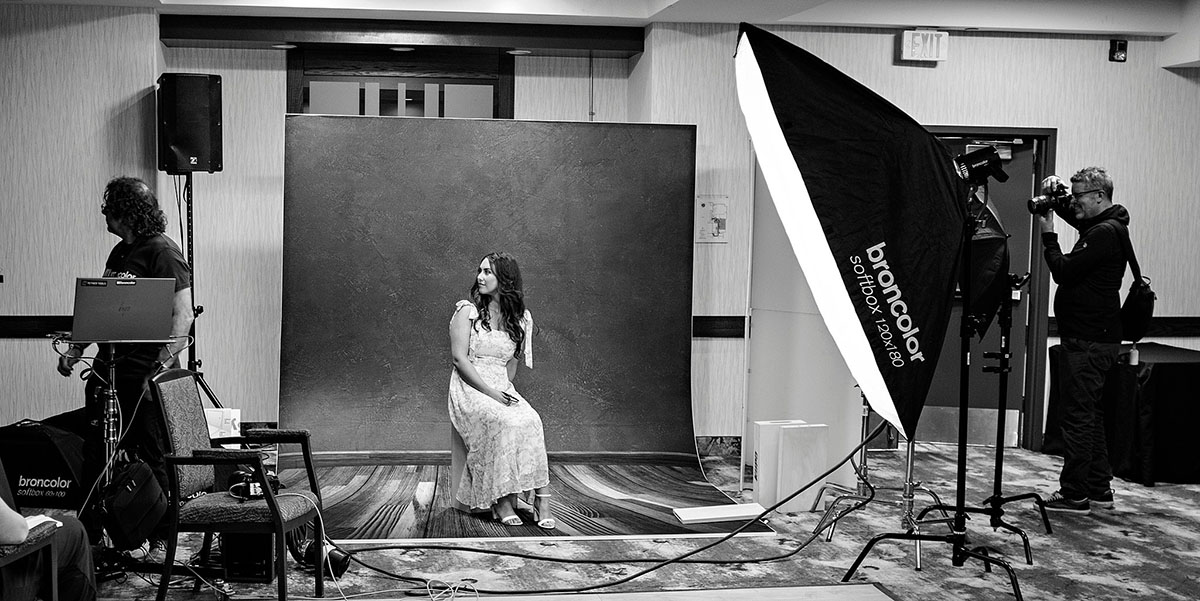
We compared different modifier shapes such as strip boxes, octas and square softboxes and looked at how a softbox can be made to behave like a harder source through positioning and control techniques. We explored feathering, the use of grids, edge masks and special diffusion and then moved into hard reflectors like beauty dishes and standard reflectors. Umbrellas made their appearance as well, along with more unique tools like the broncolor Para, bare bulb setups and reflective panels and V-flats. I also included a few inexpensive alternatives toward the end, because great light doesn’t have to come with a premium price tag.
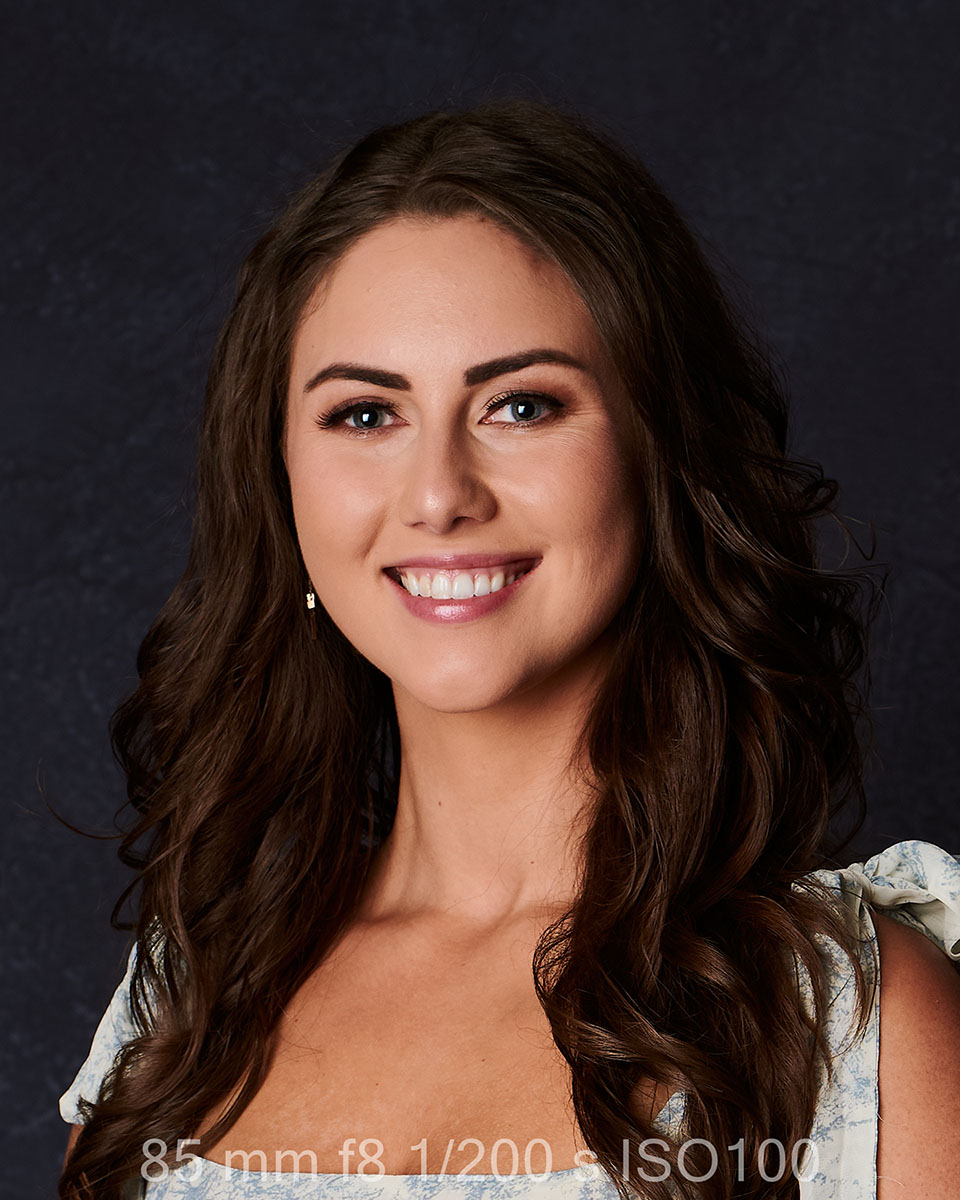
A huge part of what made this workshop successful was my model, Kendra. She brought the perfect mix of charm, quick wit and genuine enthusiasm and she handled the repeated poses and subtle adjustments like an absolute pro. When you’re asking someone to hold the same position while you debate modifiers like it’s a playoff game, that kind of patience is priceless.
The goal for the session was to give participants a solid understanding of SSD – Size, Shape and Distance – and how surface type affects light, while also helping them move from simply using gear to controlling light with intention. We explored how to use softboxes, beauty dishes, hard reflectors and Para modifiers creatively, how to shape light using bounces, DIY reflectors and how to build complex lighting setups without needing a truckload of equipment. The workshop itself was highly interactive, with participants asking questions, testing ideas and engaging throughout.
Using the broncolor Satos 3200 power pack, we examined how flash duration, power and colour consistency impact workflow. The Satos offers an 11-stop flash range with consistent colour across the entire range, which is something no other lighting system can claim. Many other flash systems shift colour as power changes and once you move beyond a two-stop difference, those shifts can become noticeable and add extra work in post-production. Consistency from flash to flash also becomes less reliable in those systems, which can slow you down when precision matters.
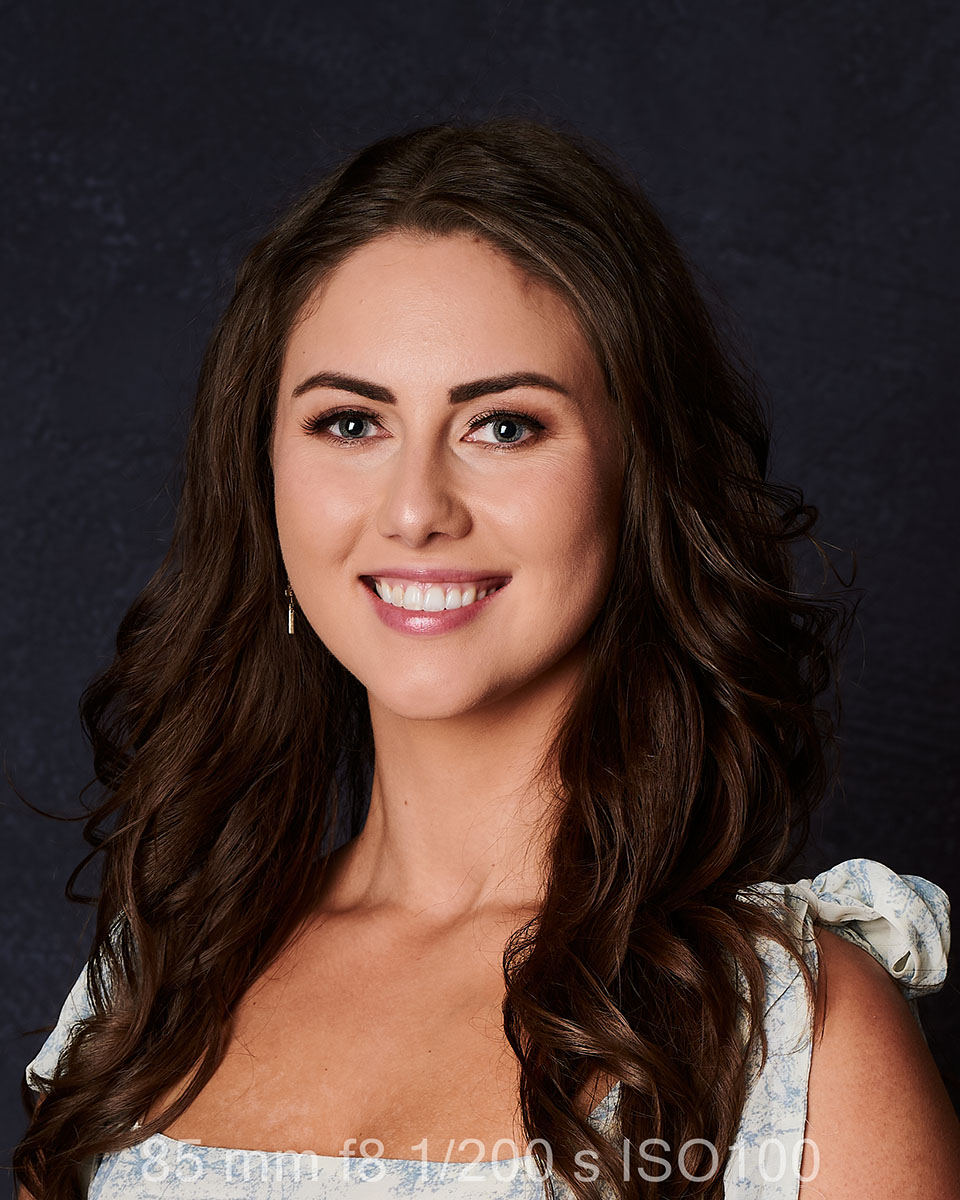
We started with the fundamentals by breaking down hard and soft light. The simplest way to identify the difference is by looking at highlights and shadow transitions. When highlights are bright and defined, especially on areas like cheeks, nose and lips and when shadows have crisp, sharp edges, you’re looking at hard light. When those transitions are gradual and the light appears to wrap around the subject, you’re seeing soft light.
From there, we moved into SSD, which is really the backbone of lighting control. The size, shape and distance of your light source determine whether your light appears hard or soft and understanding how those three factors interact gives you far more control than simply swapping modifiers and hoping for the best.
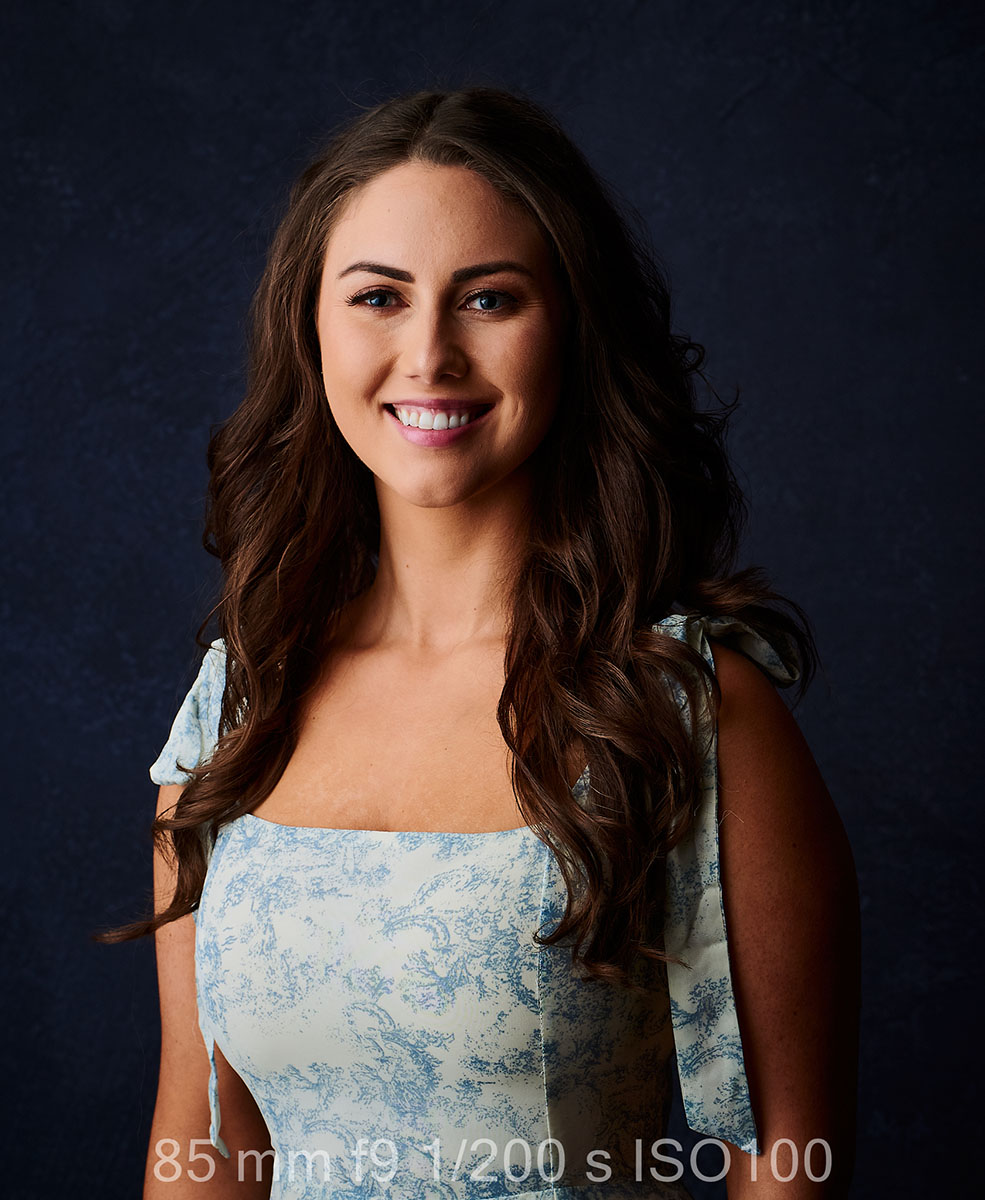
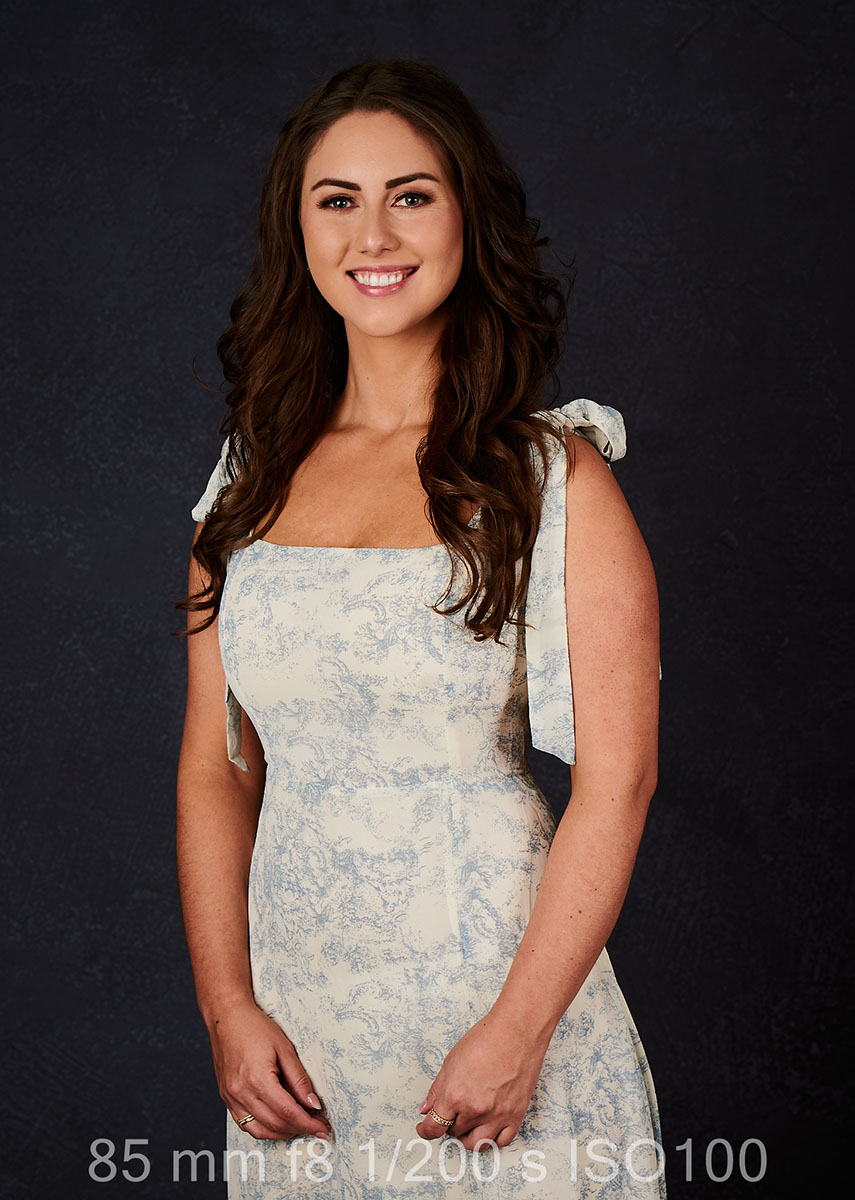
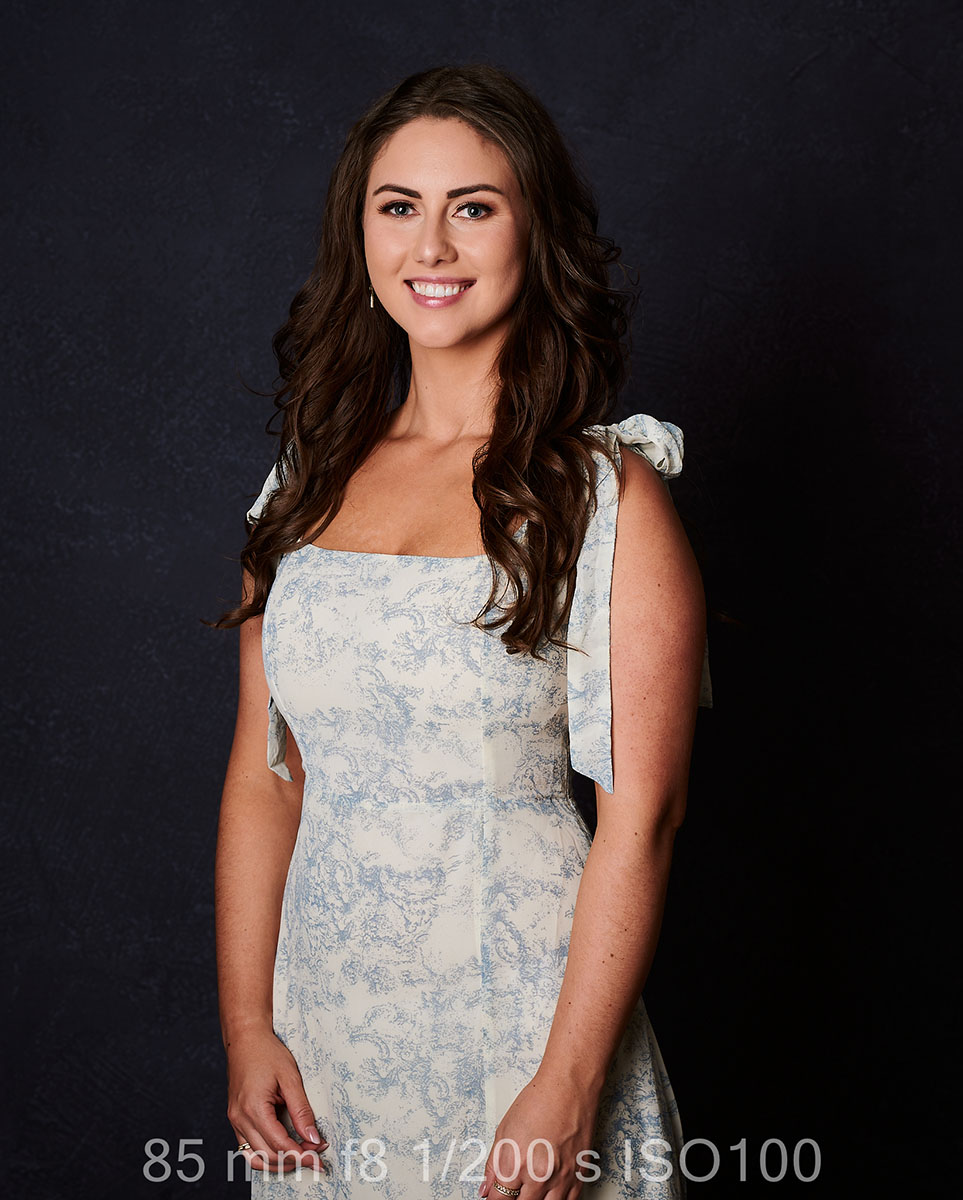
When we explored distance, we used a 35×60 softbox to demonstrate how dramatically things change. At approximately one metre from Kendra, the light was soft and wrapped nicely around her. When that same light was moved back to three metres, the shadow transitions became much harder and the highlights in her hair, nose and lips became sharper and more defined.
This shift is explained by the inverse square law:
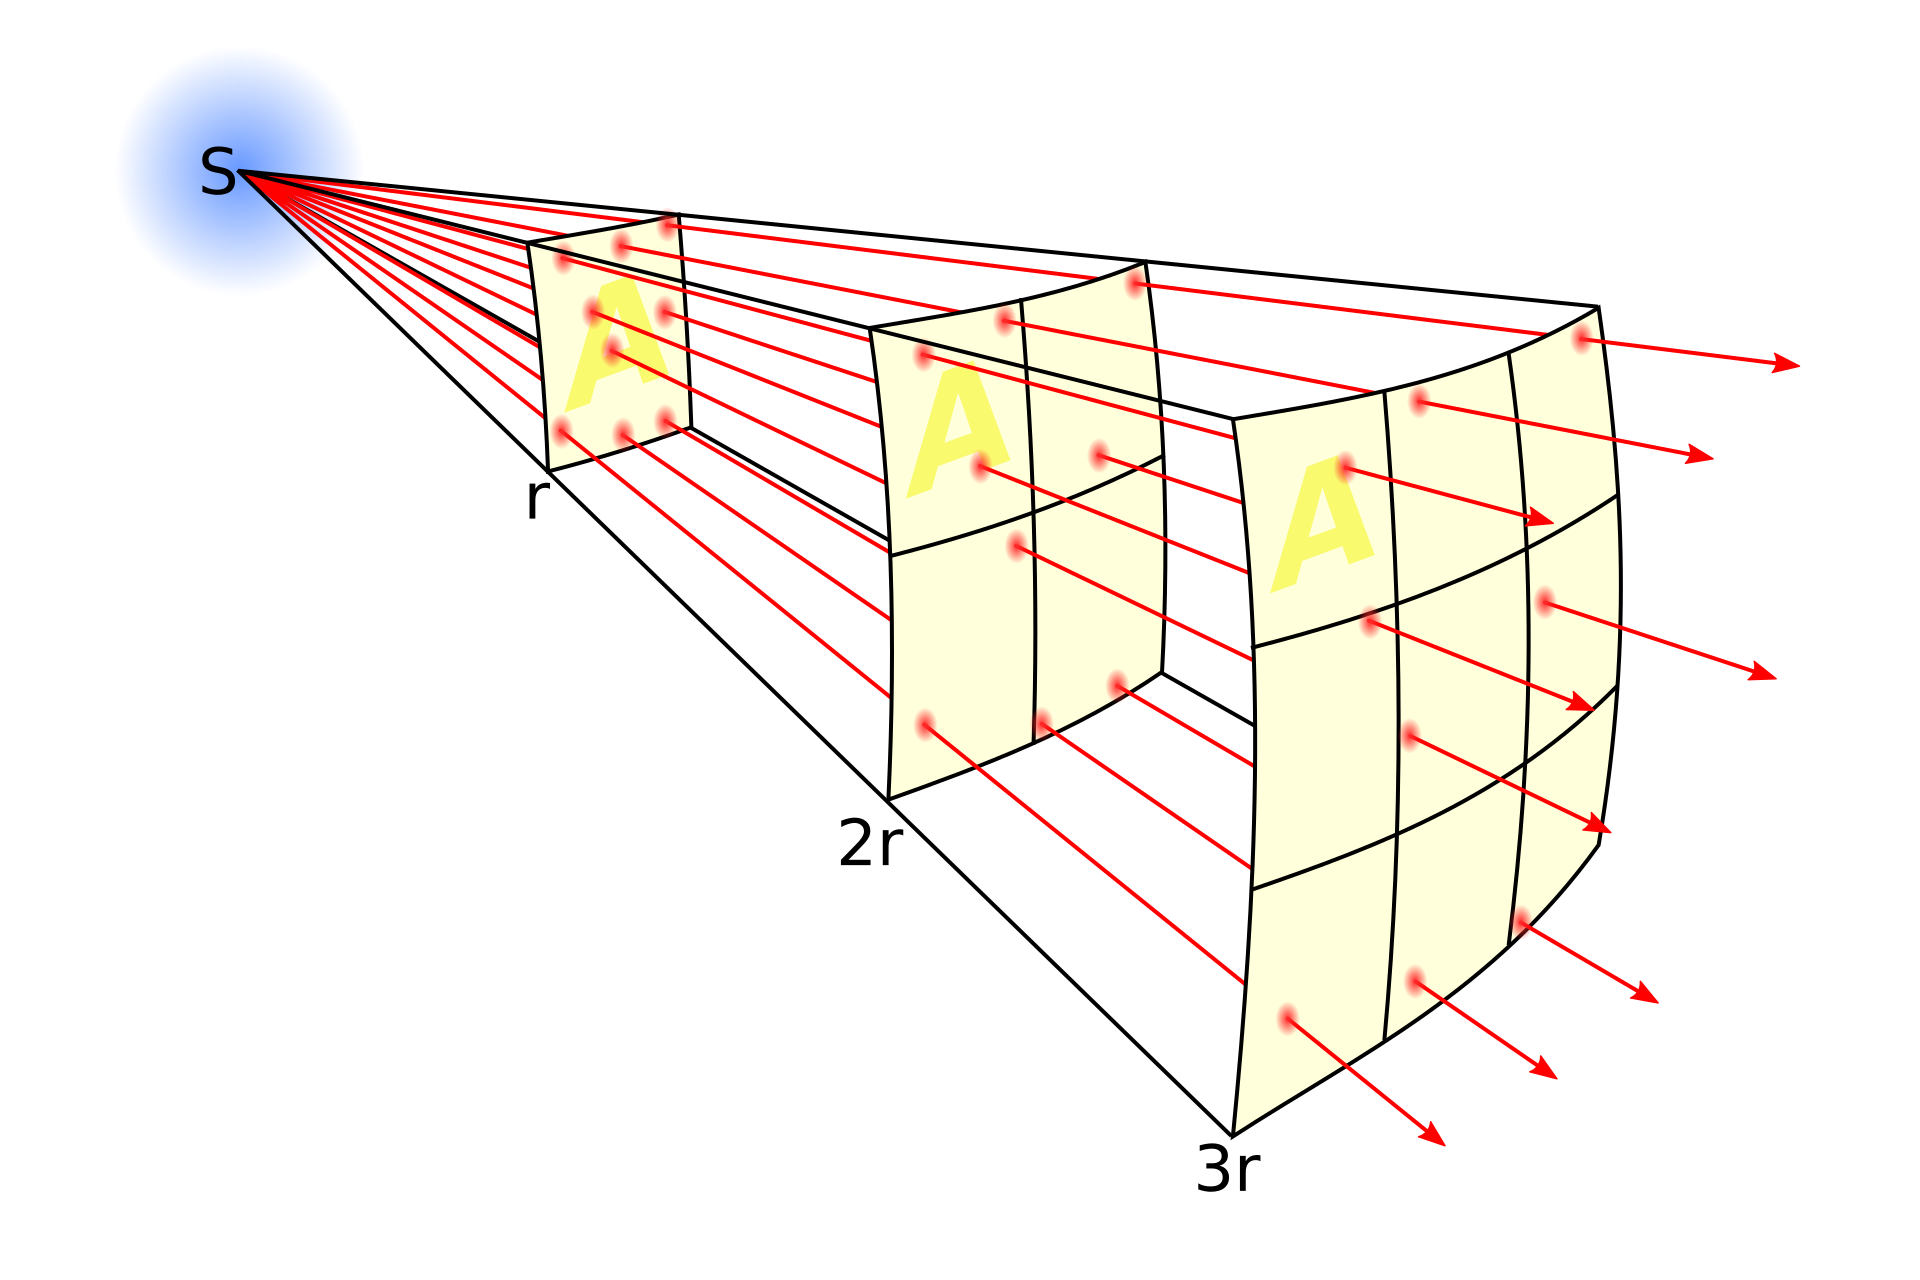
By Borb, CC BY-SA 3.0, https://commons.wikimedia.org/w/index.php?curid=3816716
As the distance increases, the intensity of light falls off rapidly. Moving the light from one metre to three metres means that only about one ninth or roughly eleven percent of the original light intensity reaches the subject. To compensate, we need to add three stops of light. In practical terms, this means increasing flash power or opening the aperture. If you move your light closer, you need to reduce power accordingly unless your goal is to recreate the surface of the sun in your studio.
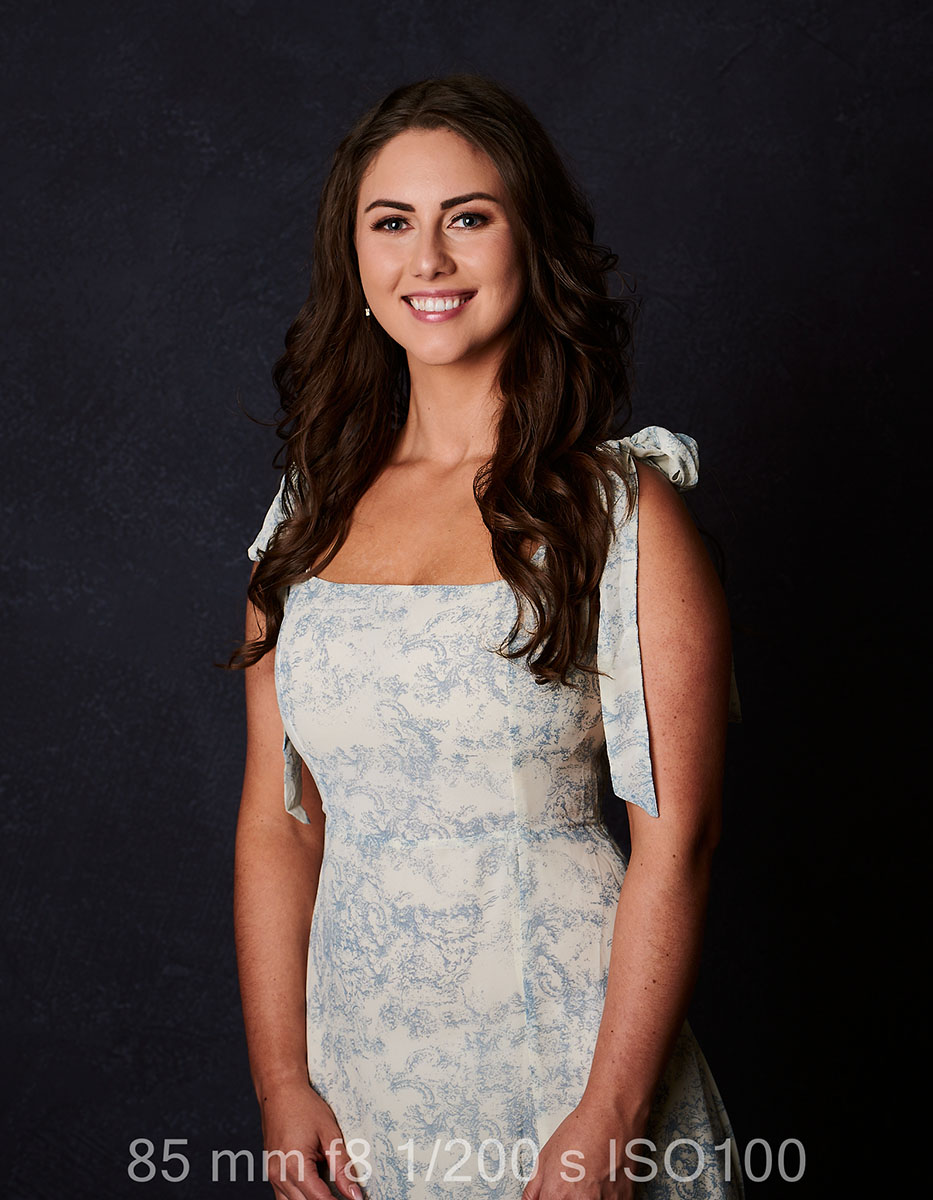
To achieve softer light at a greater distance, you need to return to SSD. If the distance is fixed at three metres, the only way to maintain softness is to increase the size of the light source. In this case, that means using a modifier with roughly nine times the surface area. A 120×180 softbox provides a comparable quality of light at three metres to what a 35×60 softbox produces at one metre, assuming the necessary three-stop power increase is applied. The resulting images show very similar shadow transitions and highlight behaviour despite the difference in distance.
This workshop ran for three full hours and covered more than can reasonably fit into a single article, so I’ll be breaking it down into a series for PHOTONews. This first piece focuses on how light works and next month I’ll dive into controlling surface interactions, including how to manage matte and glossy finishes and how to eliminate glare from glass without losing your mind.
For those considering an upgrade, there’s currently a trade-in promotion running from April 1 to May 31, 2026. Photographers can trade in existing gear of any brand or condition and receive up to 35% off new broncolor equipment through authorized dealers. It’s a solid opportunity to modernize your setup and retire a few pieces of gear that may have already emotionally retired themselves.
More information is available here:
https://www.broncolor.ca/trade-in-promotion/
At the end of the day, lighting is about understanding how to control what you have – and occasionally reminding your gear that you’re the one making the decisions.
![]()
Amplis Foto and PHOTONews Canada are proud sponsors of the Professional Photographers of Canada, helping to support events, education and community initiatives across the country. Their involvement strengthens opportunities for photographers by making high-quality workshops, demonstrations and industry resources more accessible, while also helping to connect emerging and established photographers with the tools, knowledge and inspiration they need to grow their craft.
Claude Brazeau
Claude Brazeau
Claude Brazeau
Author: Will Prentice

A portrait, fine art and commercial photographer for 30 plus years, Will Prentice is not just a contributor to PHOTONews magazine, but also host of PHOTONewsTV, owner of Captura Photography+Imaging and Technical Support/Brand Manager for Amplis Foto, Canada’s largest distributor of photographic equipment.
Will teaches photographers of all skill levels how to improve their craft – from creative photo projects to picking the right gear for their needs to flattering lighting to getting the best expressions to creating final images for screen and print. His unique style of highly detailed images with perfect tonality, wide dynamic range and stunning colour is instantly recognizable. Commercial clients rely on Will’s creative eye and mastery of lighting.
When he’s not behind the camera or in front of a class, you’ll find Will outdoors in any weather – usually on one of his bikes or enjoying time with his grandchildren.