

Most of Canada (and North America, for those travelling) is in for a spectacular visual treat on April 8, 2024 – a Total Solar Eclipse will be visible coast to coast. Prime viewing for this celestial spectacle will be along the lower Great Lakes through the St. Lawrence before cutting through the middles of New Brunswick and Newfoundland. For photographers wanting to capture this incredible scene, aside from praying for a cloudless day, I share my top gear suggestions so you can get stunning images with proper exposures.
Please remember – NEVER look directly at a solar eclipse! Use protective glasses or best, look indirectly through a solar eclipse viewer (you can make your own – instructions are online).
Where and When
On April 8, 2024, the solar eclipse will be visible from Windsor (2:00PM start/3:14PM maximum) through Toronto (2:05PM start/3:20PM maximum), Kingston (2:09PM start/3:23PM maximum) through Montreal (2:14PM start/3:27PM maximum), Fredericton (3:23 PM start/4:34 maximum) through the Northwestern end of PEI (3:27PM start/4:37PM maximum) then through the middle of Newfoundland (4:05PM start/5:13PM maximum). A Partial Eclipse (over 90% coverage of the Sun by the Moon) will be visible in Ontario and Quebec South of James Bay through the entirety of the Maritimes.
For Western Canada, British Columbia will see a Partial Solar Eclipse (17% coverage) starting at 10:43AM; Alberta will enjoy 26% coverage beginning at 11:48AM; and Saskatchewan at 35% starting at 11:53AM. Southern Manitoba will experience over 50% coverage starting just before 1:00PM with maximum coverage around 2:00PM. Thunder Bay (70%) and Sault Ste. Marie (80%) should look to the East just after 2:05PM for the start with maximum coverage over an hour later at 3:19PM.
For details specific to your location, check here: Eclipse Path of Total Solar Eclipse on April 8, 2024 (timeanddate.com)
What is a Solar Eclipse?
A solar eclipse occurs when the New Moon passes between the Earth and the Sun. The Moon blocks the light travelling from the Sun to the Earth and, in areas experiencing at least 90% coverage, darkness equal to early evening will prevail.
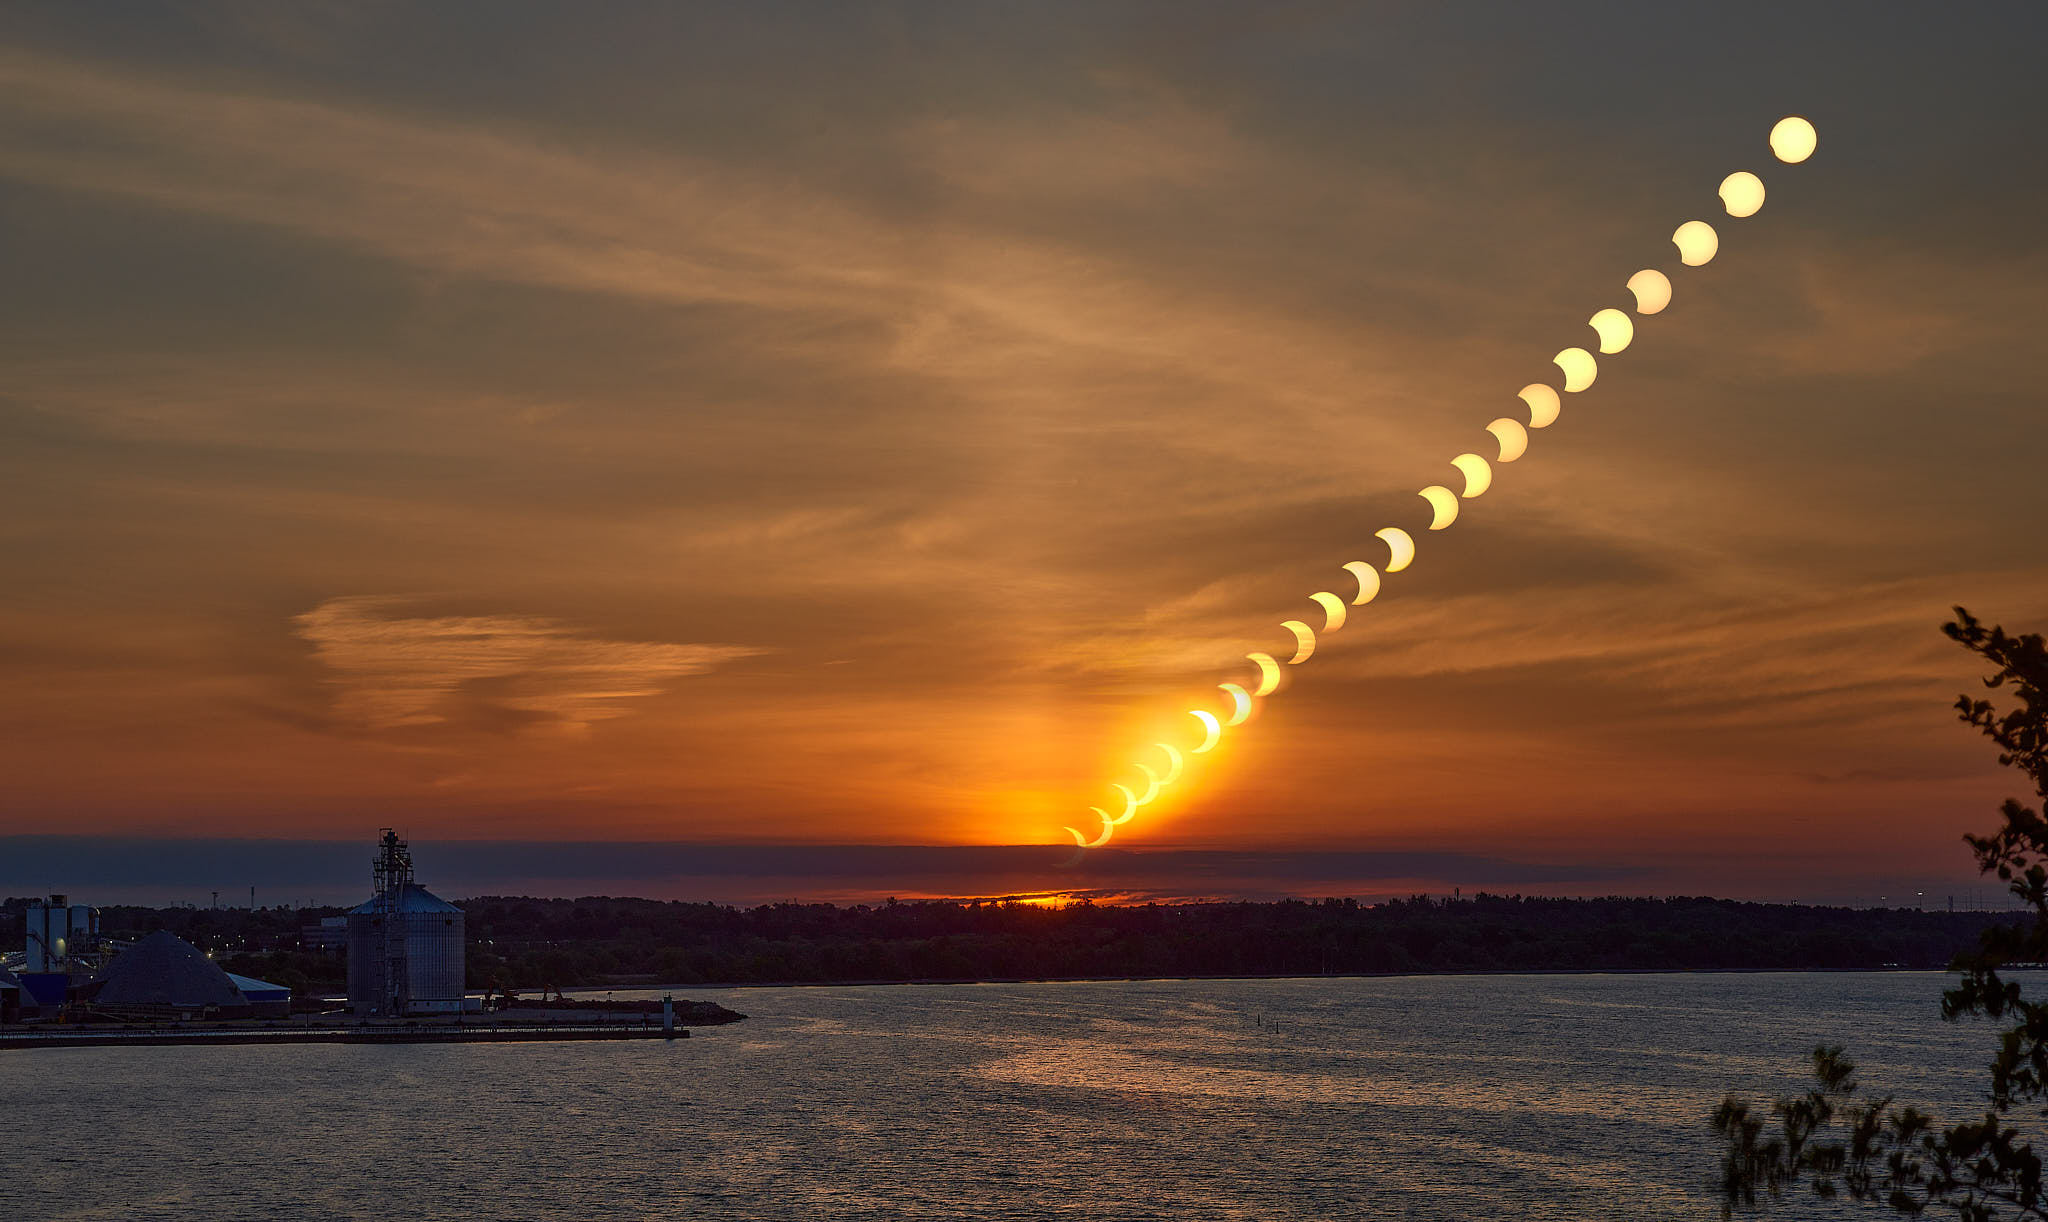
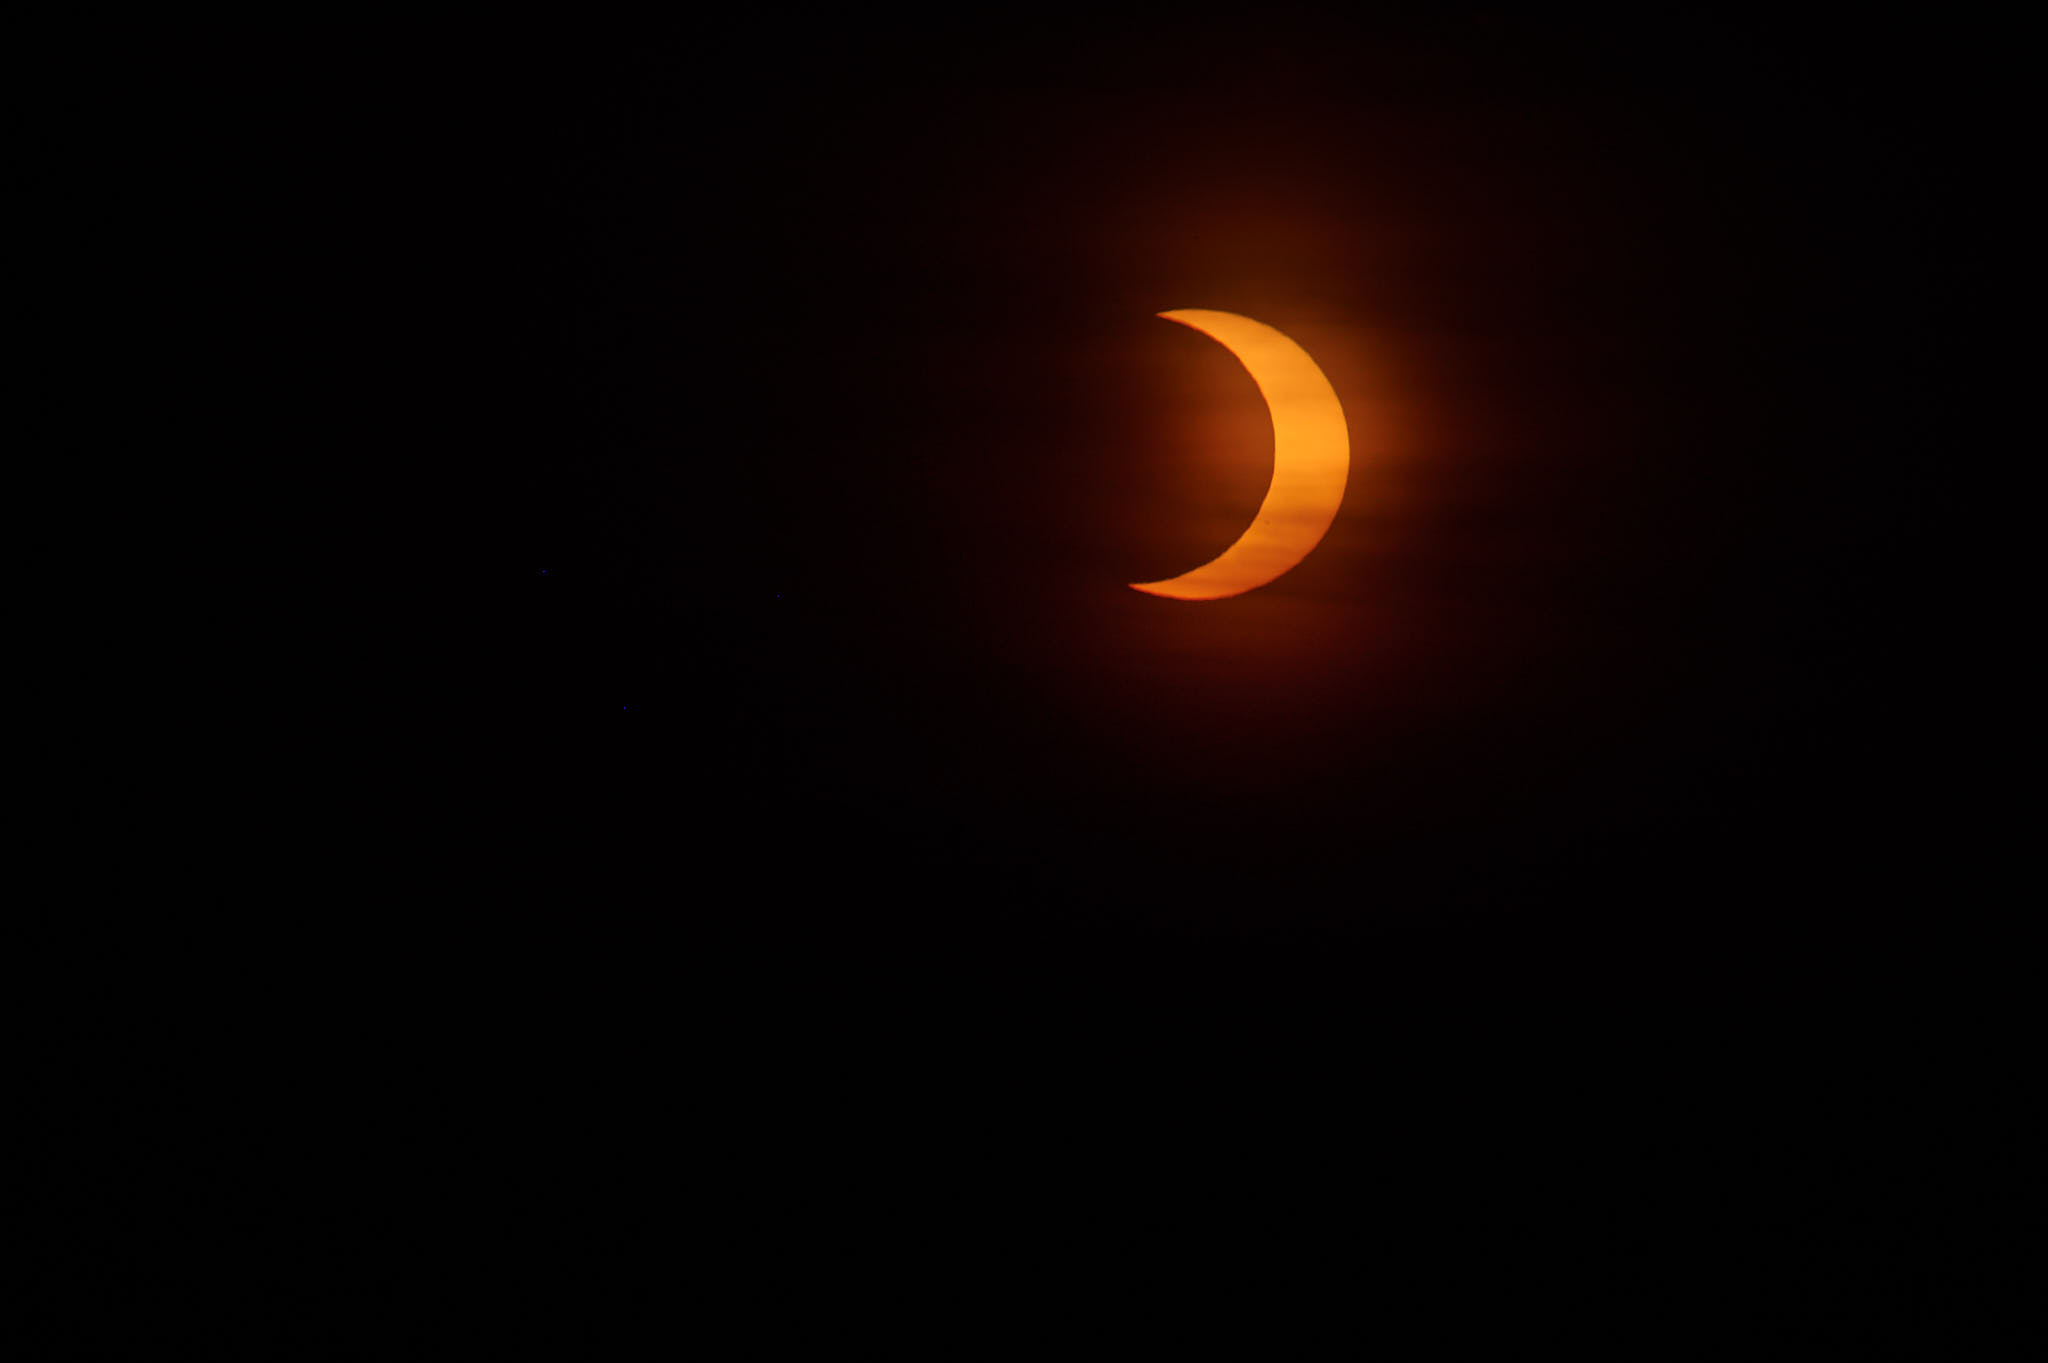
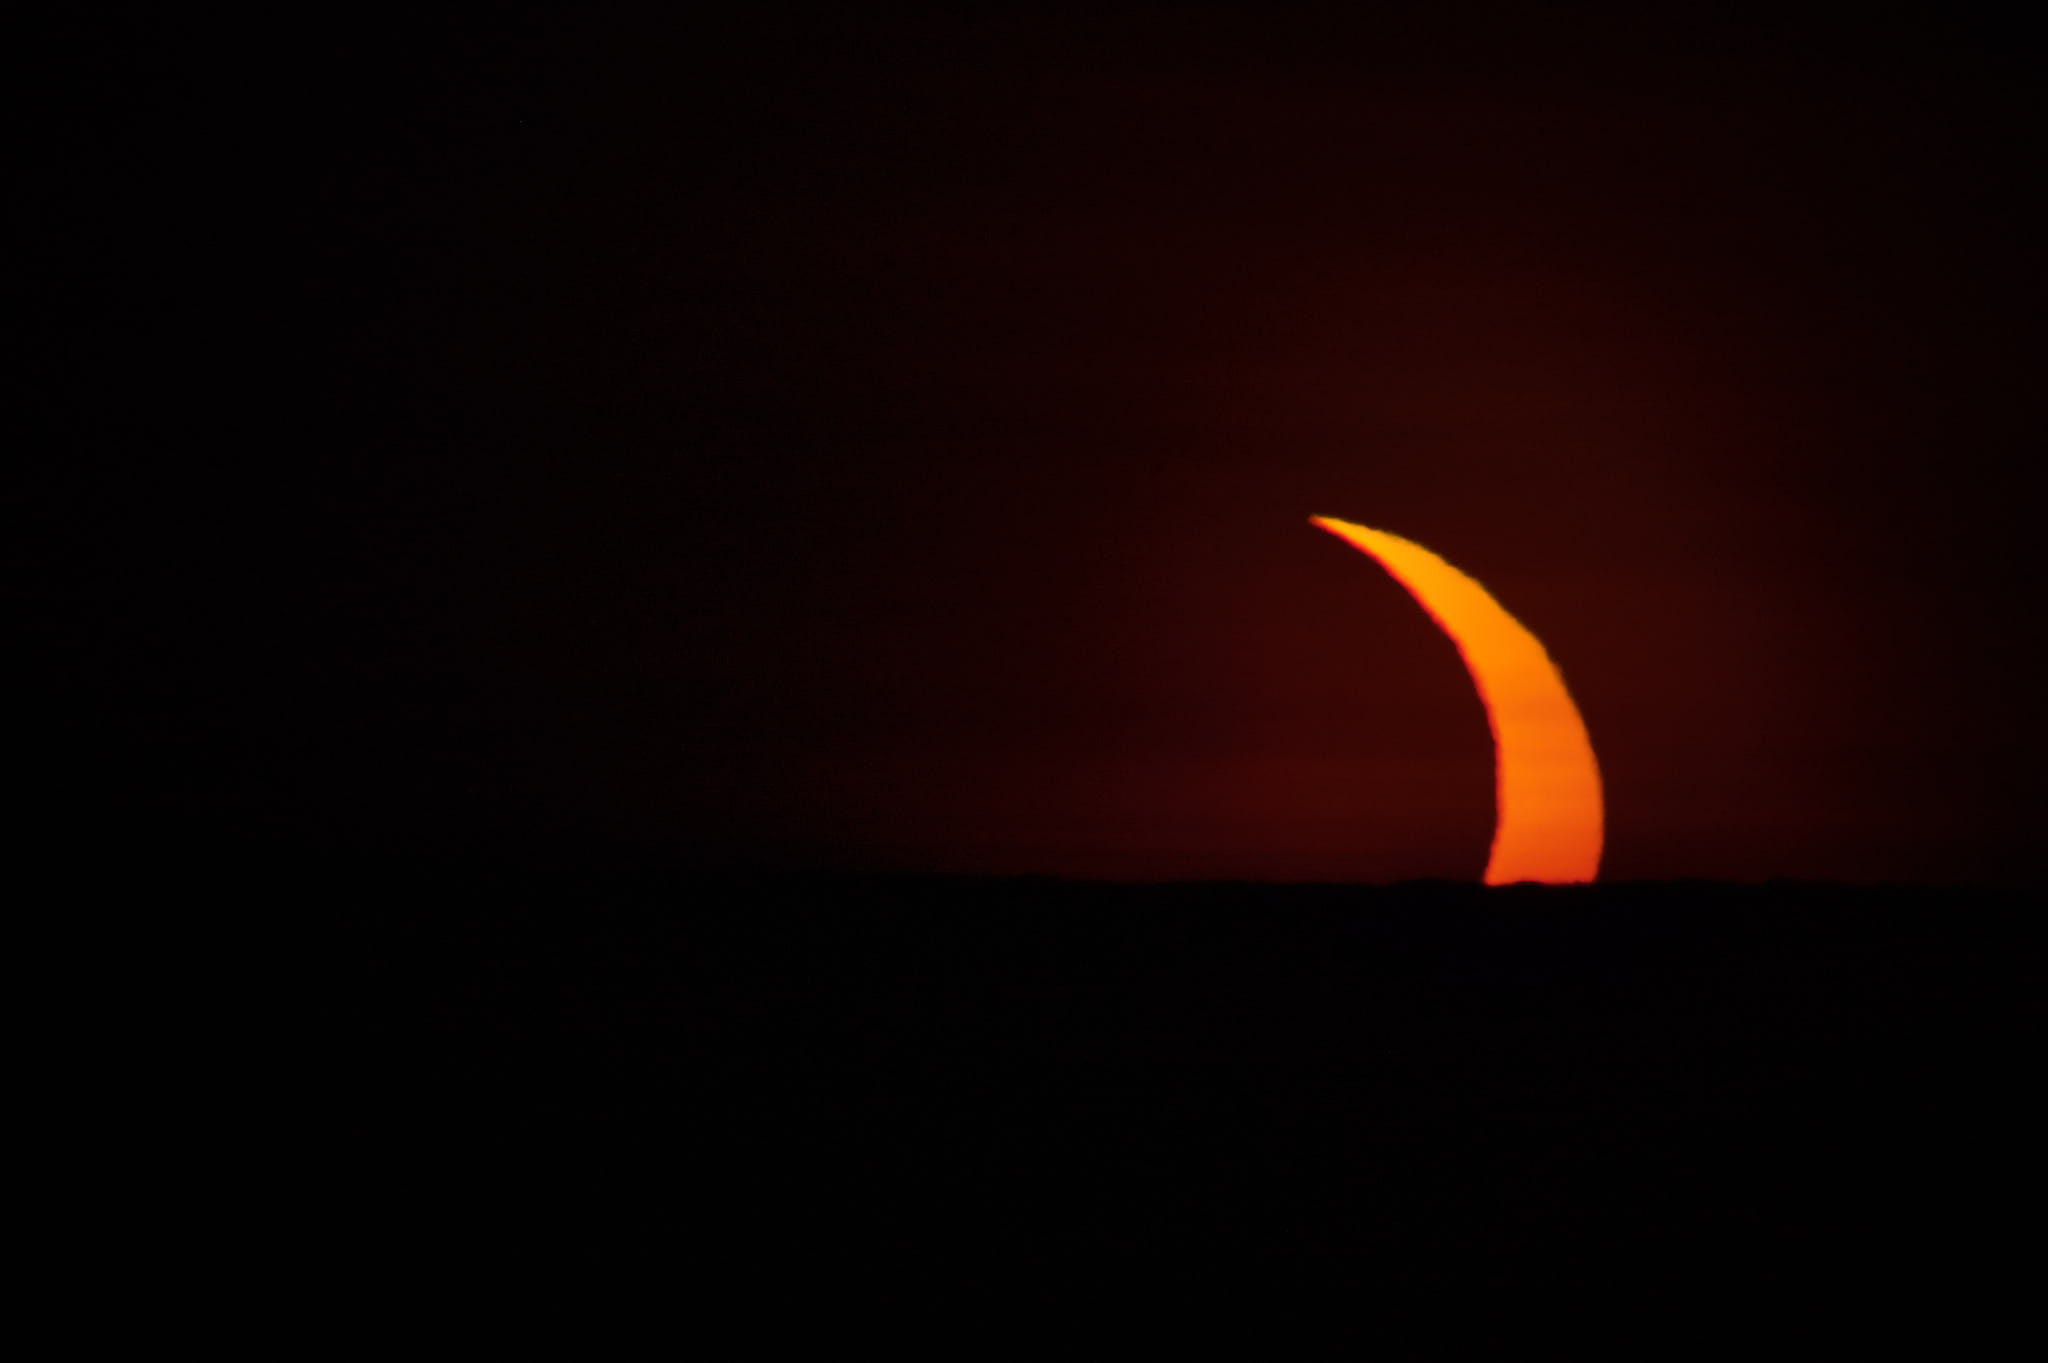
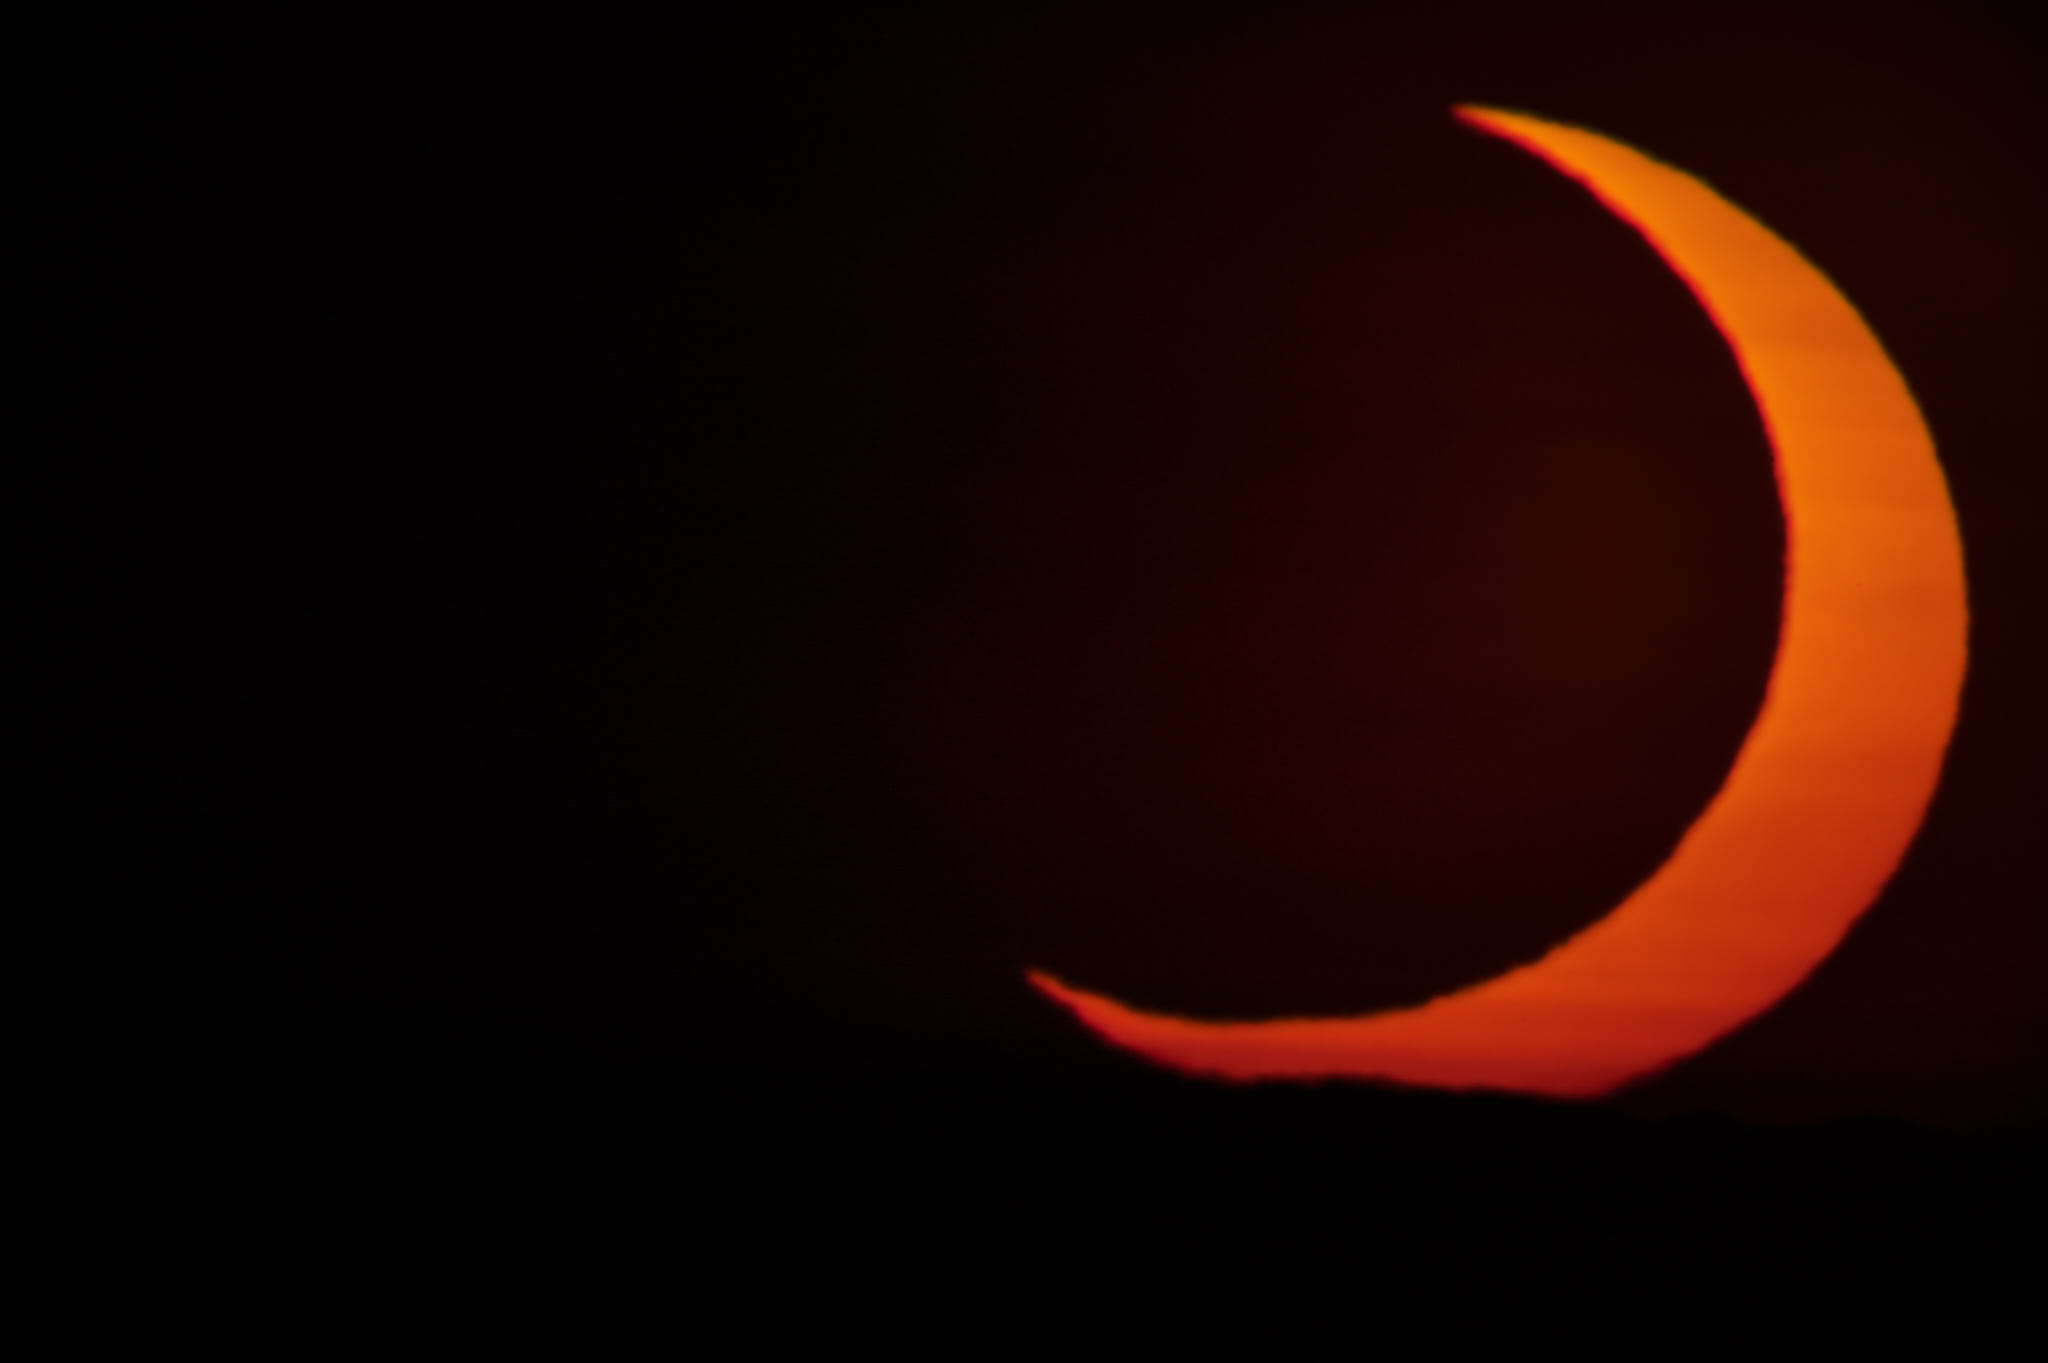
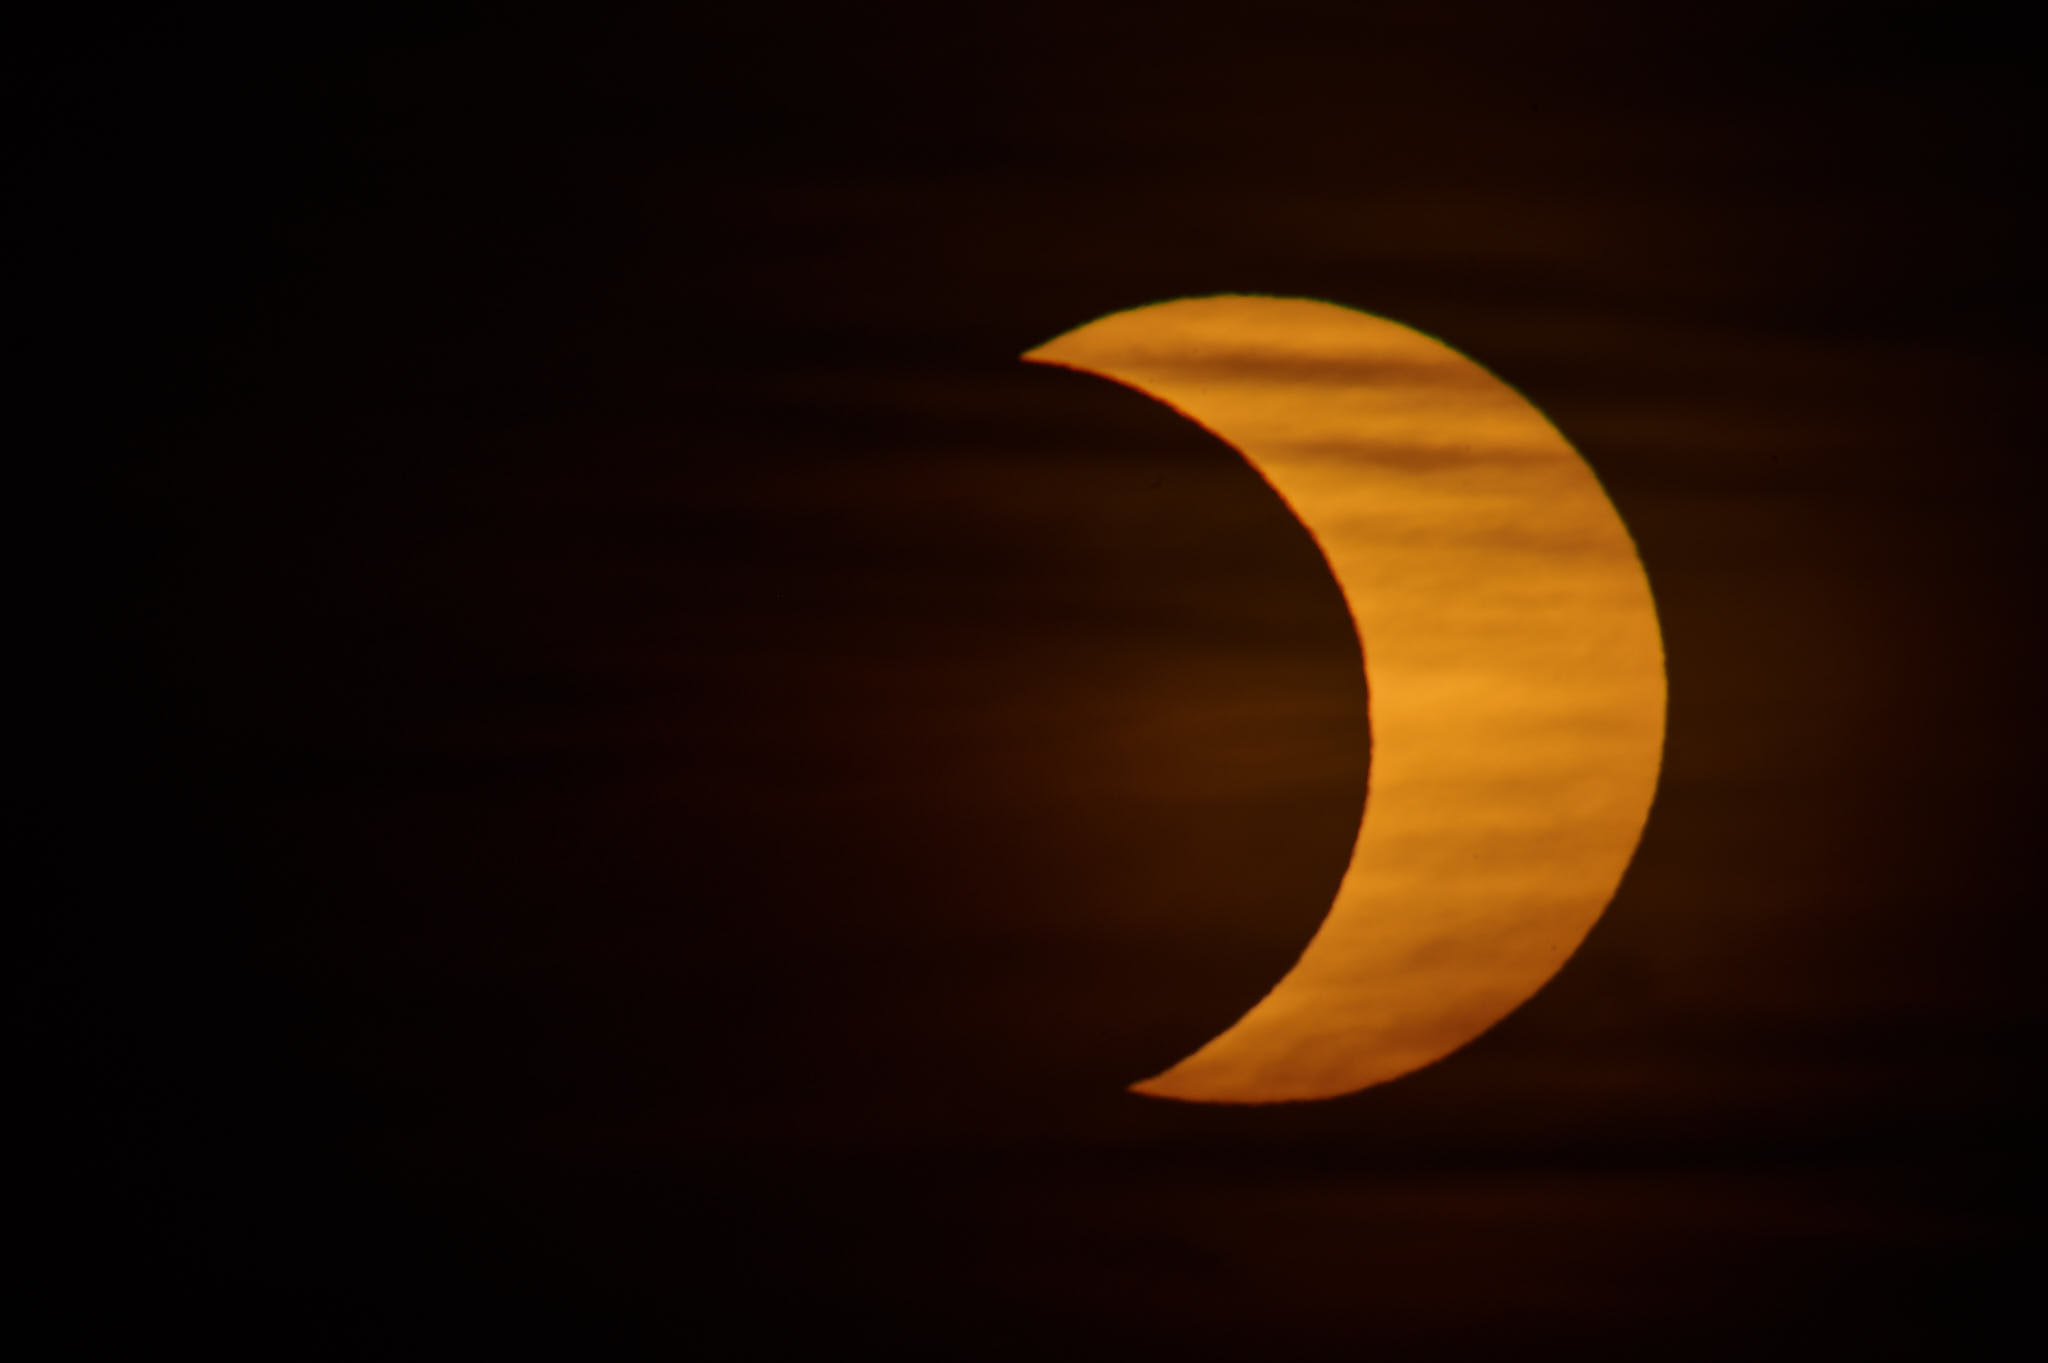
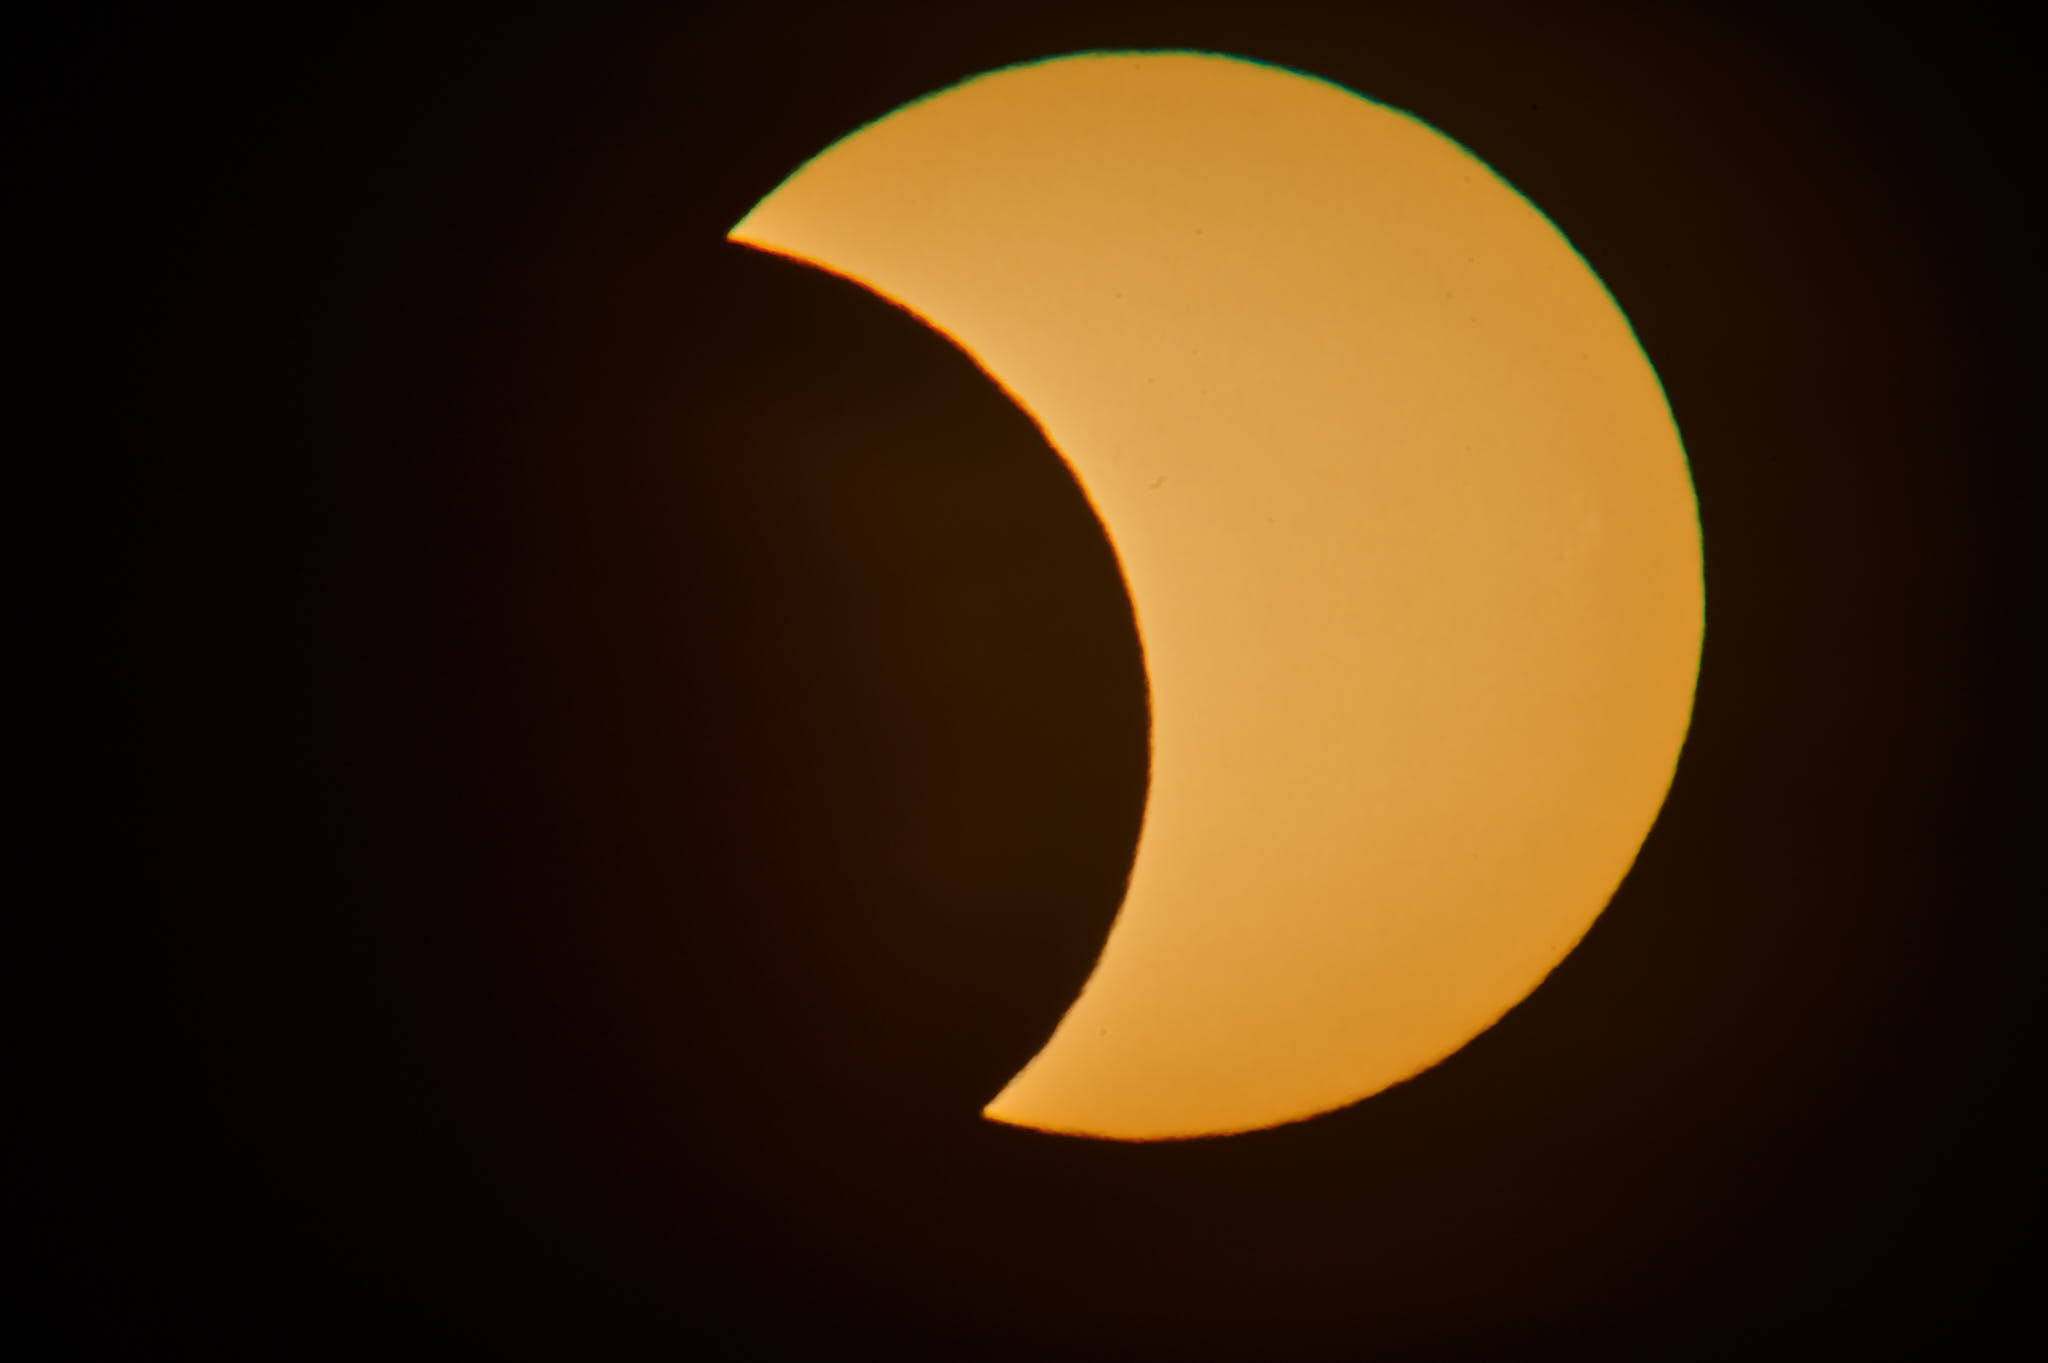
Areas enjoying the Total Solar Eclipse will only see, at maximum obscuration, an extremely bright but thin ring around the Sun. Western Canada will see a “bite” out of the Sun, similar to what Eastern Canada experienced a few years ago. It’s still a visual treat for photographers and with the right landscape, photographers can create some incredible imagery.
This particular solar eclipse is special for many reasons:
- It happens the day after perigee (when the Moon is closest to the Earth in it’s orbit, meaning the Moon will appear slightly larger than usual);
- The next Partial Solar Eclipse visible over most of Canda won’t happen until January 14, 2029;
- A Total Solar Eclipse will happen August 22-23, 2044 (over 20 years from now) over Western Canada;
- The next Total Solar Eclipse for Eastern Canada won’t happen until August 12, 2045 – and it will pass over the Southern US meaning Canadian photographers will see 60% coverage at best;
- June 11, 2048 will feature an Annular Solar Eclipse visible from Coast to Coast to Coast.
Recommended Gear for Photographers
Having and using the right gear is not just the mandatory for capturing stunning images but is also protection for your very valuable camera gear. Although the Sun is obscured by the Moon, the light coming from a Total Solar Eclipse is incredibly powerful. This light can burn your retinas as well as the imaging sensor on your camera. Even with proper Solar filters, you want to monitor your gear to ensure it’s not getting too hot.
You have two options for lenses – super telephoto, perhaps with a Kenko teleconverter, for close-ups of the spectacle; or, if you have a nice landscape, a wide angle lens such as the Laowa 12mm.
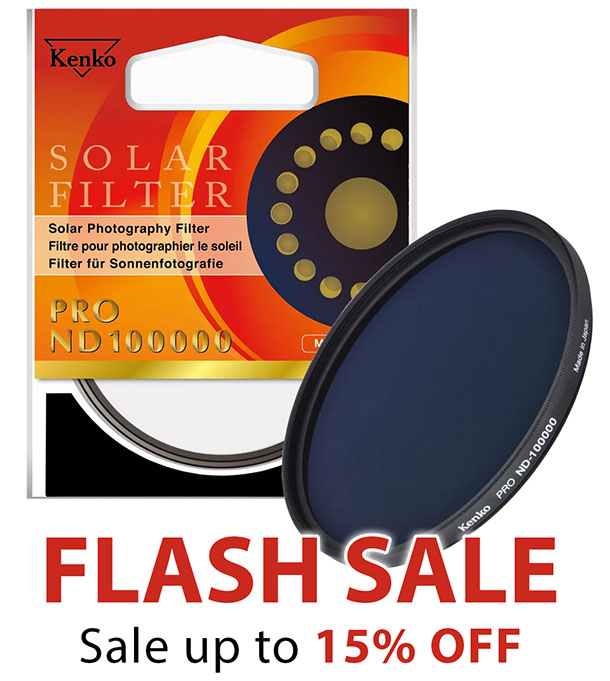
You’ll also need a Solar Eclipse filter. One of the best that I’ve found and use is the Kenko Pro ND1000000. If you’re planning on using the same filter on more than one lens, it’s a great idea to buy the filter for your largest lens and then use Stepping Rings to fit smaller diameter lenses. You can use standard step rings or the H&Y REVORING Variable Step Adapter.
You’re also going to need a solid tripod. My choice is either the Vanguard VEO 3+ 263AB Aluminum Tripod with Dual-Axis Ball Head or the Vanguard VEO 3+ 263CB Carbon Fibre Tripod with Ball Head. What I like about these tripods are the size of the legs – they’re very robust and can handle my full-frame DSLR with grip plus Tamron 150-600 G2. The other stand out feature I’ll use to full advantage during this eclipse is the Multi-Angle Centre Column and VEO+MA1 adapter which lets me mount a second camera on the same tripod. Instead of two tripods, I only have to carry one tripod. I can use my Cambee A17 gimbal for my telephoto and the included ball head for my wide angle setup.
Read my review of the VEO 3+ 263AB 160S tripod here.
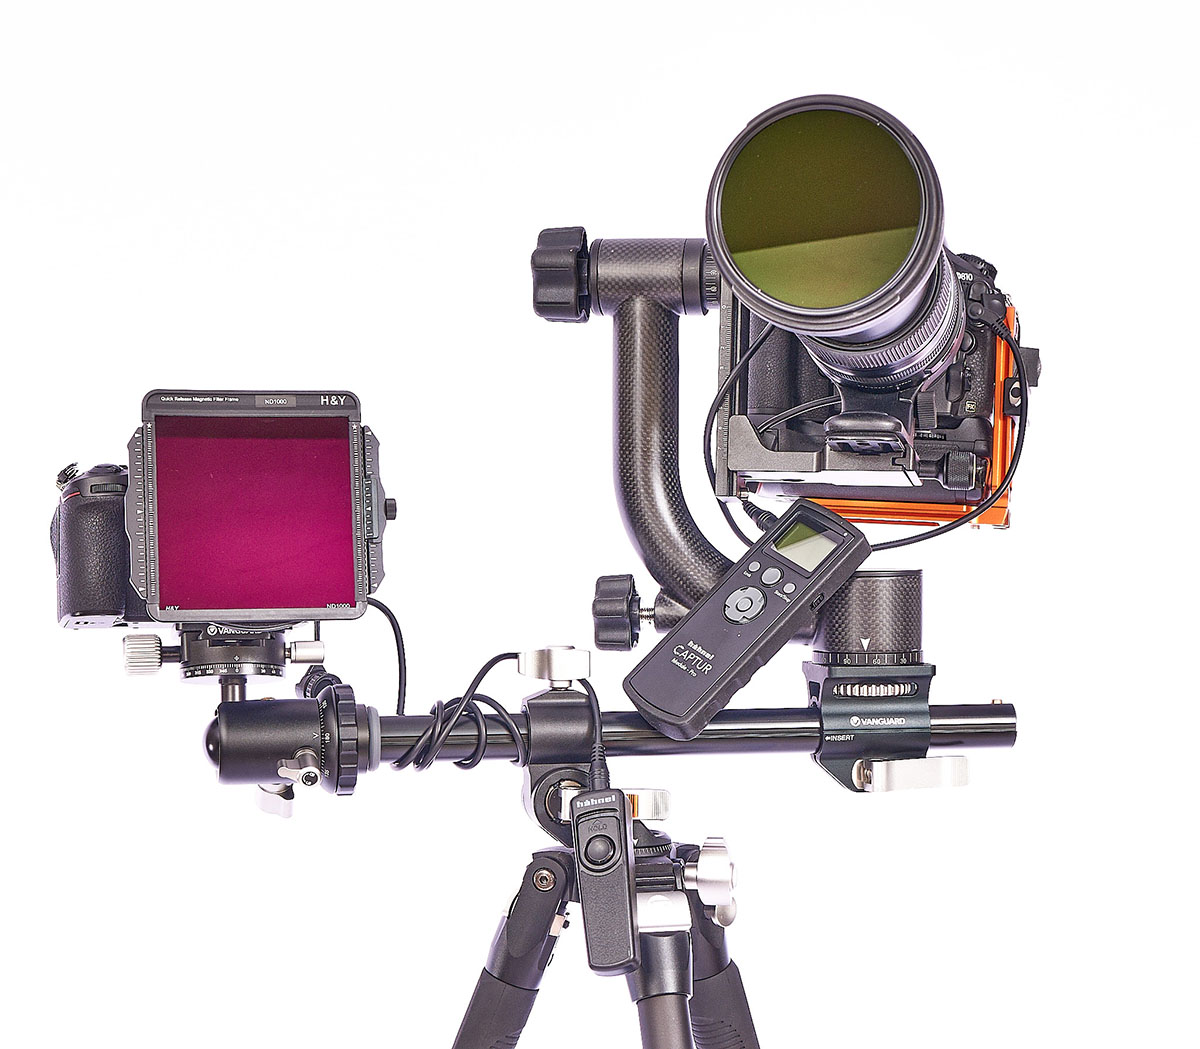
I like to fix the composition with my wide-angle lens – that camera won’t move during the eclipse. The telephoto camera set will have to move to track the sun throughout the eclipse, so the gimbal is the perfect head for smooth and precise movement. Watch my video on how to setup your gimbal before you use it: https://youtu.be/DJvMkeGETcg
I have two options from Hahnel for triggering my cameras. For my wide-angle setup, it’s a “Set it and forget it” kit – I’ll program my Hahnel Capture Timer Kit to take 3 bracketed images every minute. I’ll set the aperture and ISO and bracket the exposure time. For my telephoto kit, I’ll use an HRN 280 Pro wired cable release. Again, I’ll bracket my images with aperture and ISO locked in and have three stop variances in my exposure time.
I’m often asked if you can use a standard ND and/or Circular Polarizer and the answer is … maybe. The Kenko Pro ND100K filter blocks 16 3/5 stops of light – Circular Polarizer are about the equivalent of an ND2, which means you would need to add an ND16 plus ND4000 to get the same exposure. The risk of stacking filters in this instance is dealing with reflections – the light from the eclipse is so intense that it will bounce between your filters and cause ghost images and unwanted reflections.
If you insist on stacking filters, do so on your wide-angle lens to minimize the ghosting and reflections. Use a single filter on your telephoto lens as stacking filters will be far more apparent with a zoom lens.
Exposure Settings
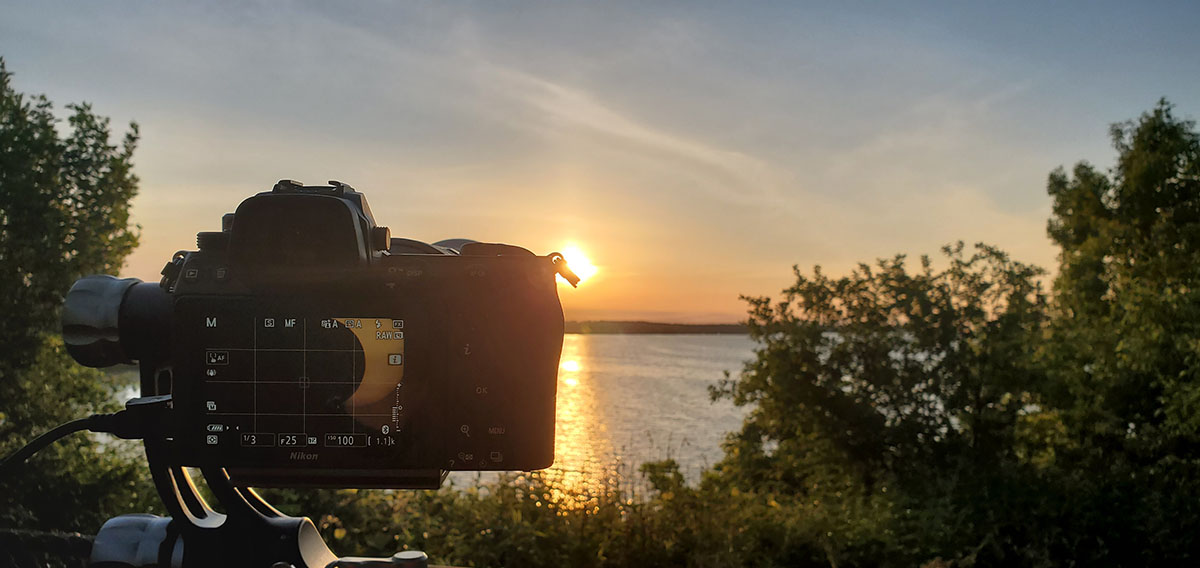
Make sure your camera is set to Manual exposure settings. Disable Auto ISO – set your camera to the lowest native ISO for your sensor.
I use an app called “Exposure Calculator” to take the guess work out of calculating my exposure times when using ND filters. It’s available for Android – Apple users should be able to find a similar app in the Apple App Store.
When I photographed the 2021 Partial Solar Eclipse, my settings went from ISO100, f/25, 1/3s (at 1,600mm with stacked teleconverters) when clouds partially obscured the sun to ISO100, f/32, 1/20s when the clouds cleared. I’m going to open my lens up a bit, but remember I’m using a stack of teleconverters to reduce cropping in post. Exposure Calculator will help you figure out your best settings.
It’s best to use manual mode on your camera (definitely NOT green auto) and adjust your aperture and shutter speed. Bracket your shutter speed, not aperture.
Be prepared, at totality, to remove your ND filter.
Helpful Tips
Make sure you protect your eyes first and your camera gear second. Invest in some certified solar eclipse glasses or make your own viewer so you can see the eclipse. Use the Live View function on your camera to compose your images and protect your eyes.
Keep an eye on your camera gear, specifically the temperature of your lenses and camera – eclipses are known to damage imaging sensors and warp aperture blades. I’ve heard of some cameras over-heating and shutting down. If you’re allowing a few minutes between exposures, pop your lens cap on to prevent light from entering your lens and camera. Just remember to remove it before capturing more images. Remove your lens hood from your telephoto lenses so as not to focus too much light and heat into your lens.
Scout your shooting location in the weeks leading up to the big day. I use an app called The Photographer’s Ephemeris to see the path of the sun and moon. I’ll scout a couple of locations and use TPE to visualize where the Sun and Moon will pass before deciding where to finally capture my images.
Check the weather forecasts before heading out. I usually start really checking a week before and then every day around the start time of the eclipse, I’ll check again. If there’s bad weather and clouds forecast for April 8, I’ll start to look for locations where the sky will be clear and the weather cooperative.
Remember to enjoy the moment. For many of us, it will probably be the last Total Solar Eclipse we see (barring international travel). Make sure you’re not playing with your camera the entire time. This is also a good experience to share with others you like to spend time with, even if they aren’t photographers. Buy some extra eclipse viewing glasses so they can see it as well. Take a selfie with your glasses. I’ll never forget the children who got to look at my camera’s LCD during the last Annular Solar Eclipse – the looks of joy and wonder on their faces was heartwarming. Don’t forget to look behind you – there are so many cool and interesting sites all around you during an eclipse.
Share your favourite photos on our Facebook page and tag us on Instagram. We look forward to the thousands of images and creations that are bound to come from this event.
Suggested Aperture and Shutter Speed
Refer to the table below to find suggested shutter speed value depending on different aperture values and the f-stops reduction factor of your chosen ND filters. Please note that these are to be considered as starting values and need to be adjusted on the spot by taking different test shots and making necessary correction accordingly.
ISO:100
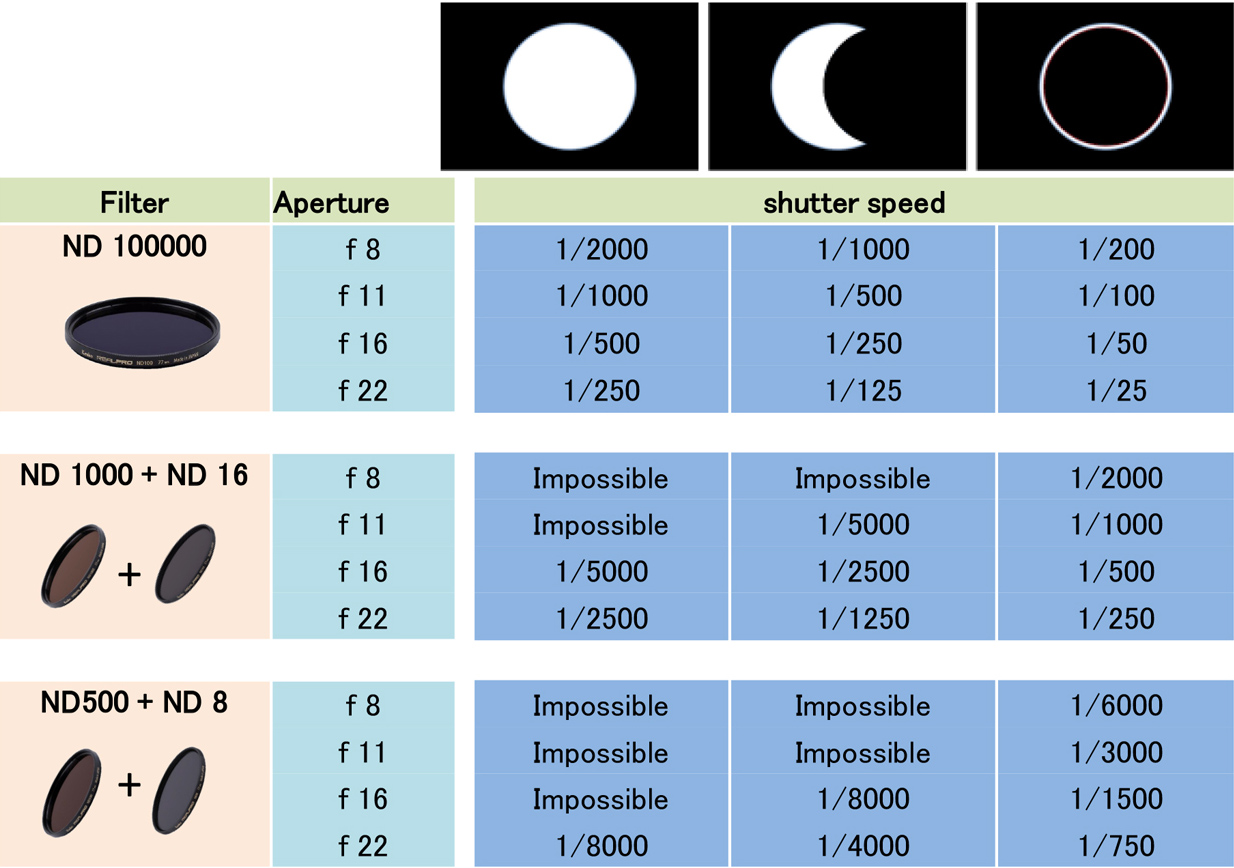
As you can see, low f-stops reduction like ND 4000 (ND 500+ ND8) may limit your options on aperture and shutter speed. For this reason the use of a dedicated ND 100000 filter is suggested, and ND 16000 (ND1000+ND16) could be a good compromise, too.
TIP: The difference in f-stops reduction between ND 100000 and ND 64000 (ND 1000 + ND64) is less than 1 f-stop. It means that you can refer to ND 100000 suggested aperture and shutter speed values for ND 64000 (ND 1000 + ND64) combination as well!
Items discussed
Author: Will Prentice
A portrait, fine art and commercial photographer for 30 plus years, Will Prentice is not just a contributor to PHOTONews magazine, but also host of PHOTONewsTV, owner of Captura Photography+Imaging and Technical Support/Brand Manager for Amplis Foto, Canada’s largest distributor of photographic equipment.
Will teaches photographers of all skill levels how to improve their craft – from creative photo projects to picking the right gear for their needs to flattering lighting to getting the best expressions to creating final images for screen and print. His unique style of highly detailed images with perfect tonality, wide dynamic range and stunning colour is instantly recognizable. Commercial clients rely on Will’s creative eye and mastery of lighting.
When he’s not behind the camera or in front of a class, you’ll find Will outdoors in any weather – usually on one of his bikes or enjoying time with his grandchildren.


Greetings from Canada!
Next eclipse will be my 13 th one.
Does the nd filter discussed here protect from solar UV and IR rays?
I always used Baader solar film to make my own filters for my cameras and lenses…..
Thanks for your input on the matter!
Michel
Hello Michel,
13th eclipse! Lucky you!
Kenko ND filters reduce light evenly across the full light spectrum.
Best
Will