Apparently it is Worldwide Pinhole Day on April 29th, 2012. Be sure to check out http://www.pinholeday.org/ for more info.
Never heard of Pinhole’s?
A pinhole camera is essentially the most manual camera you’ve ever used. One aperture, a manual shutter and no viewfinder. Focus need not apply. It’s just a box with a hole in the front.
What’s the point?
It’s getting back to basics and can be a great experiment. I remember doing this back in my high-school photo class many years ago, and seeing images appear from a cardboard box in a darkroom tray was a great experience.
What do I need to make one?
– A box.
– A popcan.
– A sewing needle.
– Black spraypaint or black construction paper.
– Lots of tape.
– Some photo paper.
– Photo paper developer and fixer.
– A small room you can black-out (like a bathroom).
That’s too much work. Can’t I just buy one?
Sure thing. Ilford sells a “Pinhole Camera” called the Harman Titan.
The Camera
We used one of these boxes from Ikea, the Kassett. It was 13x15x11.75. We planned to use 11×14 paper that we had lying around, so this would work perfectly. You can use just about any box, as long as you can make it light-tight. I taped all of the edges, the handles, and rivets on the outside of the box to prevent any light leaks. I then covered the inside in black construction paper (for lack of spray paint) to make sure there were no internal reflections. Sweet, now you’ve got a camera body.
The Lens
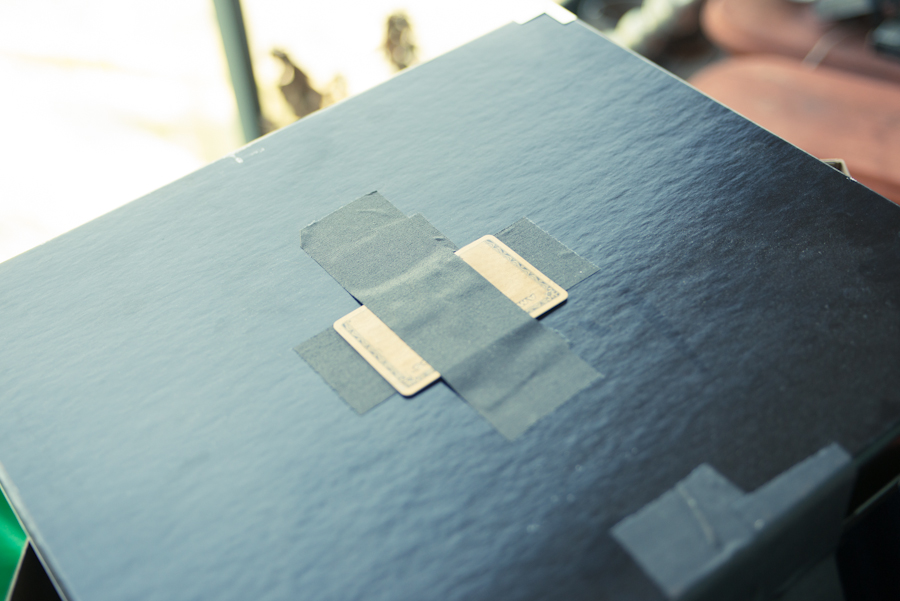
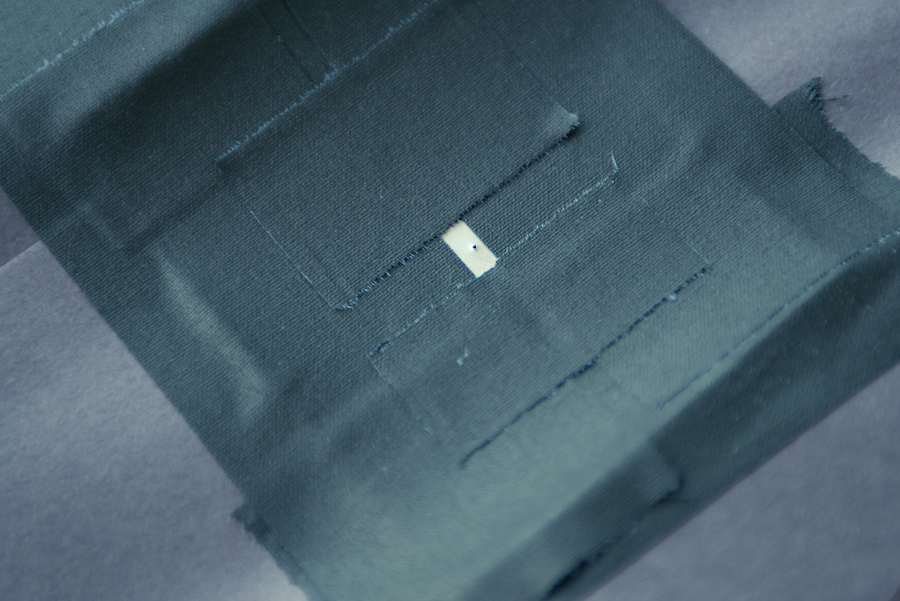
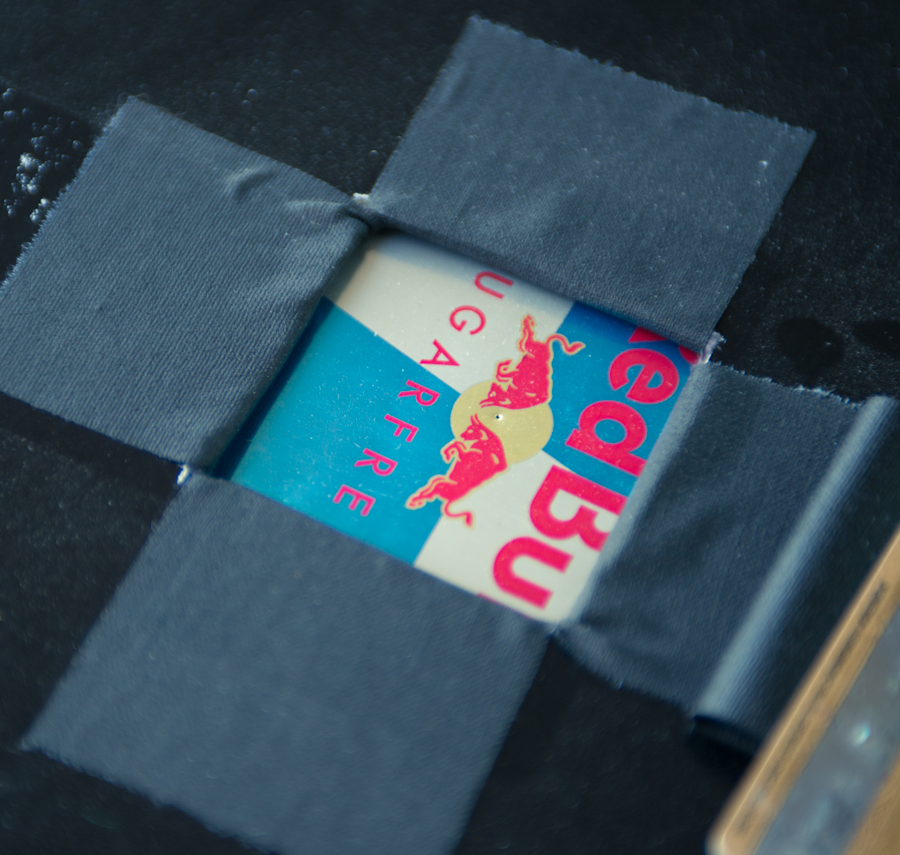 Next was the lens/aperture/shutter. In a pinhole, this is all in one. We used the lid of the box and cut a hole in the centre, approximately 3 inches by 2 inches. I then chopped up a can of Redbull, removing the top and bottom, and cutting a seam down the side. I layed the metal under some books to flatten it out, and took my sewing needle, piercing a tiny hole through the centre. I taped everything into place of the lid. Now you need to make a shutter. I took a credit card and placed it over my lens, then threw a piece of gaffer tape over the whole thing, top to bottom. This stopped light from entering my camera, but gave me a nice flap to open up for the exposures. Lens complete.
Loading Film
To shoot the photos, we taped a sheet of Ilford 11×14 RC Multigrade IV paper to the bottom of the box. If you’ve never worked with photo paper before, DO IT IN THE DARK. Everything has to be done in pitch black, or your photo paper would be exposed. Make sure your lid is on tight, and the shutter (credit card) is closed.
Shooting Photos
For this shot, we worked out that the f-stop was around f/500 using the Mr. Pinhole Camera Design Calculator. The exposure was for 2 minutes in the afternoon sun.

Developing
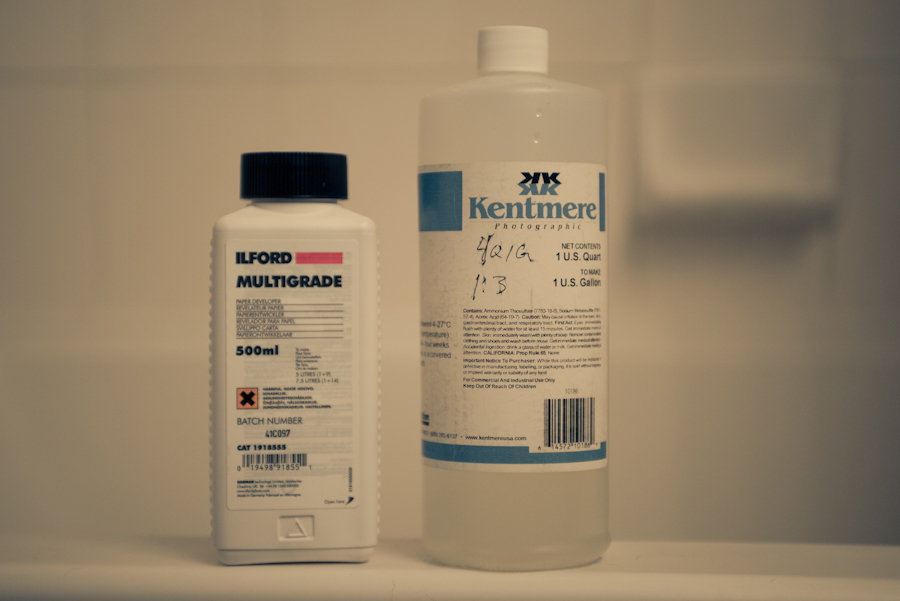
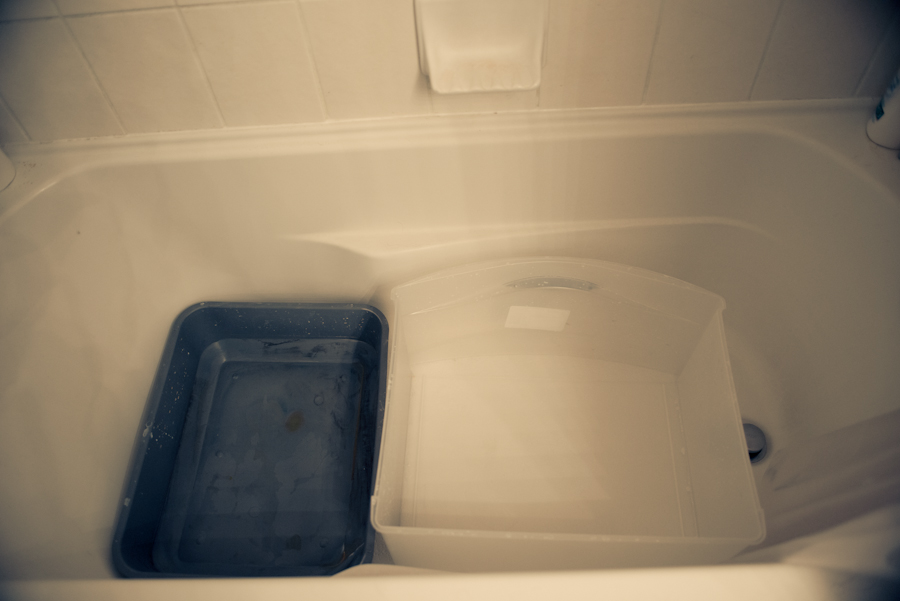
Using some Ilford Multigrade Paper Developer and old Kentmere Paper Fixer, we had a mini paper darkroom setup. You should really have some Stop Bath between those two, and some Hypo Clear at the end of the line, with a proper wash bath as a final stage, but lacking all of those things, the developer and fixer will get you through. My developing time, based on the bottle was about 2.5 minutes and that seemed to work out fine. Fixer was another 3 minutes, and then the print was just washed under cold water to get rid of the chemical.
This Photo Looks Weird
That’s because the photo paper you’re holding is actually a negative, so the blacks are white, and whites are black. You either need to make a contact print in the darkroom, or do what we did. Scan the print, take it into Photoshop, and press Invert. Bam!
The Final Image