 For the latest Metz ad in PHOTONews, I wanted to create a celebratory beverage in honour of the now available five year warranty on all new Metz speedlights.
This shoot presented two fun challenges: lighting a glass on a white background and using science to create layers and interest!
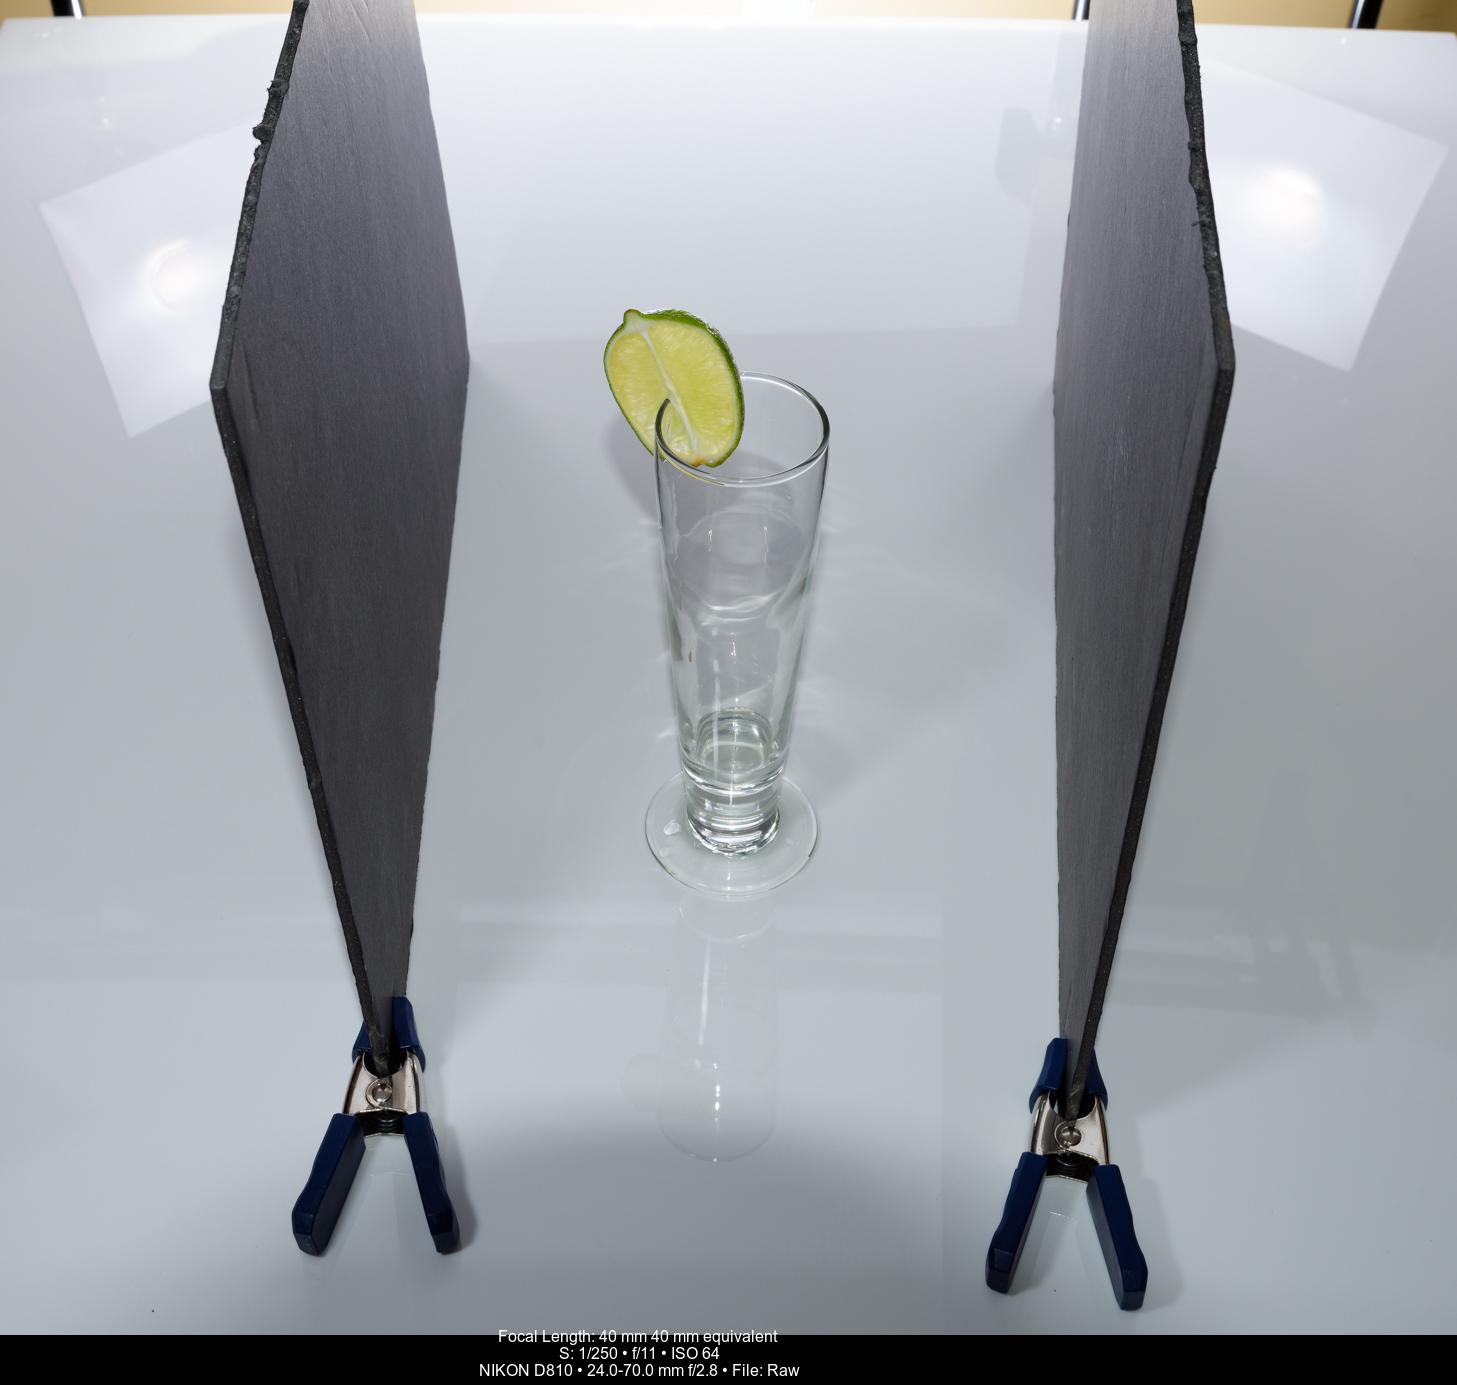
Whenever I do a product shoot, I tether my camera and use CaptureONE Pro with a dual monitor setup so can clearly preview everything on the screen in live view. I’ve got my Nikon D810 mounted to a Vanguard ABEO tripod, with a Tamron SP 70-200mm f/2.8 Di VC USD G2 at 170mm. This focal length helped the line at the back of the plexi disappear.
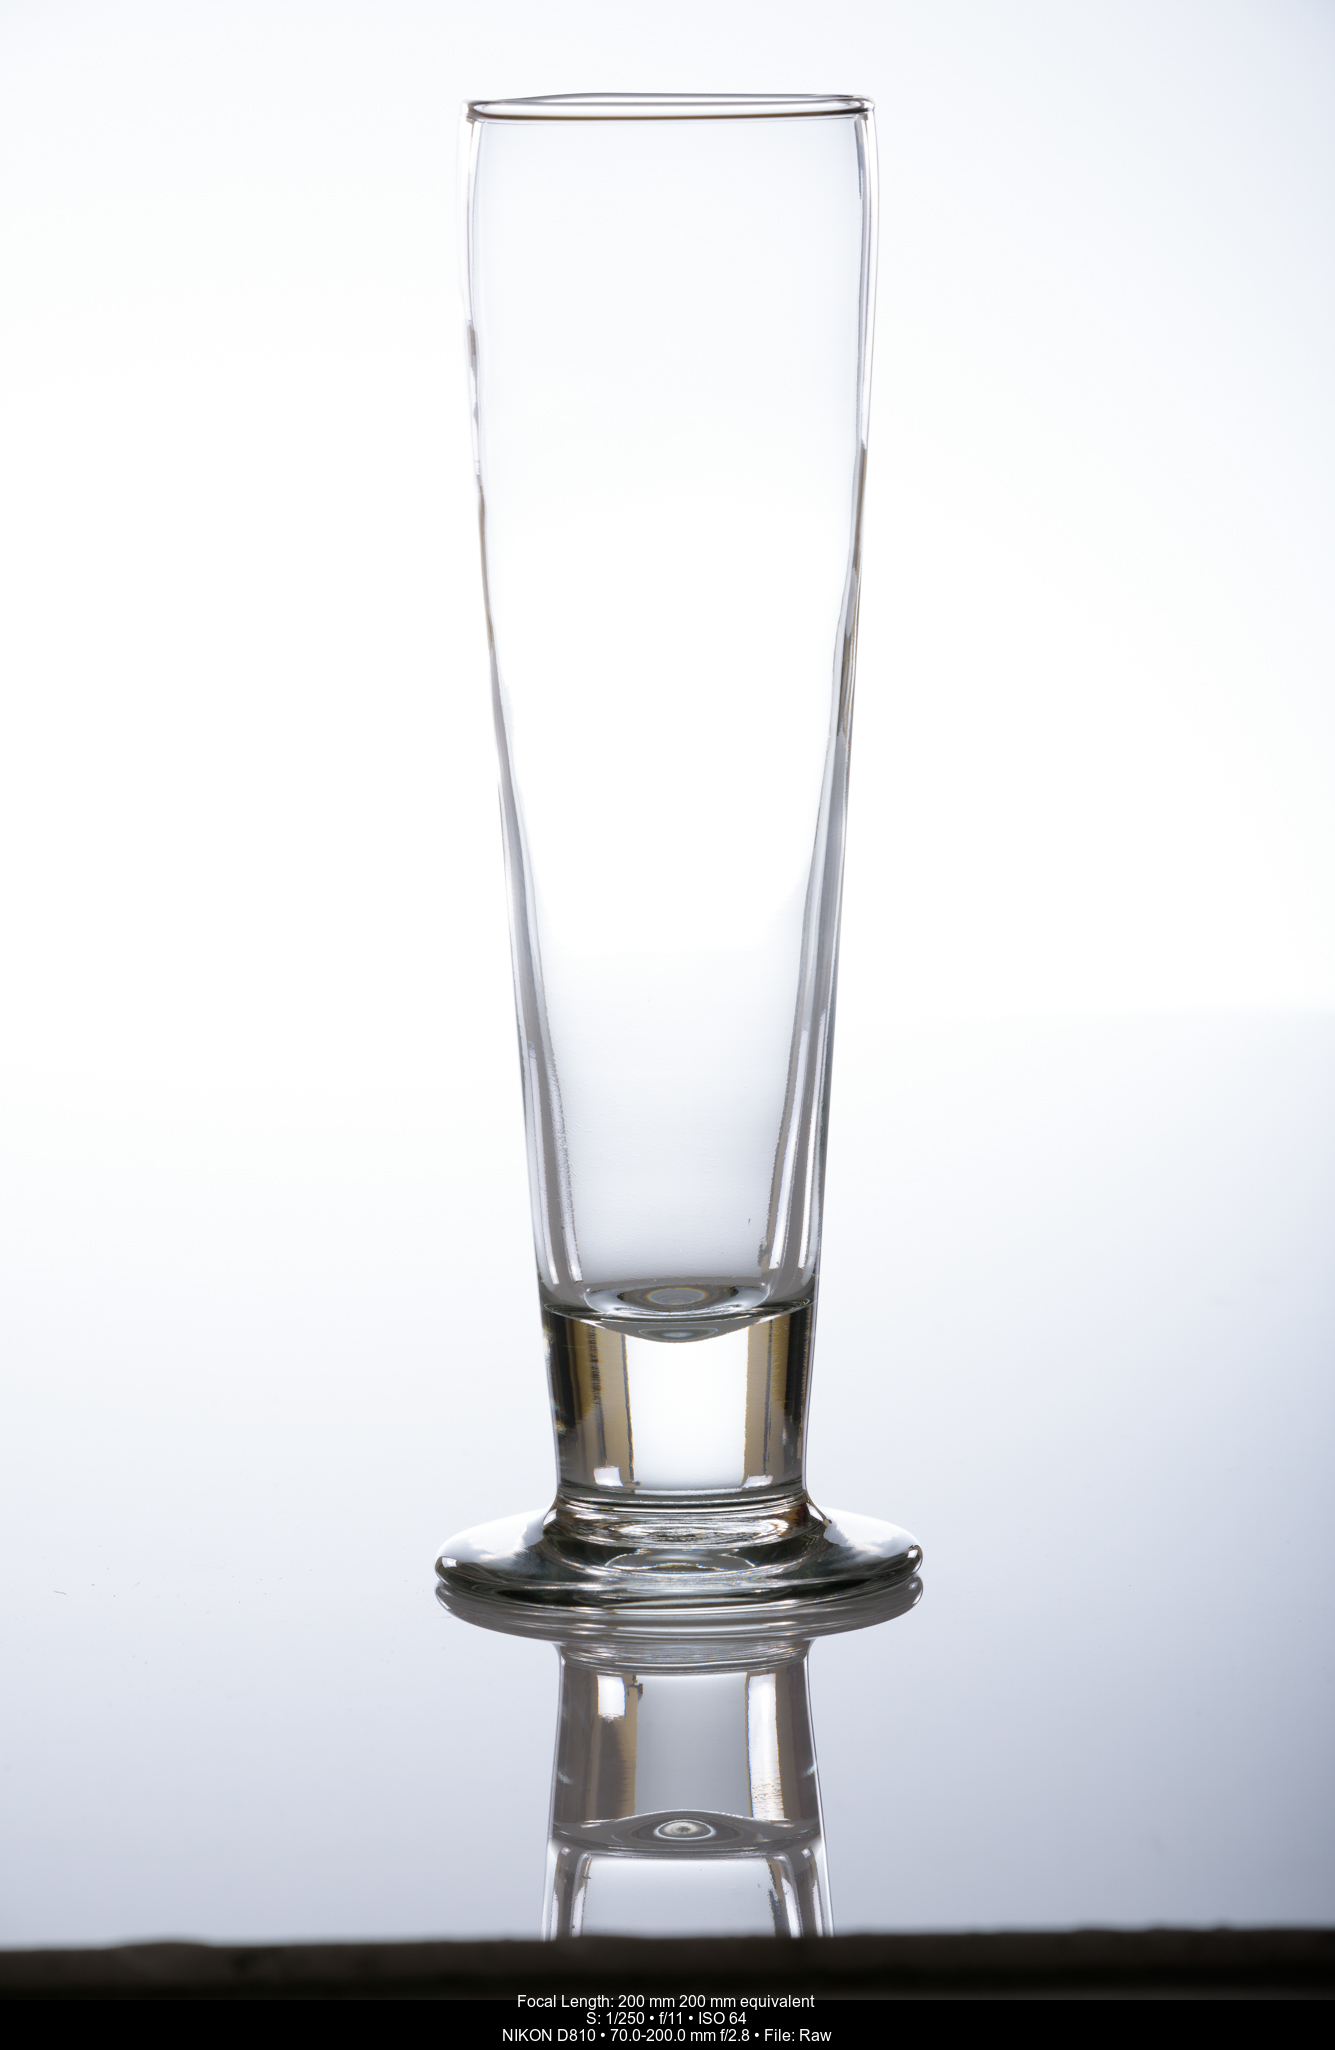
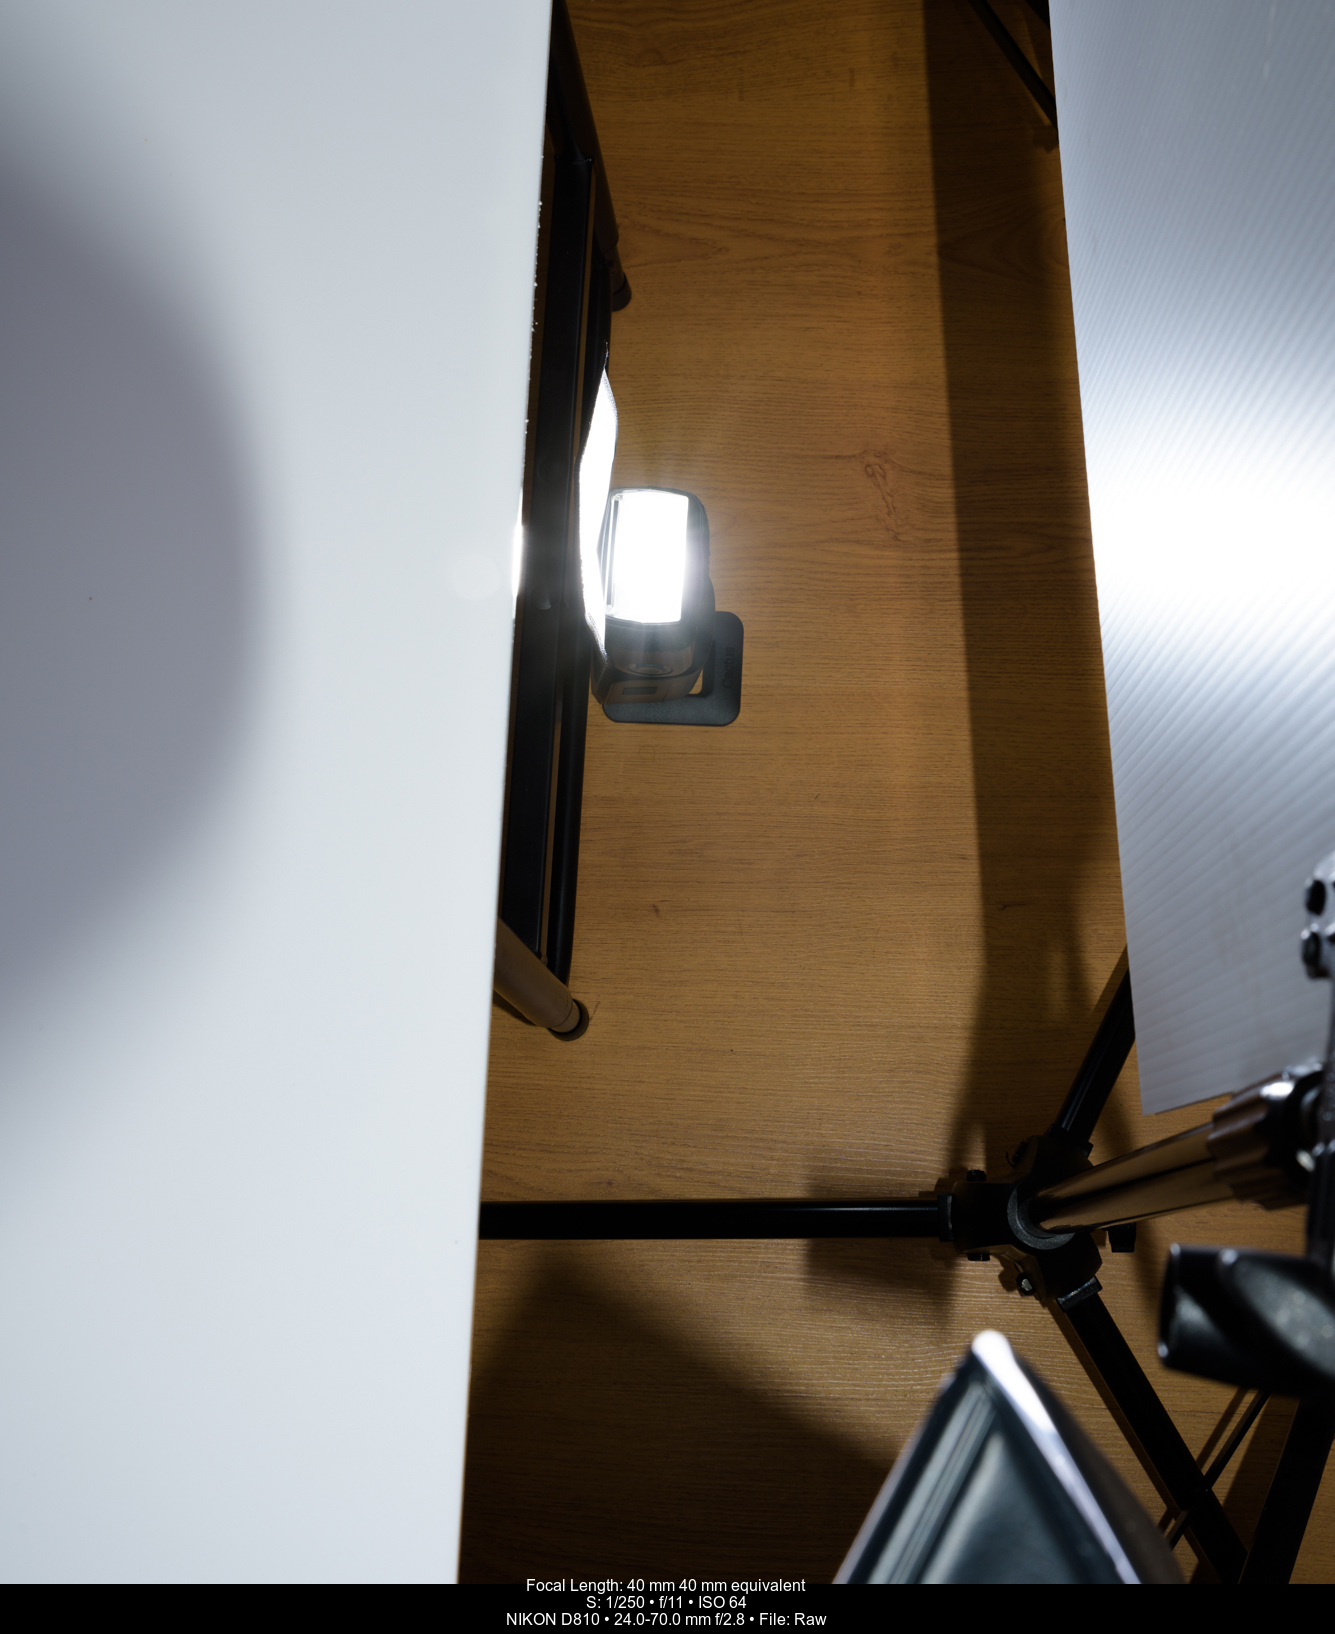
I started by lighting the glass. A tall Pilsner glass on a sheet of white plexi. From photographing glass many times, I know that you have to light it from behind unless you want some really ugly reflections.
I clamped a piece of white foam core to use as a background. A Metz mecablitz 64 AF-1 with an Aurora Lite Bank Portaflex bounced off the foam core to provide both background and main light. I metered this light to f/9 at ISO 64.
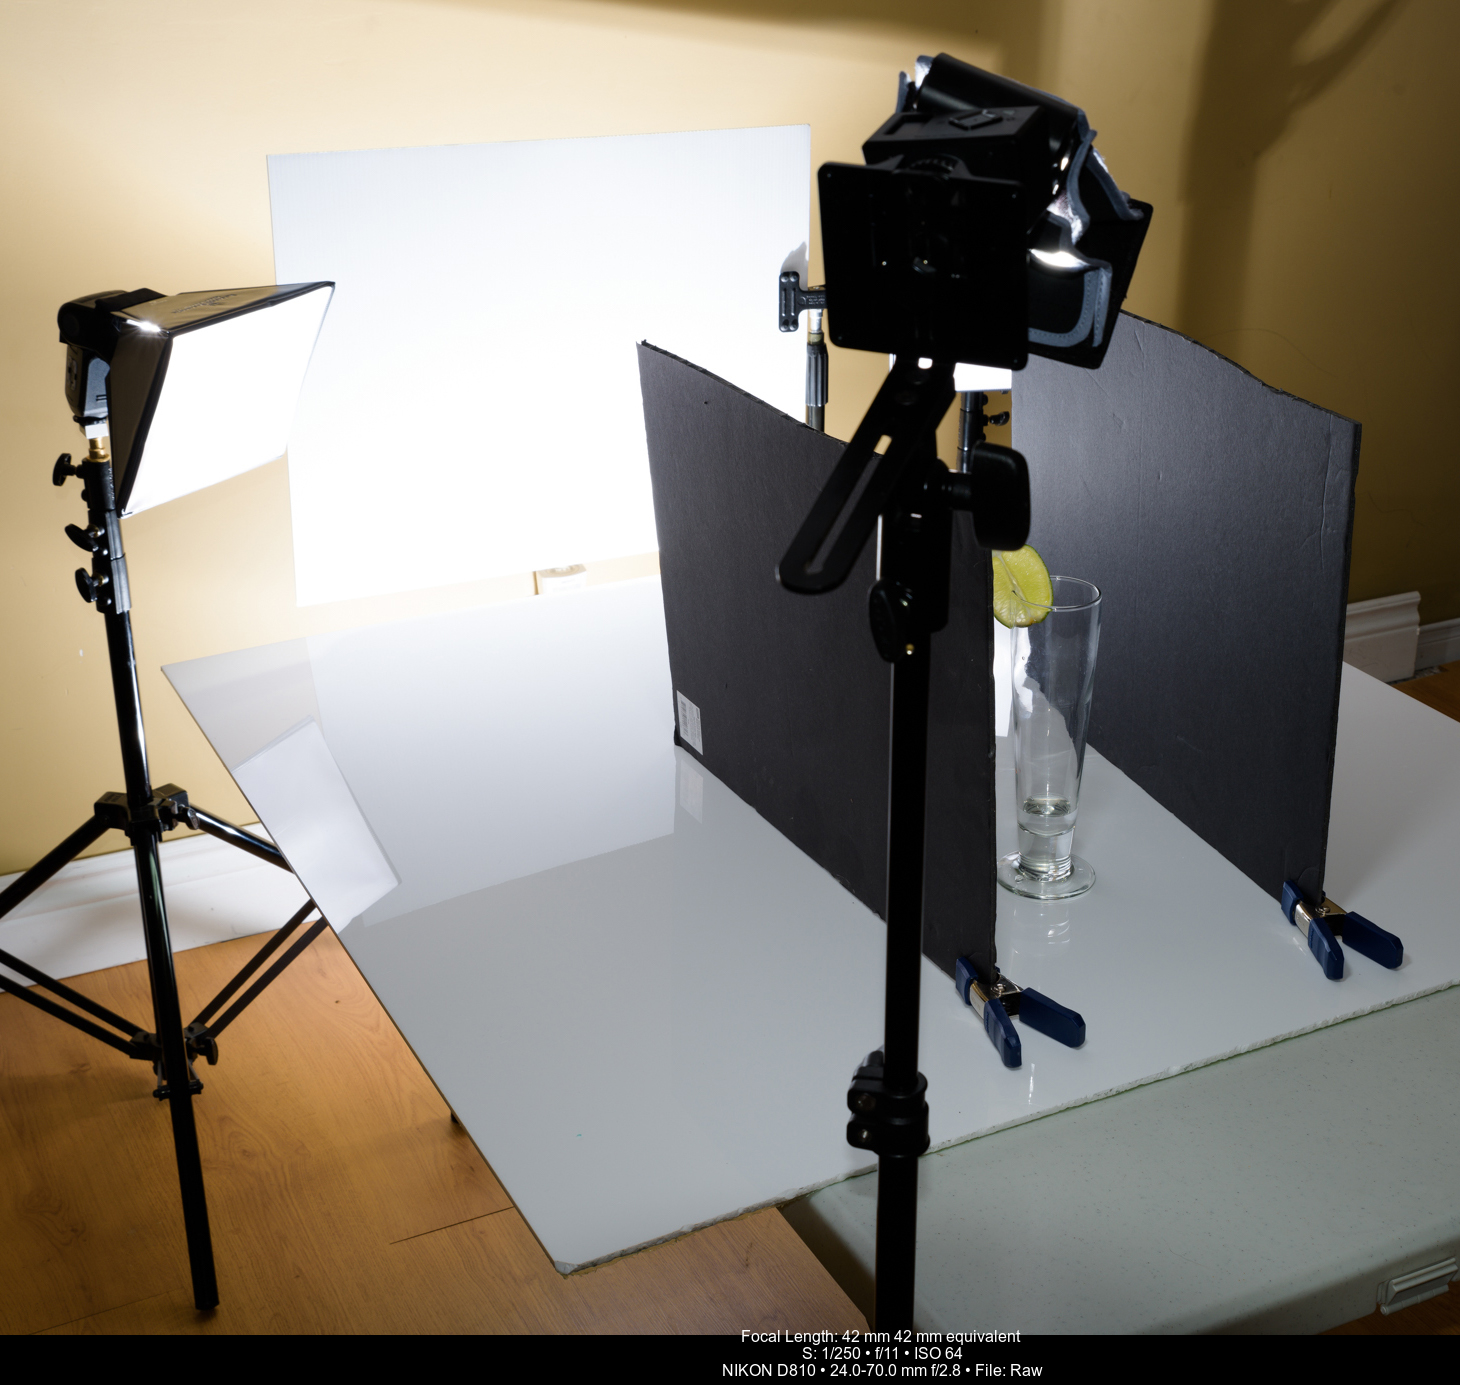
I placed a Metz mecablitz 44 AF-2 and mecablitz 52 AF-1 with LumiQuest Softbox IIIs on two stands behind and at the same height as the glass, about 30-35 degrees either side of centre. Using my light meter, I set each speedlight power so they would emit f/8 from each side.
Overall light was good, but I was losing definition in the side of the glass. This is where the two pieces of black foam core come in. The clamps on the front let them stand and I could move them in and out and see the effect on my computer screen. This “negative light” bounces black onto the glass to help define the edges.
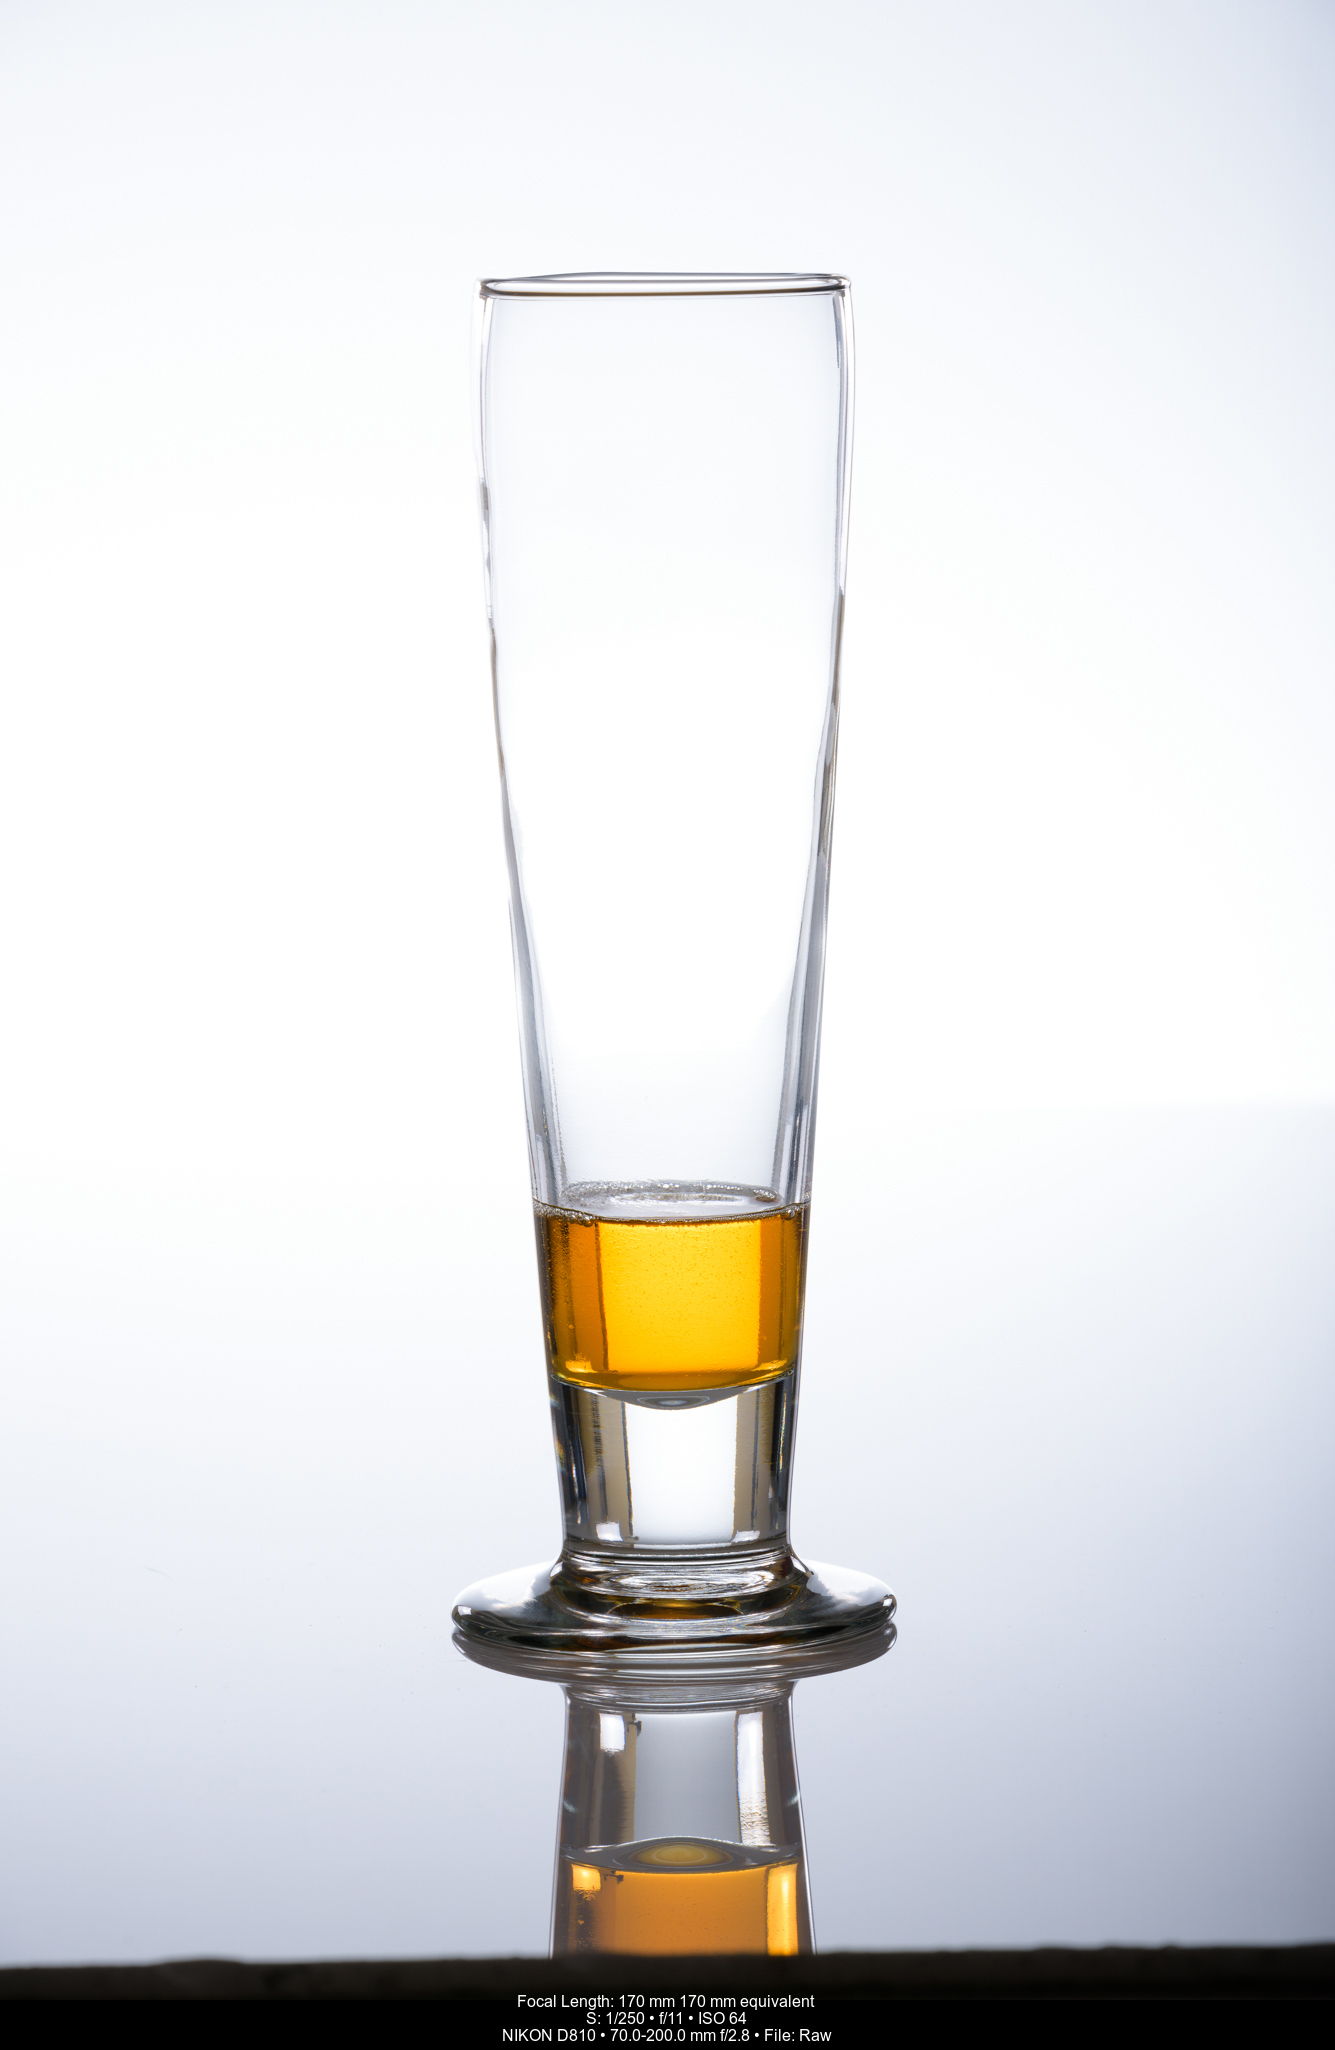
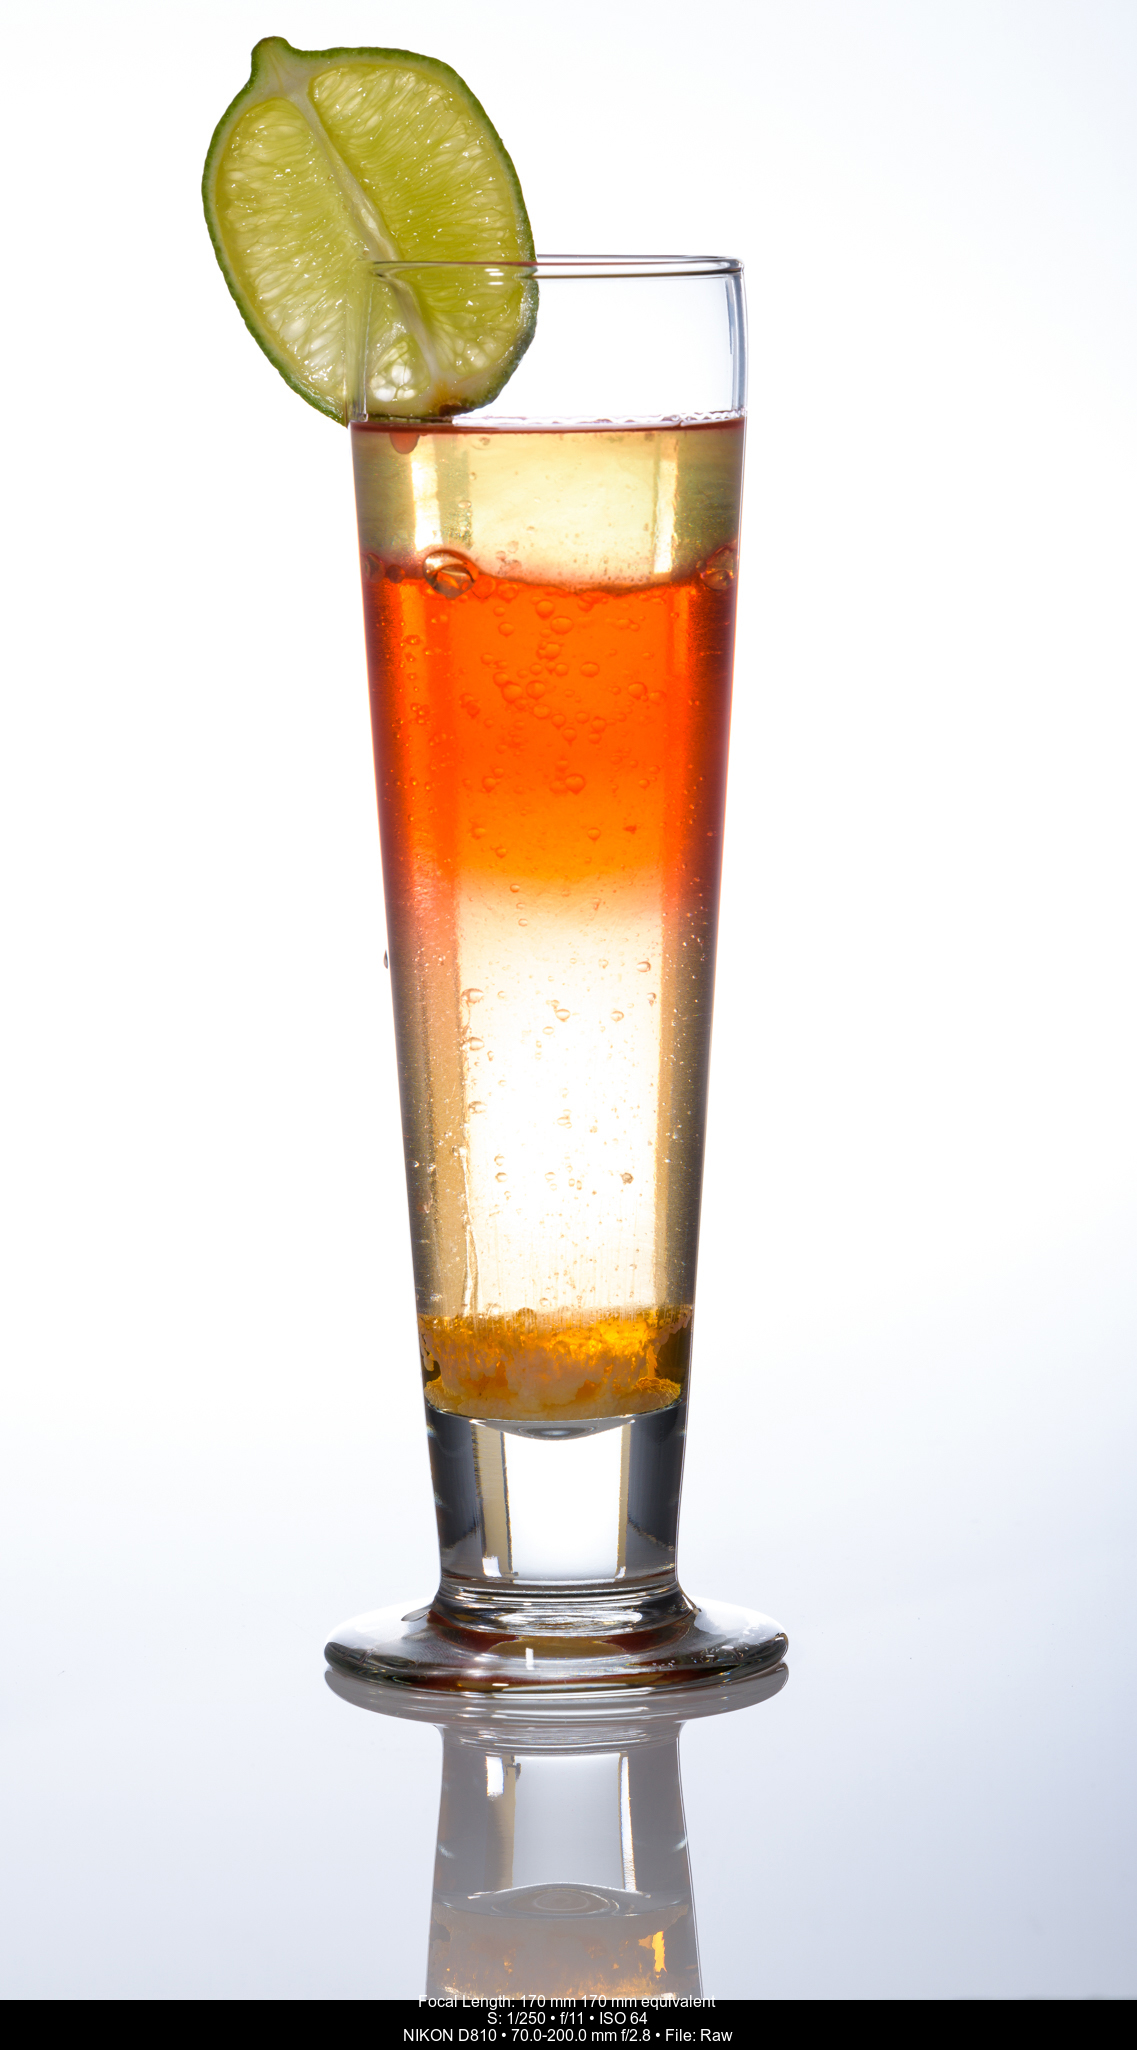
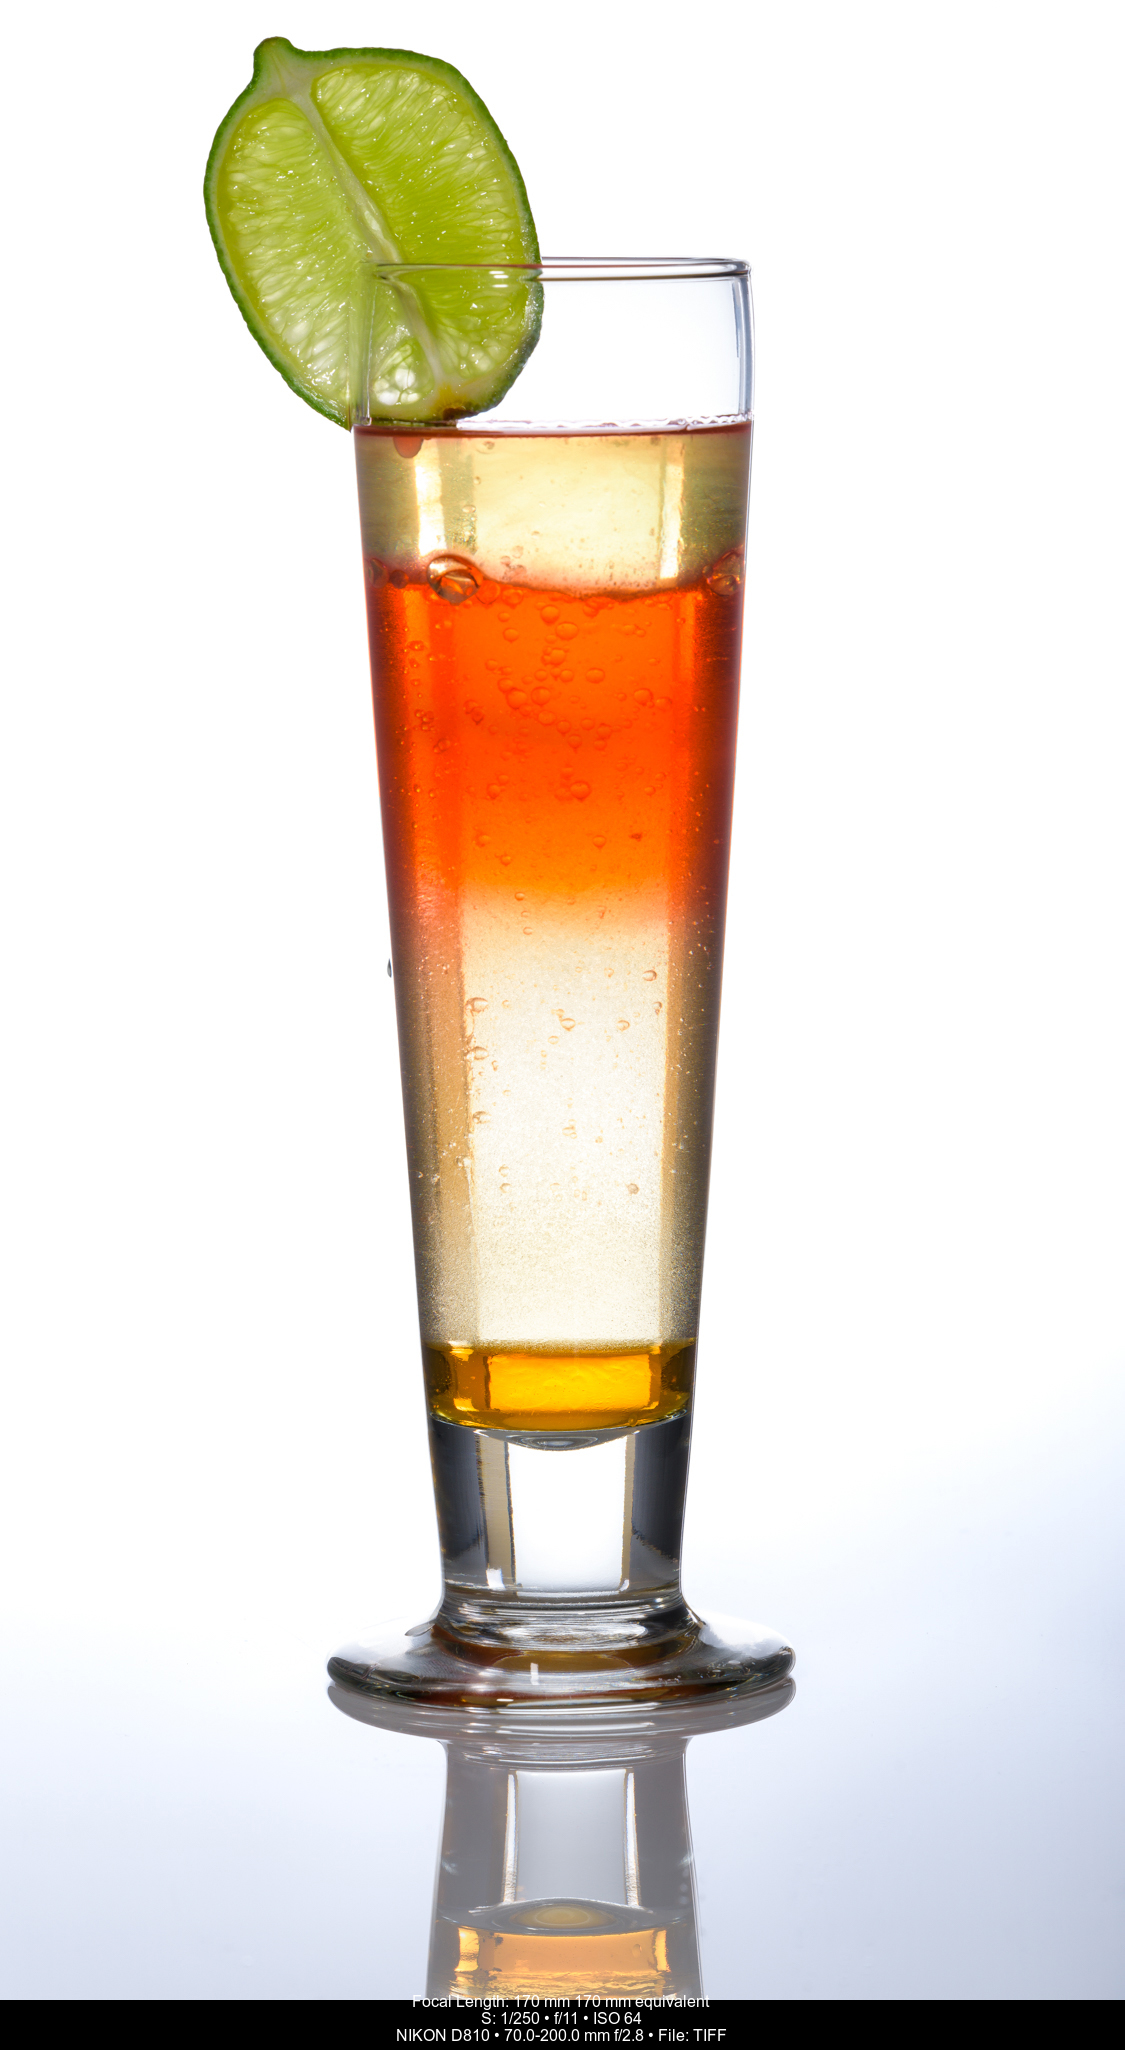
Once the glass is properly lit, it was time to add some science! Different liquids have different densities, which allows you to create layers.
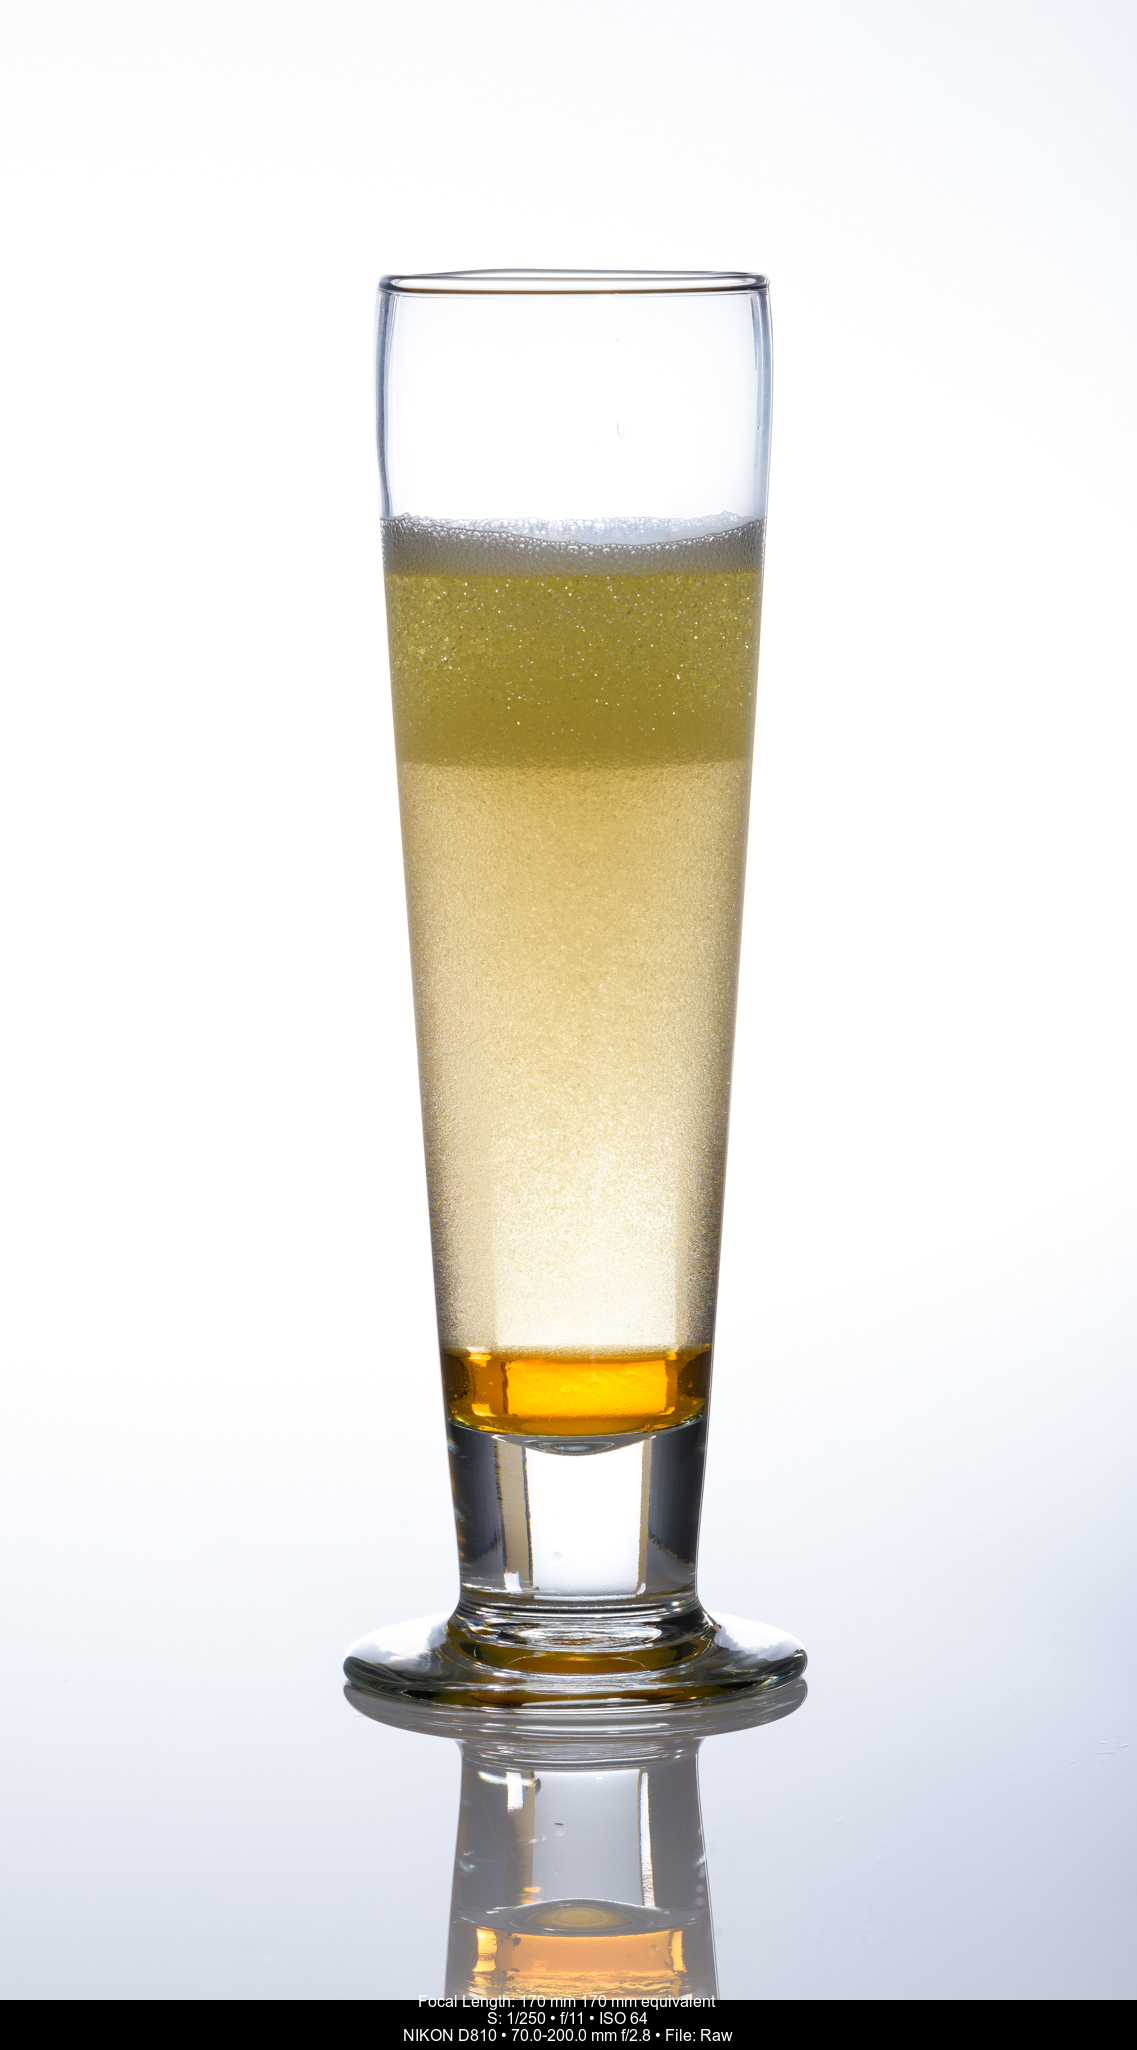
The first liquid was orange dish soap. It’s nice and thick and will stay at the bottom. I wanted to create a bubbles layer, so next I added rubbing alcohol. The alcohol sat perfectly on the dish soap layer, until I added some hot water! This created a beautiful bubble layer with a thin head on top. Did you think that was beer in the ads?
For a more colourful drink, I added a few drops of red food colouring to the water and carefully poured it in. This mixed with the alcohol layer, which had now risen to the top, and created a nice, rich red layer.
To complement the red, I thinly sliced a lime and then cut a notch in it so the lime would sit nicely on the top of the glass.
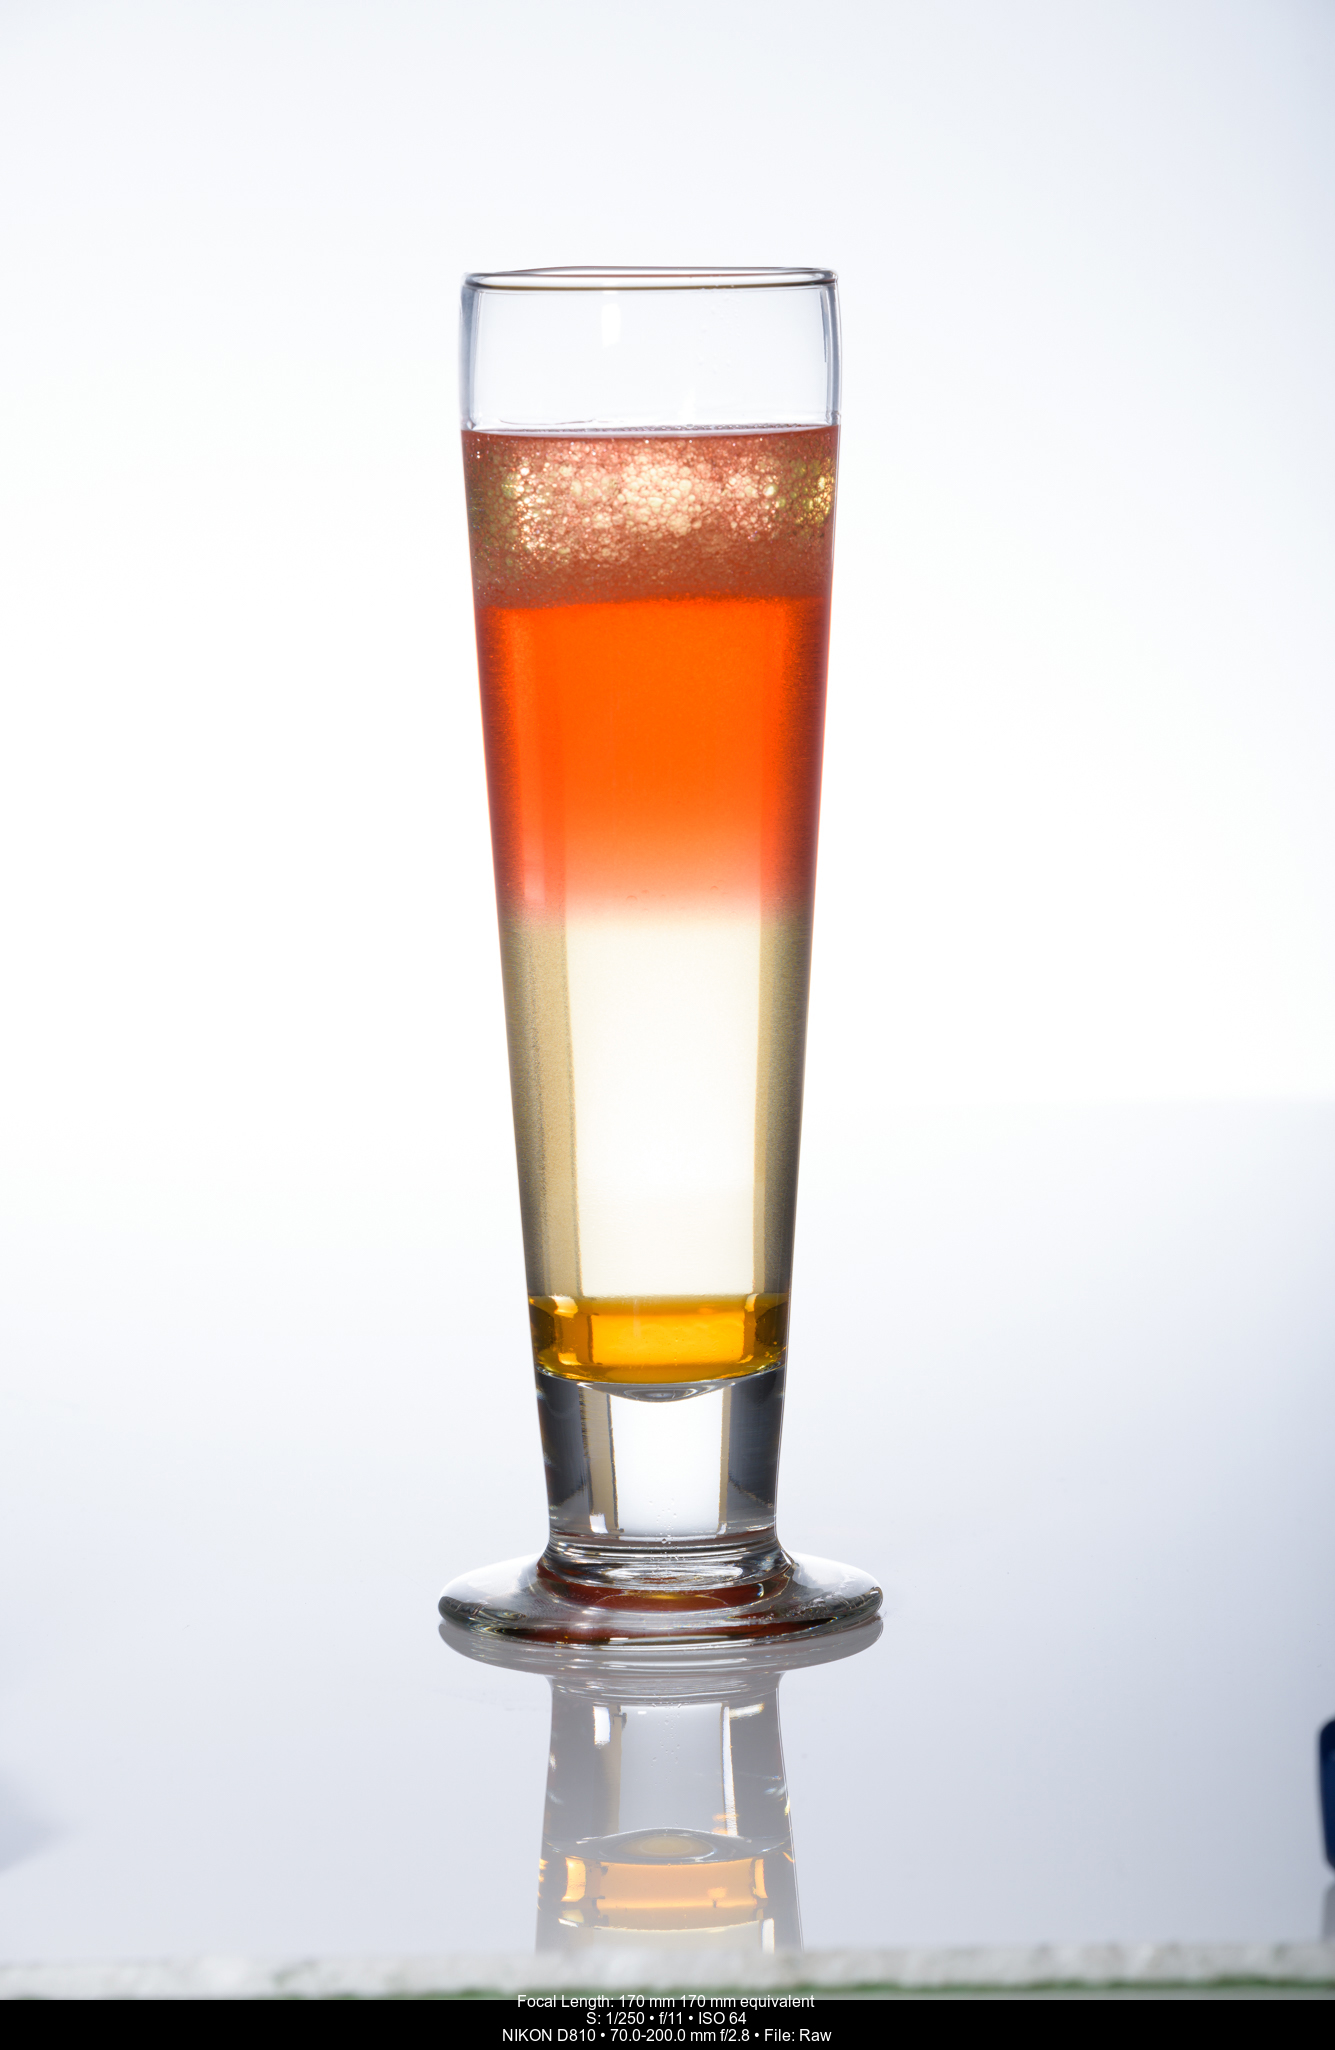
I needed a little light on the front of the lime so the green would pop. I mounted a mecablitz M400 on a stand with an Aurora Lite Bank Microbox. I used the existing black flag and aimed this speedlight just over the top. The flag prevented any light from hitting the glass and creating any nasty reflections. I now had a really nice pop of green on top.
To create some larger bubbles and clean the bubbles out of the alcohol layer, I carefully poured salt next. This created the desired effect and cleaned up the alcohol layer. I now had the image on my computer that I had in my mind!
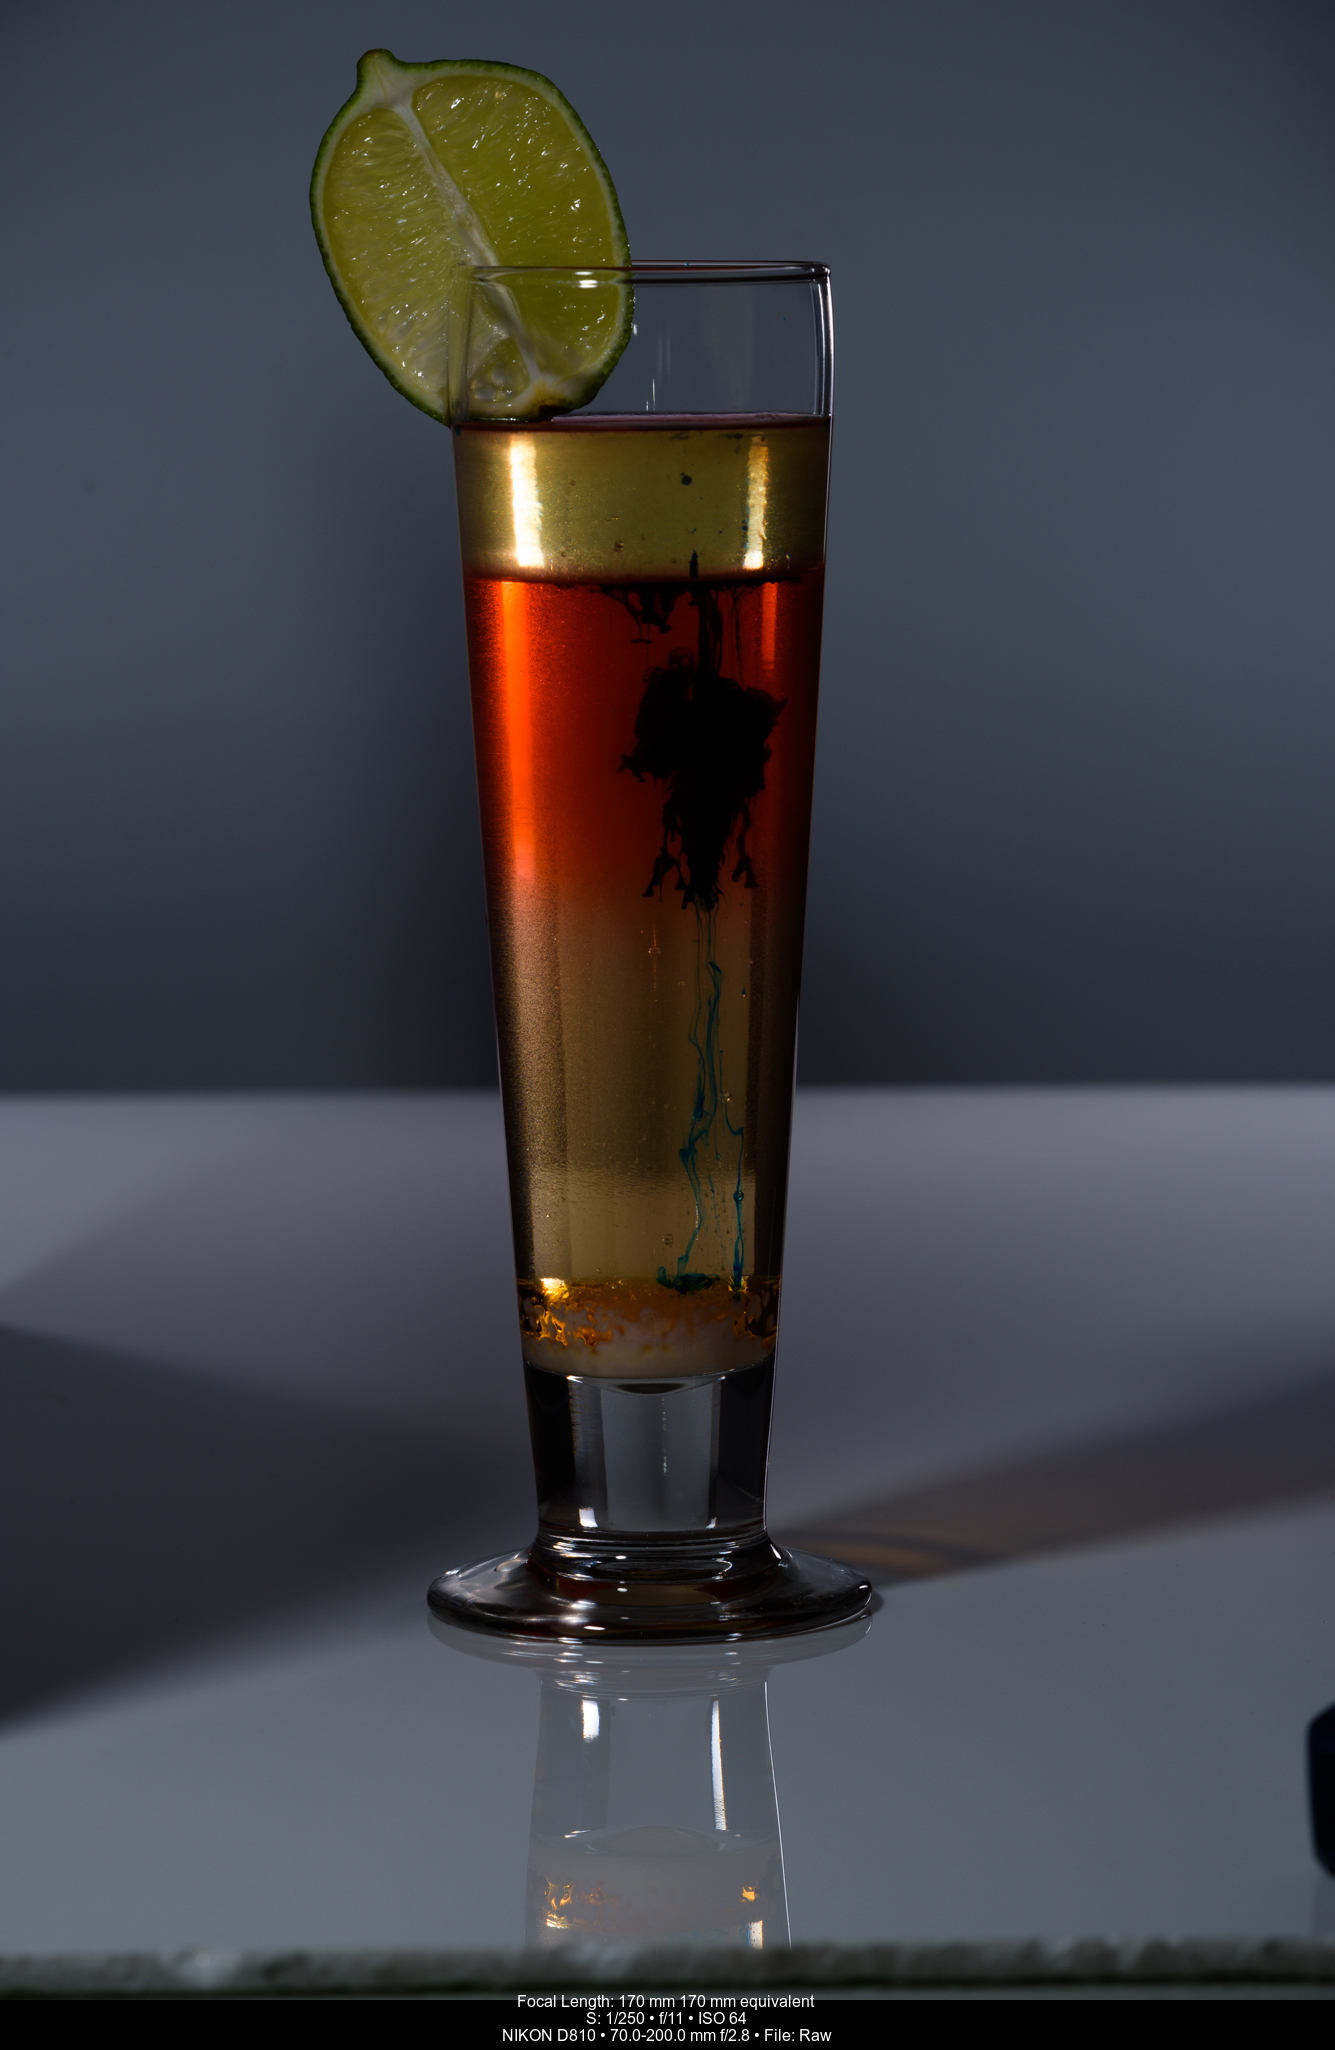
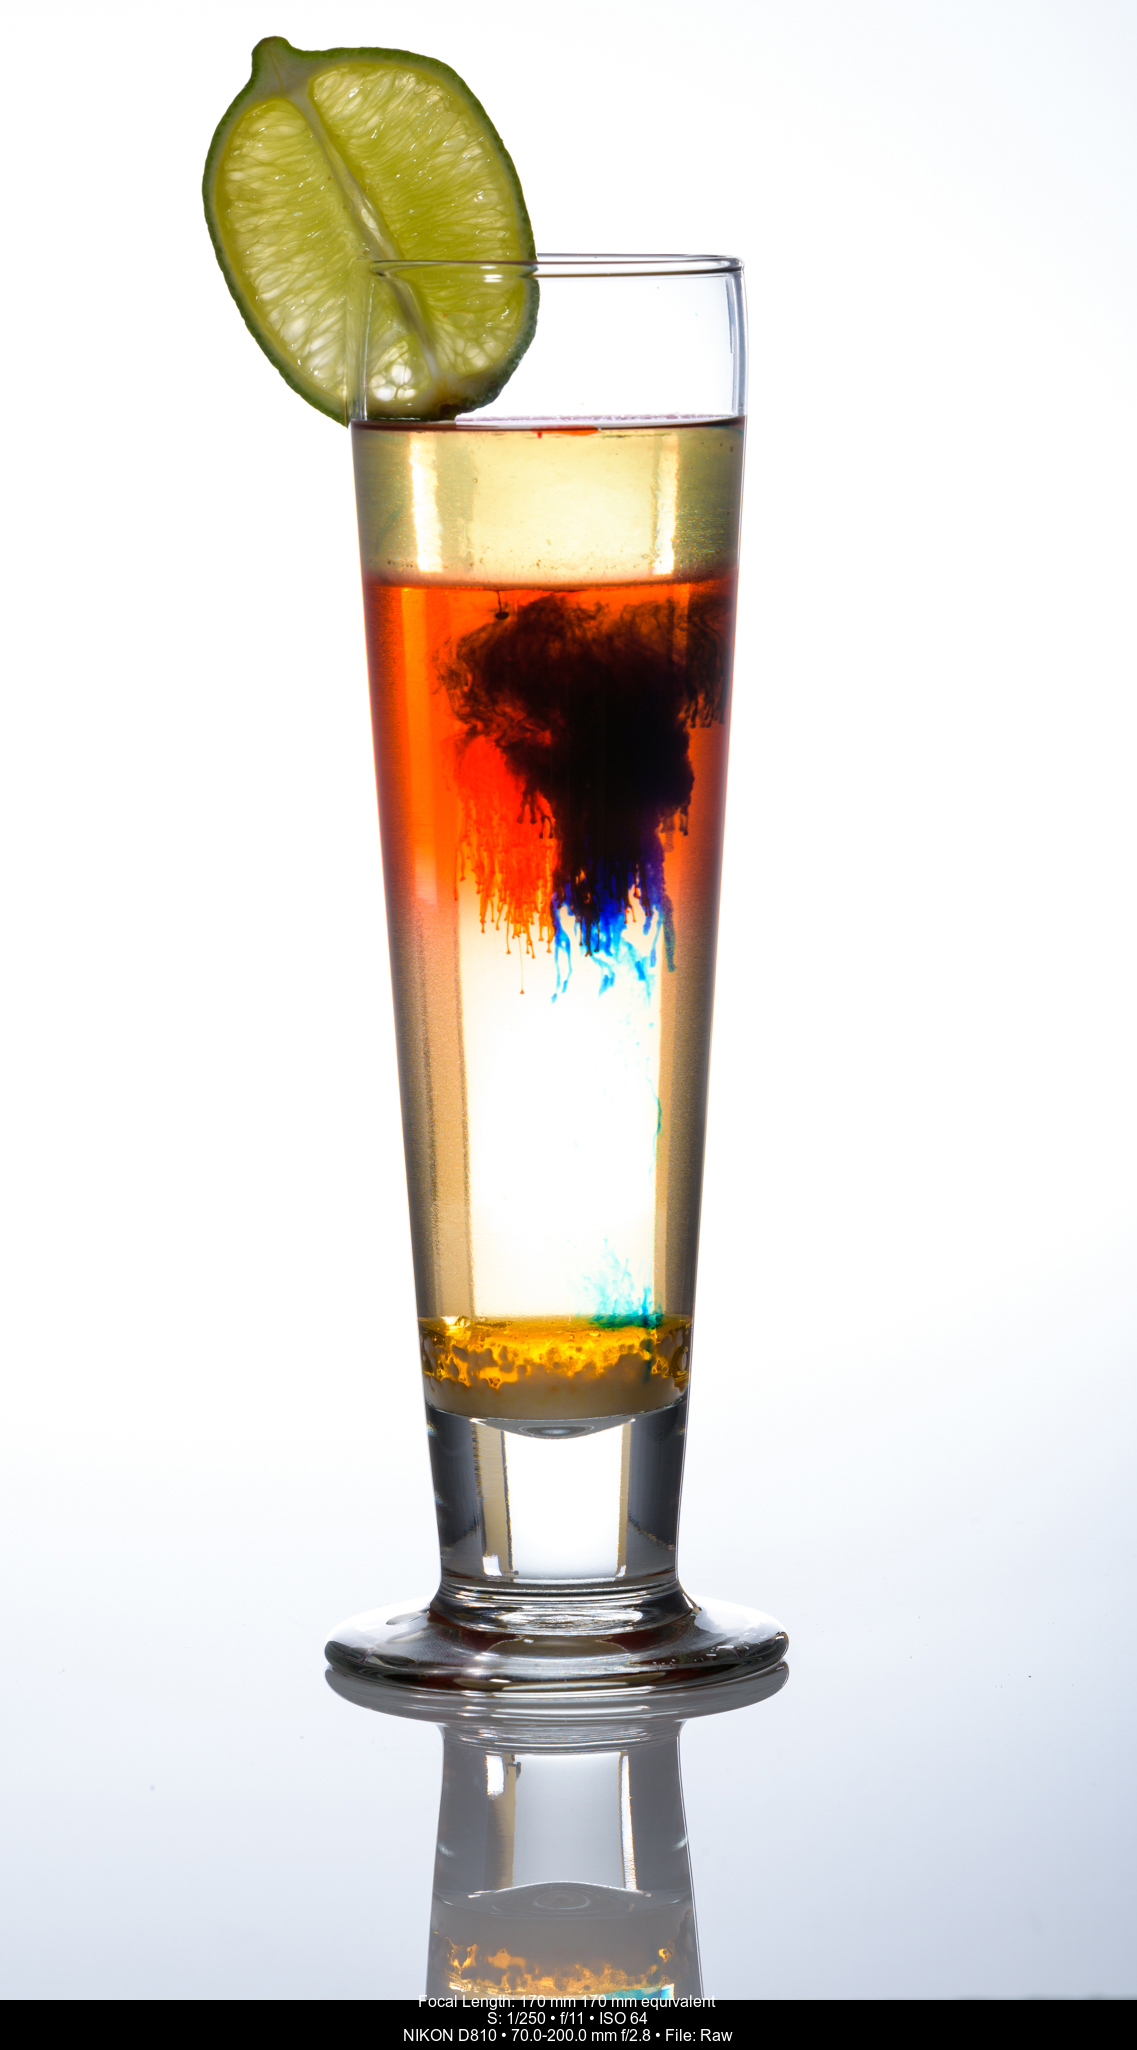
After that, it time to play a little. I experimented with adding drops of blue food colour and then red food colour. I also took one image without the main light from the 64 AF-1 to show what can happen when you try to light from the front and low power from the back.
To create the final ad image, I brought 4 images into Photoshop. Since I shot everything from a tripod and used identical settings, alignment and exposures were bang on for each image. See if you can tell which image contributed to which part of the final! Let us know in the comments.
I’ve got some black plexi on my wish list now, to try something different yet similar for next issue. Share your photos of liquid science experiments on our Facebook or Flickr pages!
About the Author – Will Prentice (www.capturaphoto.ca) is a professional photographer based out of Whitby, Ontario and Brand Specialist – Lighting for Amplis.