Simple is good. Paul Markow shows us why as he revisits classic high key lighting reminiscent of Irving Penn’s series of Vogue Magazine covers from 1943.
The technique looks easy because the results are so clean and uncluttered, but there are a few tricks that make it all work. Markow pays homage to Penn with his construction of a large surrounding reflector and gobo (go-between) to create shadowless, yet interesting lighting. The approach also reduces lens flare by protecting the camera from much of the back light.
In the 1940s, when super dramatic low key lighting dominated countless ‘film noir’ movies in Hollywood, high key lighting made a huge splash. It still works today, especially for imparting a breezy feel to lifestyle shots, portraits and weddings. When you see this setup, review the comparison shots and examine the results, you’ll want to add this technique to your repertoire.
The Approach
As a commercial photographer with several decades of experience, I like to watch the trends in lighting so that I can be mindful of what today’s clients are looking for. Shooting into light, where your subject matter is predominantly back-lit, is becoming an increasingly popular approach, particularly with lifestyle shoots. The effect often yields a high-key, summery feel and works well to convey a relaxed carefree vibe.
However, shooting in this style requires some finesse with your lighting to really pull it off well. In this lesson, I set out to re-create what I call “natural loft style” lighting. I used my north-facing studio garage door as my principle light source, and then had bounce cards, a LitePanel and the Photoflex TritonFlash Kit to serve as supplemental light sources. In the end, this setup helped to elevate the soft, mushy look you can get when shooting into light.
The Space
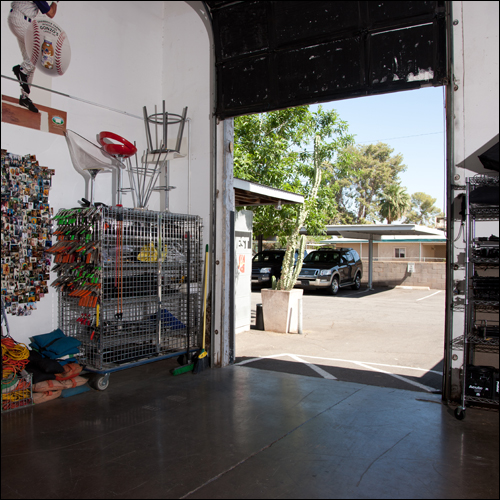
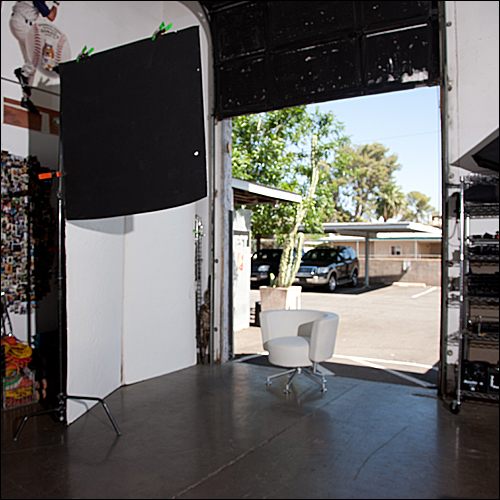
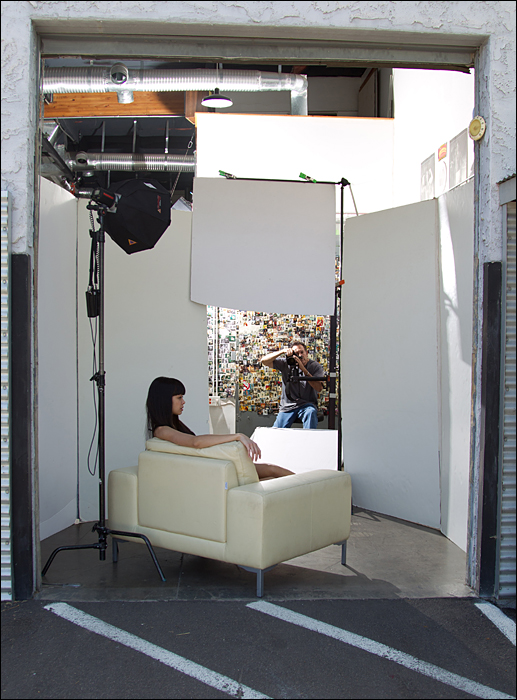
For shoots like this, I try to plan for mid-day to get as much natural light as possible, which means I need to set up in the morning. Here is the space I decided to shoot in, with the 8-foot wide garage door open, facing north.
Creating a Reflective Wrap-Around Wall
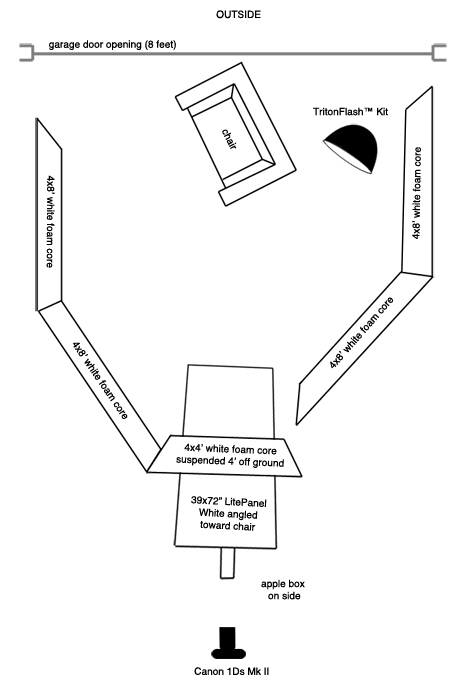
When shooting in back-lit situations, it helps to be able to bounce light light back into your subject matter. I have two pieces of 4×8-foot white faced foam core taped together that I often use to reflect light, ideal for this type of setup. It’s an inexpensive, space-saving solution, but one that periodically needs to be replaced, as foam core will break down with use over time.
For this shoot, this foam core would serve as the first reflective wall of my “loft”. To keep the foam core steady, I clamped a section to the adjacent wire cage. I also placed a white chair on set to help in determining the overall composition.
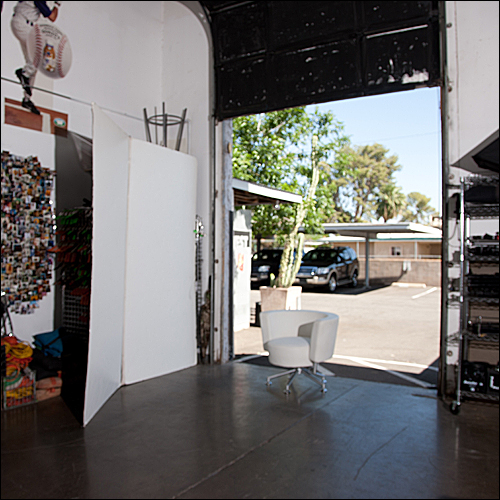
I wanted to create a broad area of fill, but also needed to have a space that didn’t obstruct the line of sight between the camera and the model. So rather than place another 4×8 sheet next to the first wall, I clamped a smaller 4×4 sheet of foam core to a light stand and raised raise it so that the bottom edge was approximately four feet above the ground.
Additional Bounce
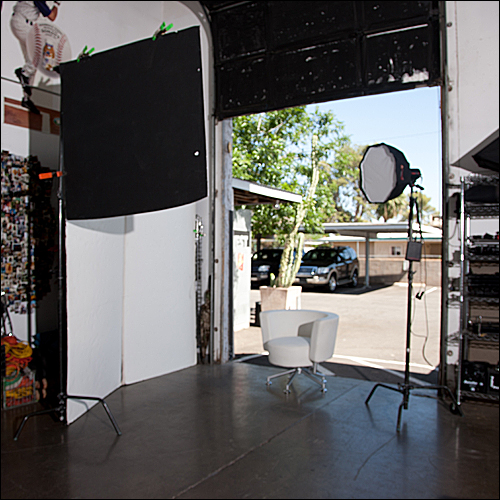
For the high key look I was going for, I needed to generate a little more light bouncing off the foam core walls than the indirect north light would provide. So I decided to bounce some soft, directional light from a Photoflex TritonFlash Kit. This unit is great for many reasons, one of which is because it’s battery powered. Perfect for both the studio and on location away from alternating current.
Once I had it set up and synced with my camera via the included FlashFire wireless kit, I positioned it just behind and to the right of the chair, and angled the OctoDome soft box towards the left side of the 4×8 foam core and above the 4×4 foam core. This would provide a broader spread of reflected light.
Next, I completed the “loft walls” with two more sheets of 4×8 white foam core taped together positioned on the other side of the 4×4 sheet.
Note that the foam core I was using was white on one side and black on the other. The white is ideal for reflecting light, while the black is great for absorbing light. In this situation, the black sides, facing the camera, helped to prevent lens flare from the overall back-lighting.
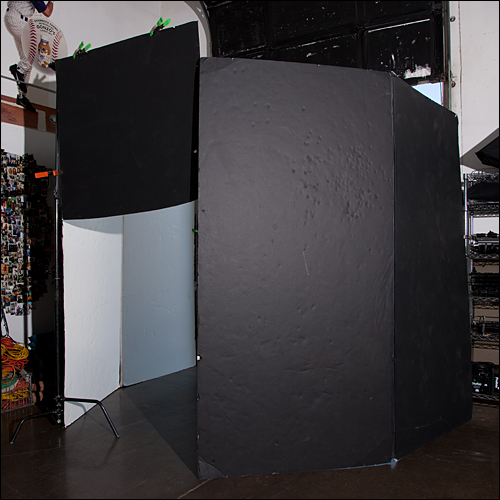
NOTE: When I’m on location where there may be wind, I prefer to use LitePanels instead of foam core, as they also offer the black/white fabric (along with other reflective combinations), but can be clamped together with GripJaw clamps for a sturdier setup.
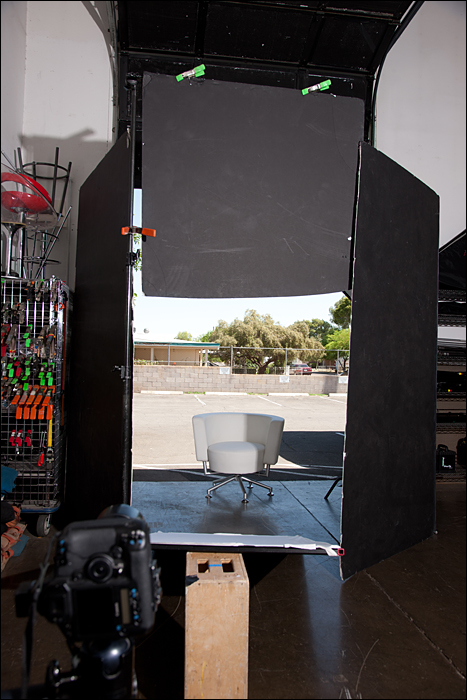
The only other place that would be sucking light was the floor, so I set up the frame of a 39×72 LitePanel Kit, attached the white fabric so that it faced the chair, and propped the outer edge up on an apple box to angle the reflected light more toward the model. With this, my high key loft setup was complete.
The Model Arrives
Shortly after I got the set put together, my lovely model Joy arrived. I decided to swap out the chair with a larger, couch-like chair and angle it away from the camera for a more interesting composition. Once Joy was ready, we took a few test shots.
Here’s the view from outside looking into the studio. Note that the sunlit look is actually coming from a separate studio light lighting the set, and not the sun.
Here’s a bird’s eye view of the setup.
The Test Shots
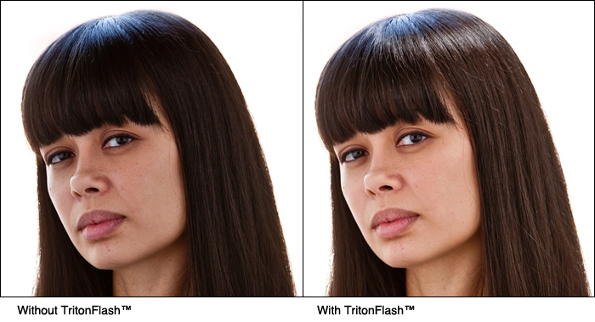
Before I started the actual shoot, I took a few more test shots to see how the light was looking. As you can see in both results, there are nice, broad catch-lights in Joy’s eyes coming from the reflective wall. However, the differences came with the TritonFlash powered on and off at 1/16th power, which bounced enough light into the foam core to help improve the tonality of the shot. Although the results are subtle, there is a distinct difference in the quality of light. Notice how Joy’s face is “cleaned up” and the contrast range is more pleasing. The TritonFlash also provided a nice highlight to her hair, which added to the high-key look I was going for.
The Shoot
With the lighting in place, I was ready to start shooting. Here’s how I had my camera configured:
- Exposure Mode: Manual
- Aperture: f/4.0
- Shutter Speed: 1/80th of a second
- ISO: 200
- Focal length: 85mm
- White Balance: 5700K
- Format: Raw
I asked Joy to give me a series of poses while I fired off frames every few seconds. Here’s one from that series.
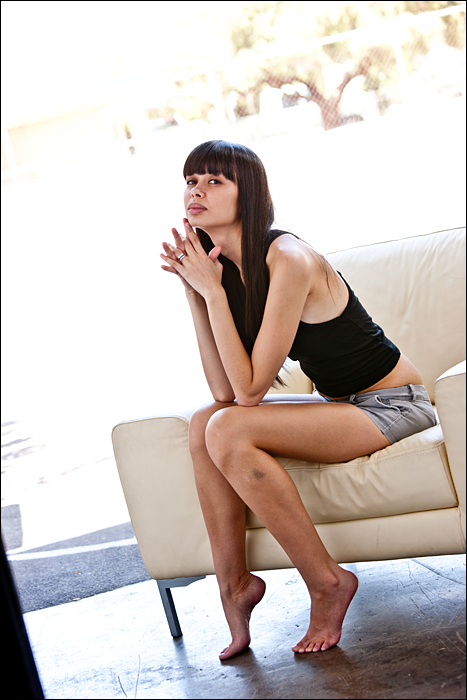
I liked the overall look of the set, but felt that her top was a little too dark for the high key look I was going for. Fortunately, Joy had brought some additional clothes and we decided that a short, off-white dress would work better for this shot.
After she changed, we shot another series. These results turned out great and were reflective of what I had in mind for this shoot. Here’s one of my favorites.
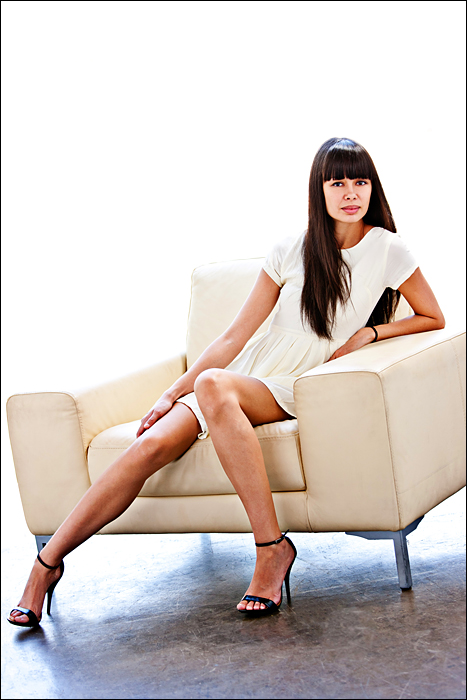
As you can see, everything came together beautifully for an elegant high key look. Joy was also thrilled with the results.
Post Production
Note that this last shot was optimized afterward in Photoshop. Raw images shot in this type of lighting situation tend to be a little washed out and it’s always a good idea to adjust the contrast and tone to where you want them. Additionally, I decided to clean up the floor a bit and eliminate the ghosted trees in the background entirely.
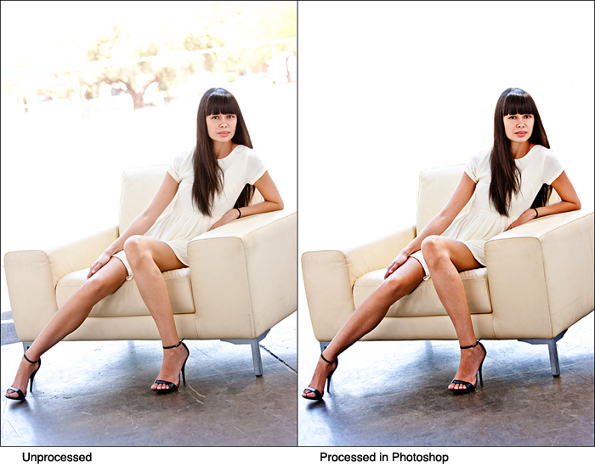
Here’s another favorite from this series that I processed afterwards.
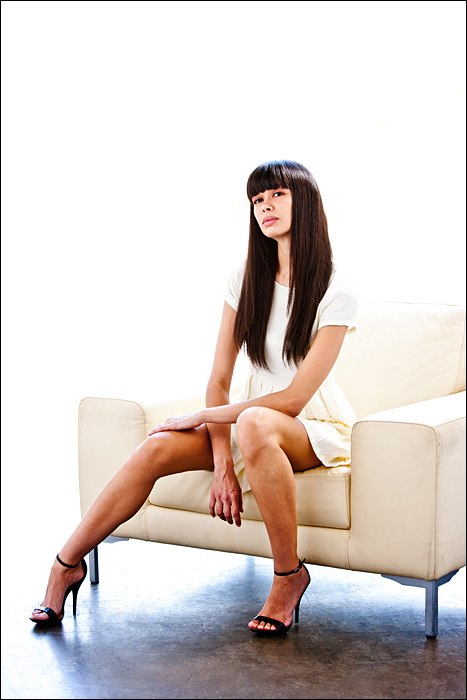
Final Notes
I find that simple light is often the best light, and that if I shoot with too much strobe power, the shot will lose its natural quality of light and look artificially lit. In most of my work, I try to go for a more natural feel. The subtle use of the strobe helps me to achieve this goal.
Equipment Used:
Camera/Media
- Canon 1Ds Mark II
- Canon 70/200mm, f/4 lens
Lighting Equipment
- LitePanel 39×72 inch kit
- TritonFlash
Photographed and written by Paul Markow, contributing Instructor for PhotoflexLightingSchool
Modeled by Joy Linton
Edited by Ben Clay
Photoflex Lighting School offers many more informative lighting tutorials just like this one. For more, visit the Lighting School and start your journey to professional lighting!
| PHOTONews on Facebook | PHOTONews on Twitter |


