Executive Vice President of Cuteness
I love animals. Pet portraits are very similar to kid portraits … lots of running around and chasing tails and wiping drool and amazing expressions. Pets young and old have a character that can shine through in their portrait. I’m going to share an easy and effective setup I use for pet portraits in studio, plus a few of my tips and tricks for better shots of your pets. You can also use this setup for children.
We have a companion video for this article, which you can see on YouTube: PHOTONewsTV: Pet Portrait Lighting Tutorial.
Let’s start with the studio space. I like to have all of my gear ready to go before I bring any pets into the studio.

Aurora Lite Bank Orion 400
I like vinyl and paper backgrounds: vinyl, as it’s easy to clean – I keep a few Swiffers handy; paper, as I can just cut out the damaged part and pull down a nice clean section at will. I’ll hang the background and then use Gaffer’s tape to hold it onto the floor.
I prefer studio strobes for pet photos so I can keep my ISO down, shutter speed at 1/250 and still get enough light for F8 to F11 – lots of depth of field for a moving pet. Once I’ve got my strobes in position, I’ll gaffer tape the cords down. The less there is for a pet to chew on, and a photographer to trip over, the better.
I typically use a two light setup, like the Aurora Lite Bank Orion 400 or Metz mecastudio BL-400 & Metz mecastudio BL-400 PLUS Cactus, for pet portraits:
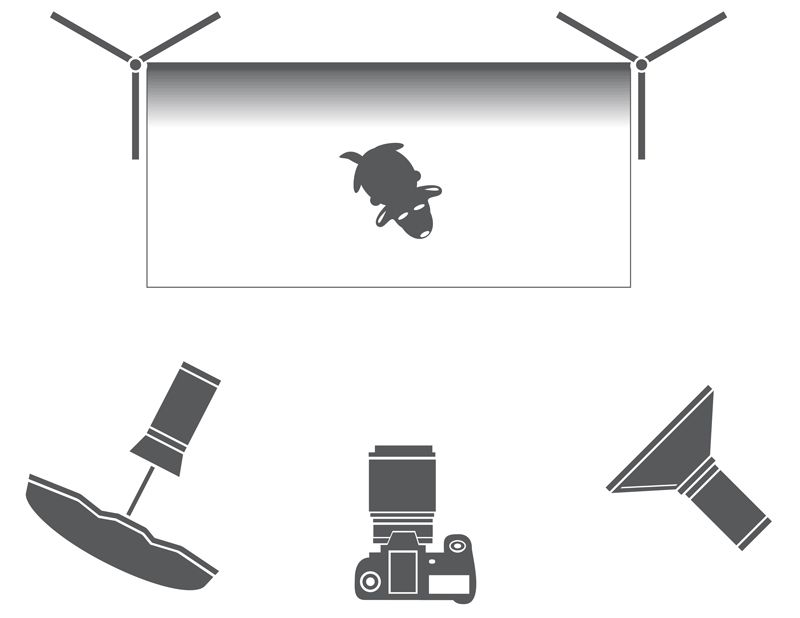
My fill is a 36” umbrella, either white or silver, feathered slightly camera left of centre. Positioning an umbrella this way helps reduce the shadows cast on the background, as an umbrella really spreads light around.
For my main light, I’m using an Aurora Lite Bank LBD2R68S with a silver interior. The 60x80cm softbox is large enough to light a pet fully and also shapes the light nicely, creating shadows where I want them. Two umbrellas would simply flatten the light across the portrait, which would be counter-productive to creating a portrait.
 Both lights are at approximately the same distance and 45° angles towards the centre. Since I’m shooting a puppy today, I’ve got the lights at the lowest point on the stands. The umbrella fill is aimed at the middle of the background where it curls from the back to the floor; the softbox main is aimed at the centre of the floor, where I hope the pet will stay.
Now that my lights are in position, I’ll use my Gossen Digisky flash meter to set the power on each light. Cactus V5 Wireless Flash Transceivers are a great addition to my studio kit so I can fire my strobes without dragging around a PC sync cable. Hold my flash meter in one hand and my Cactus V5 in the other and I can test and check my lights from any position.
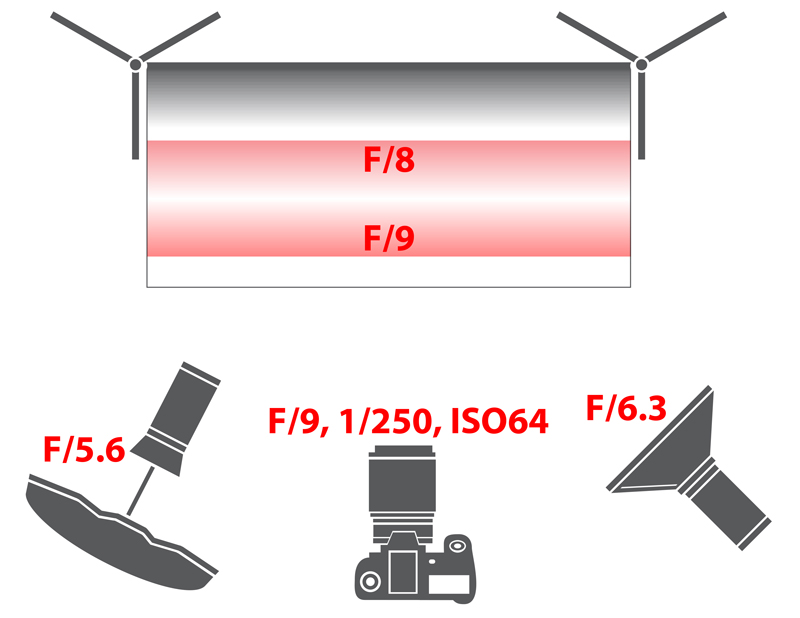
I always meter my fill first, as light is additive. The fill with an umbrella is an overall light for the scene. In this instance, I’ve adjusted power to get an F/5.6 from my fill light. My main light is metered at F/6.3-7.1 – a third to two-thirds more than my fill for light shaping.
A combined reading, with the meter aimed at the camera, gives me a reading of F/8-9, depending how close I am to the front of the background. I’m looking for a one-third range in the centre of the background. This diagram shows my light readings and ranges:
I prefer silver interiors for pets with shinier coats and/or darker eyes, as the silver enhances the specular highlights of the fur and brightens the eyes. White umbrellas and softboxes create softer highlights and are ideal for pets with less shiny coats and/or brighter eyes.
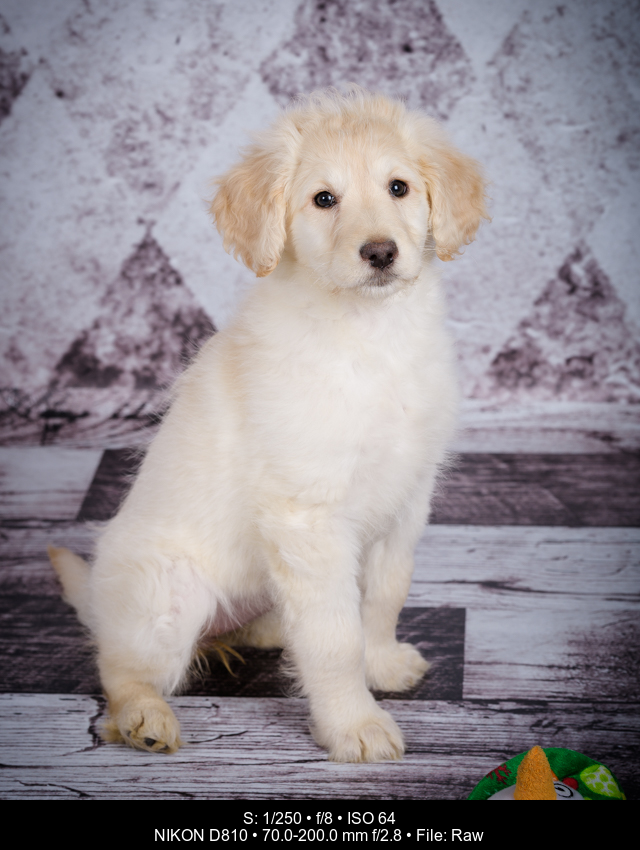
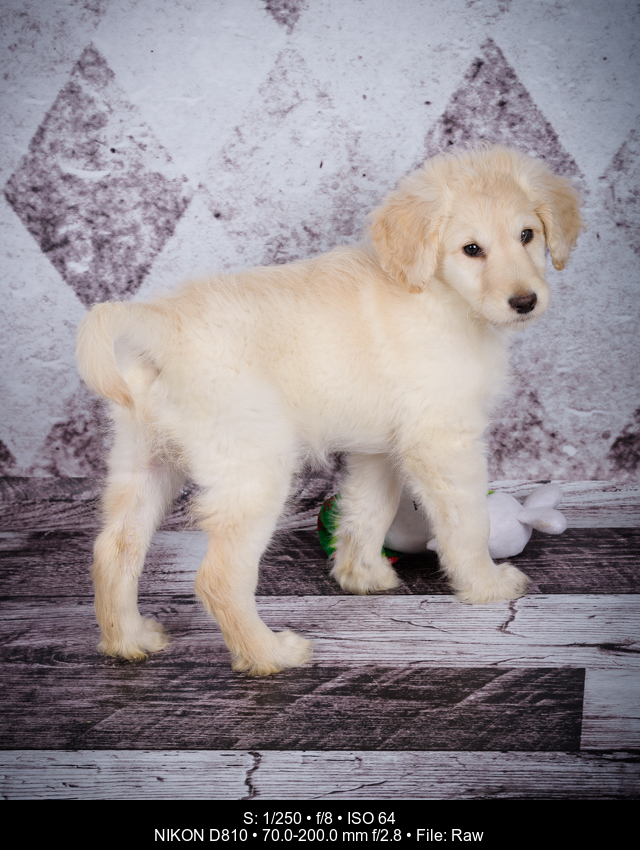
Lens choice is also important. I don’t want to shoot off the background or distort the features of the pet, so I want a longer focal length. I’ve also found that being back a bit further, especially if you have an assistant, keeps the pet in place longer. The closer I am, the easier it is for the pet to spot me and walk for pets or treats. I’m using the Tamron 70-200mm F/2.8 Di VC USD SP at 70-100mm on my Nikon D810.
 The studio is ready; now it’s time to get our pet ready. It helps to know the pet you’re photographing, so you can understand its behaviours and moods. You don’t have a lot of time with animals – they’re very intuitive – but it’s vital you spend a bit of time with the pet so it gets used to you, as well. Dogs especially can be very excitable around new people.
It’s also a good idea to make sure the pet has recently gone to the bathroom – the last thing you want is a stain on your backdrop or floor. For younger animals, I find that a good play can help burn off some energy so they’re more likely to sit for a portrait. This also helps with that creating that bond – a human who plays with a pet is a better human, in the eyes of the pet.
 Ask the owners when the pet is at its best behaviour – it’s usually right after a nap. The owners are also great wranglers – I like to keep them or an assistant handy to manage the pet while I focus on getting the poses and shots we’re after.
When photographing the animal, remember to praise him/her often, with lots of pets and rubs. Toys can sometimes help, but I find them a distraction with some pets. As soon as they see or hear the toy, they want to run. The same thing with treats … don’t tempt a pet with a treat until after you’ve got your photos taken.
It’s a great idea to finish with a treat or two and some nice rubs – show the pet your thanks!
Share your best pet photos on our PHOTONews Facebook Page and on the PHOTONews Flickr Image Pool.

About the Author
Will Prentice (www.capturaphoto.ca) is a professional photographer based out of Whitby, Ontario and Brand Specialist – Lighting for Amplis.