In the last article on this topic I discussed the need to get all of your image files in order and hopefully you have started the process. In this second part of “Organizing your image files”, I would like to talk about improving on this organizing and just as important, finding any image or group of images really quickly with the use of keywords, descriptions and other metadata that will allow us to find specific images much faster than just randomly searching through all of your image folders. For the purposes of this article I will be using Adobe Bridge. If you are using some other piece of software I am sure you will be able to follow along.
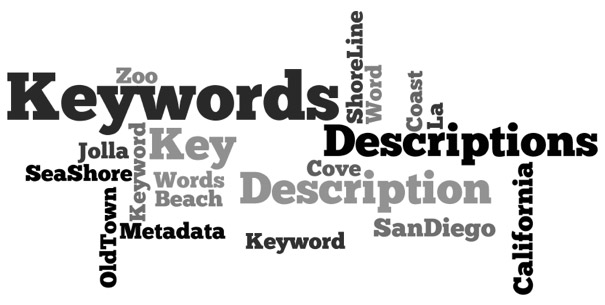
Keywords are unique words (or possibly phrases) that allow us to identify subject matter in an image. There are two kinds of keywords; global / generic and local / specific. We will discuss these in more detail shortly.
Descriptions are complete sentences that describe the who, what, when, where & why of the image. Ever notice when you do a “Google” search on a topic, the results page that shows up is based on the keywords you used to search that topic and displays about two and a half sentences of that result, along with the link of course.
Well, that couple of sentences is grabbed from the description field of the web page. Image browsers work in a similar fashion. Now I will be the first to admit that the majority of people reading this article will say that adding descriptions to my images is not necessary and I would agree with them but, for those that are professional photographers working for any of the media outlets, this may be something that the editors require. Stock photo agencies will not accept any images unless they have keywords and descriptions in them.
Both generic keywords and descriptions can be added to all of your images at one time each, which makes this daunting task much easier. Adding specific keywords to individual images can be time consuming but well worth it in the end.
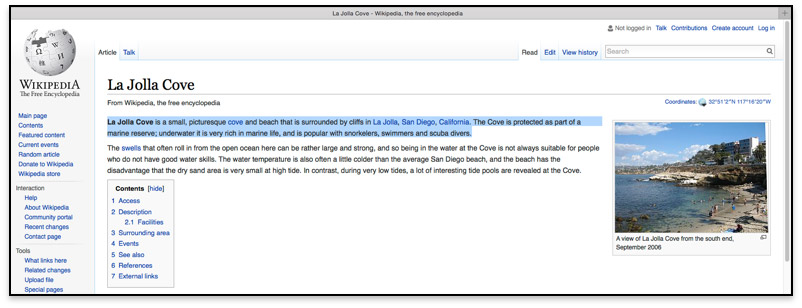
Let’s say we are planning a trip to San Diego, California and we know that we plan to visit a few specific places such as La Jolla Cove, Old Town and the San Diego Zoo while we are there. What I would do is create a MS Word document and in it I would list these three destinations. Under each destination I would place a description that I copied from, say, WikiPedia. After reading a bit about that destination, I could also type in a few keywords.
Let’s face it, even for professional photographers, this is not one of the more enjoyable tasks we perform but it is a necessary one none-the-less. Larger studios will have their office admins do this type of work because frankly, we would rather be shooting.
I know that the first thing we all want to do once our images have been transferred to our hard drives is take a look at what we have. I am going to ask you to hold off on that for a few minutes and apply en masse, the descriptions and keywords before browsing through your images. It’s really a simple matter of copy ’n paste and all of this information gets placed in each image’s metadata records in no time.
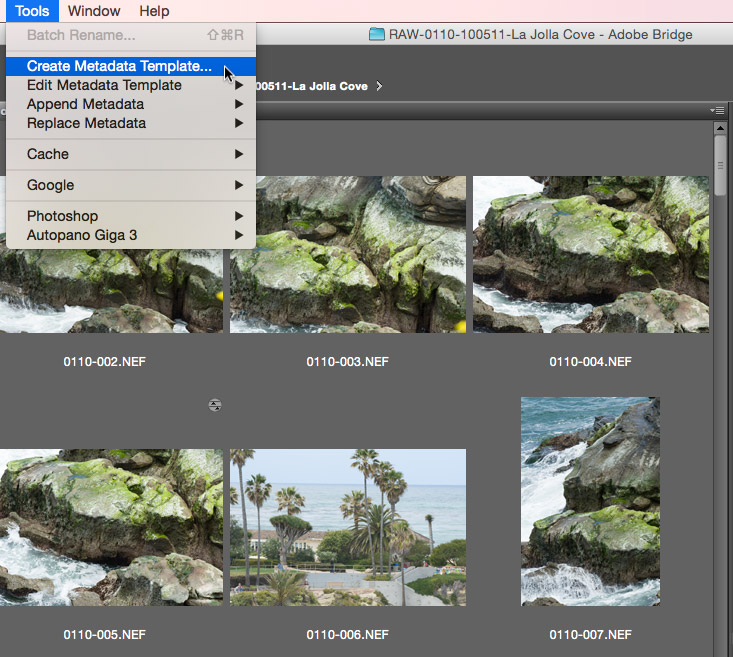
Earlier I mentioned keywords, descriptions and other metadata. One of the other metadata things we need to add is our copyright information along with at least an email address and possibly a phone number. We can add this copyright information using what is known as a Metadata Template which we have to make our selves. No big deal, Follow along please.
In Adobe Bridge, navigate to where your folder of images is located. Thumbnail previews should be displayed in the Contents area in the centre. Along the top of the interface you will see a menu with many choices. Please choose Tools. Then choose Create Metadata Template …
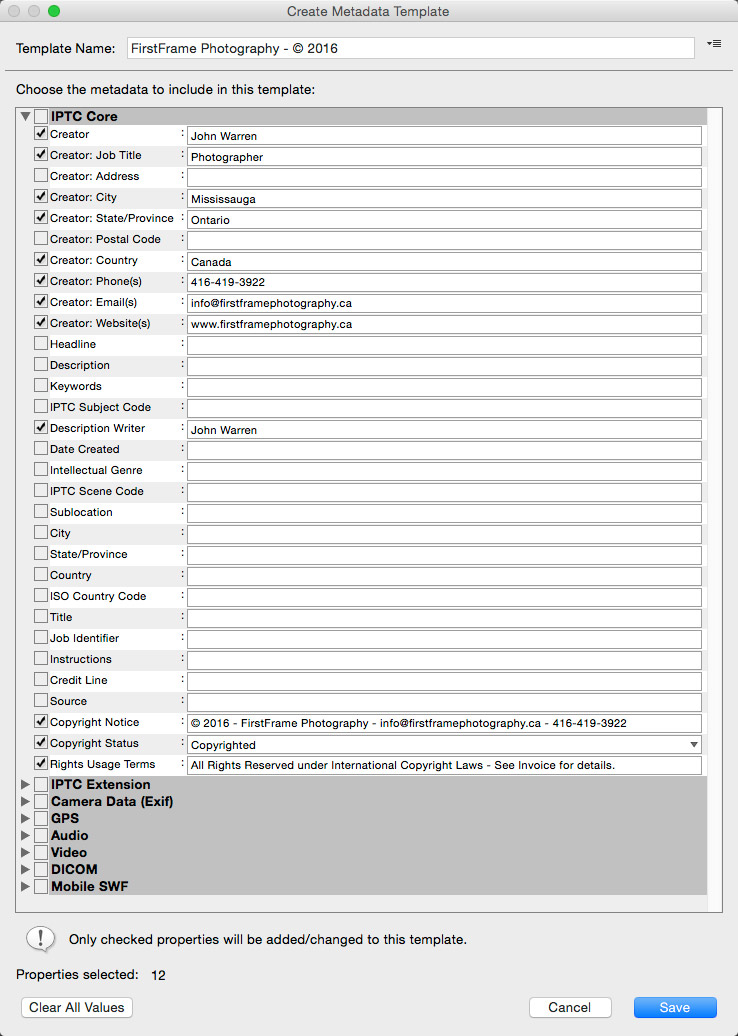
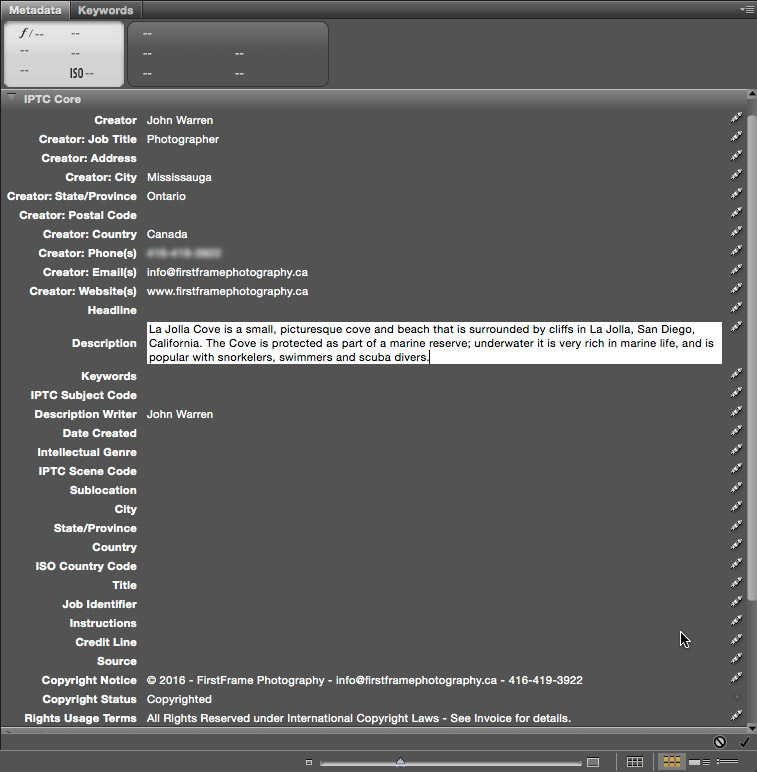
Fill in all of the appropriate fields using the image below as a guide. If you are uncomfortable including your phone number then just leave it out. Once you are done, click Save. Adobe Bridge will save this template to the correct folder so it can access it again and again.
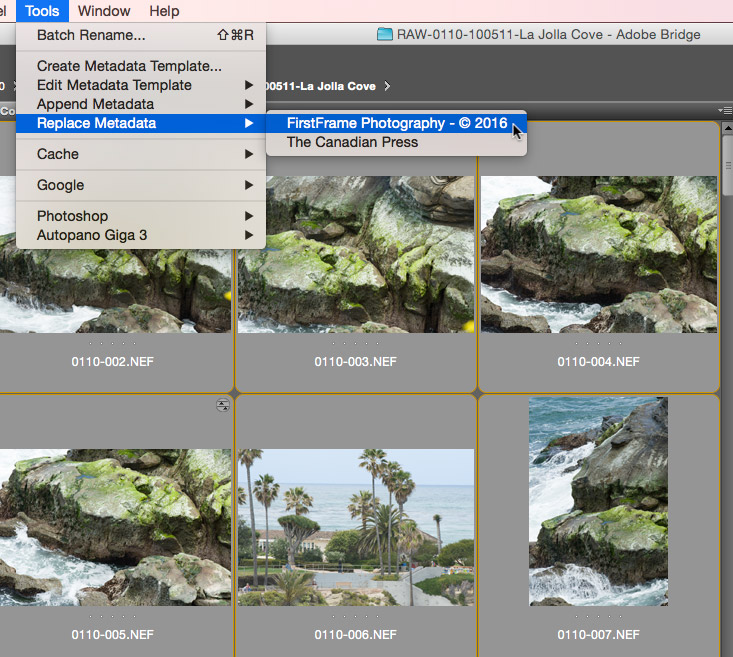
Now select all of the images inside that folder. Select one and then do a Command/Control + A to select them all. Then go under the Tools menu and choose either Append or Replace and then choose your template by name. Bridge will apply all of this information really quick.
It is always a good idea to verify that it was done correctly so, select any or all images and look to the lower right hand side of the Bridge interface and you will see that all is good.

Now let’s add the “La Jolla Cove” description to all of our La Jolla cove images. Open up your MS Word document that contains your descriptions and select and copy the La Jolla Cove description and then return to Adobe Bridge.
In Adobe Bridge, select all of the La Jolla Cove images and over on the right hand side in the metadata section, click in the text input field for “Description” and paste. Use the traditional method of either Command/Control + V. Click anywhere outside that text field to get Bridge to accept these changes.
Now do the same for the keywords. You may not have created generic keywords before actually travelling to your destination so now you will have to look at the images and think of a few. In this example I’ll choose, La Jolla Cove, San Diego, California, seashore and coastline. I am sure you can think of many others as well.
Now let’s look at the Keywords section in detail.
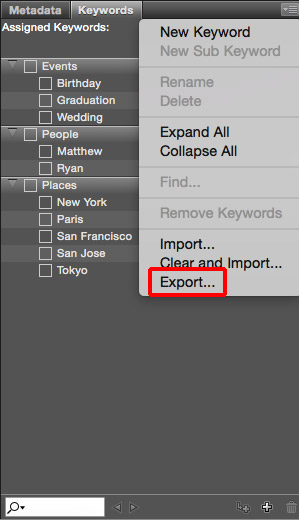
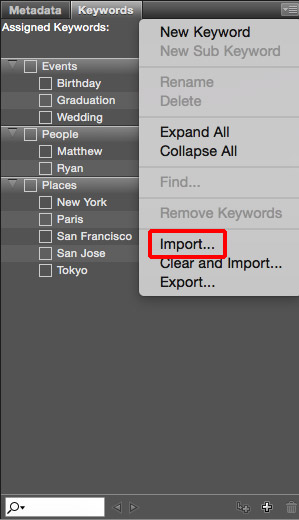
Click on the Keywords Tab – it is right beside the Metadata Tab. Notice that Adobe has already given us a head start on specific keywords with main categories of “Events”, “People” and “Places”. Notice that each on of these main events has subcategories. Now, it’s easy enough to rename these. Just right-click on a name and from the contextual menu that appears, choose Rename and then rename as you see fit. You can add keywords and sub keywords by doing the same thing just choosing a different option but, what if you had a large list of items that you want to add? This would be painful to say the least. Luckily there is a much better way to edit this keyword list and that is to go to this panel’s option menu in the upper right corner and click on it and choose Export form the options. You have now exported a plain “txt” file that you can edit really easily using the simplest of text editors.
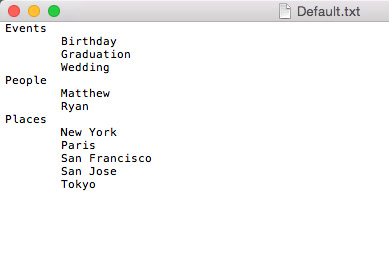
In this example, I added a subcategory of San Diego to the Places category. When you hit the “Enter or Return” keys, your cursor ends up on a new line at the left edge of the document. At this point you would be creating a new category but, we don’t want to. We want to create a subcategory so we must “Tab” this entry in one.
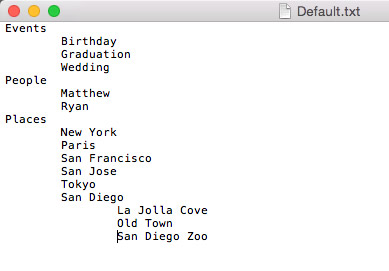
To create the three places in San Diego that I want, under the San Diego subcategory, I must hit the “Tab” key twice. This creates a sub-subcategory, if you will. Once you are done, save this file and then Import it back into Bridge by clicking on that same Panel Options Menu icon and this time choosing Import as shown in the image below.
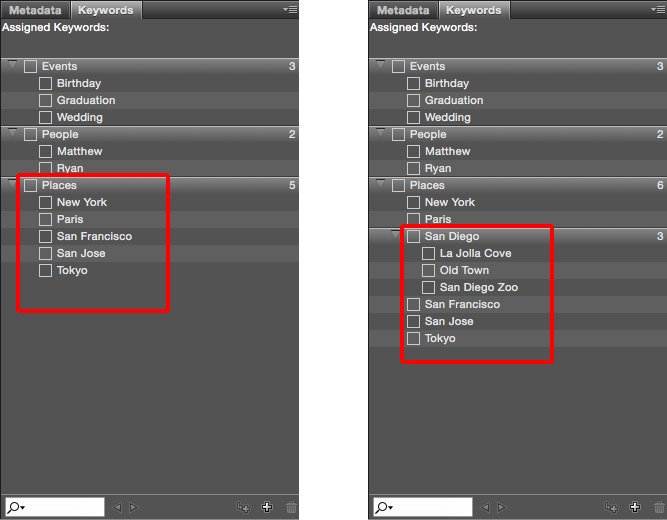
The image on the left below shows default keywords that Adobe supplied us and the image on the right below show the added subcategory for Places, San Diego and, the subcategories for the San Diego subcategory that I added and imported.
So now all I have to do to add the keywords “La Jolla Cove” to all of my La Jolla Cove images is select all of the La Jolla Coves images and then click once on the “La Jolla Cove” subcategory of San Diego. Pretty simple isn’t it? Yes, yes it is.
One more thing about the benefits of adding some description text to your images and that is this information can be displayed along with your image(s) depending on what photo sharing web site you are using. If you have joined an online photo group that allows you to show off your images, wouldn’t it be nice if your viewers could read something about the image itself? Yes, it would. Also, if you use programs like Lightroom, this descriptive information can be displayed in slideshows, web galleries and when you prepare your images for printing.
And lastly, if you are a sports photographer shooting for a media outlet that requires your images right away, you might want to look into a program called Photo Mechanic. This software has two main benefits; one is that it renders your image previews super fast and secondly, it allows you to take advantage of something called Code Replacements which allows you to load up a team roster and with a couple of key strokes (codes) replace that code with a complete string of descriptive text. maybe this should be a topic for another day.
In the next article I would like to discuss some best practices for sorting through all of your images in order to find and isolate the better ones using star ratings, colour labels and creating collections based on certain criteria for various end games.
About the Author:
John Warren is an award winning Photoshop Instructor and Professional Photographer living and working in the Greater Toronto Area and is on the faculty at Humber College.