
As a Landscape Astrophotographer, I have a special affinity for photographing the heart of the Milky Way. Unfortunately, it is only visible for me during the warmer months.
With that being said, that doesn’t mean that I pack all my gear away when the temperatures reach single digits or even negative values. There are numerous reasons why the cold weather months are actually a better time to get out there and practice the art of Landscape Astrophotography.
It has generally been my experience, that when the temperature dips, the skies become clearer making many more stars visible, both to the naked eye, and to the sensors in our DSLRs.
Repeated Long exposures will heat up the camera sensor, which in turn will create more noise in the image. Cooler weather helps reduce the heat built up by those long exposure shots and in turn leads to less noise in the image.
As for personal comfort, clothing technology has also changed significantly over the years. You can now easily wear multiple layers of light clothing and will remain quite comfortable for several hours at a time. Mate that with some warm headgear, a good pair of boots and some gloves that allow for you to flip the front so you can press the shutter and you’re all set for a night of astrophotography.
I like to travel lighter in winter so for these images I was shooting with my Canon 6d accompanied by the new Laowa 12mm f/2.8 “Zero-D” lens. This little tank of a lens – build quality is great! – is almost half the weight as some of the other lenses I use for night photography. The lack of pincushion or barrel distortion with this lens also makes for great star field images.
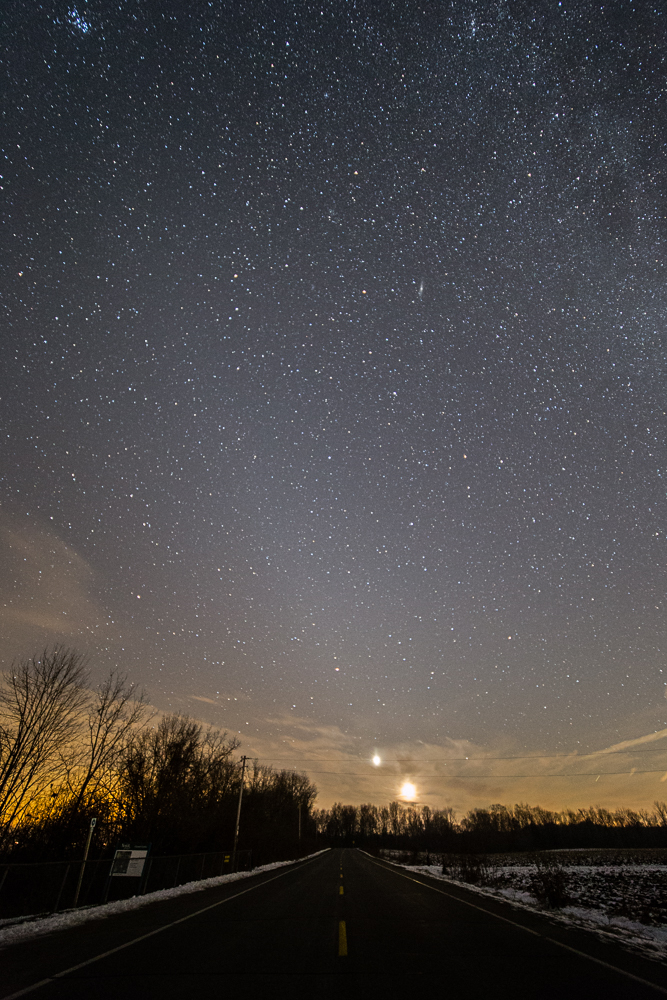
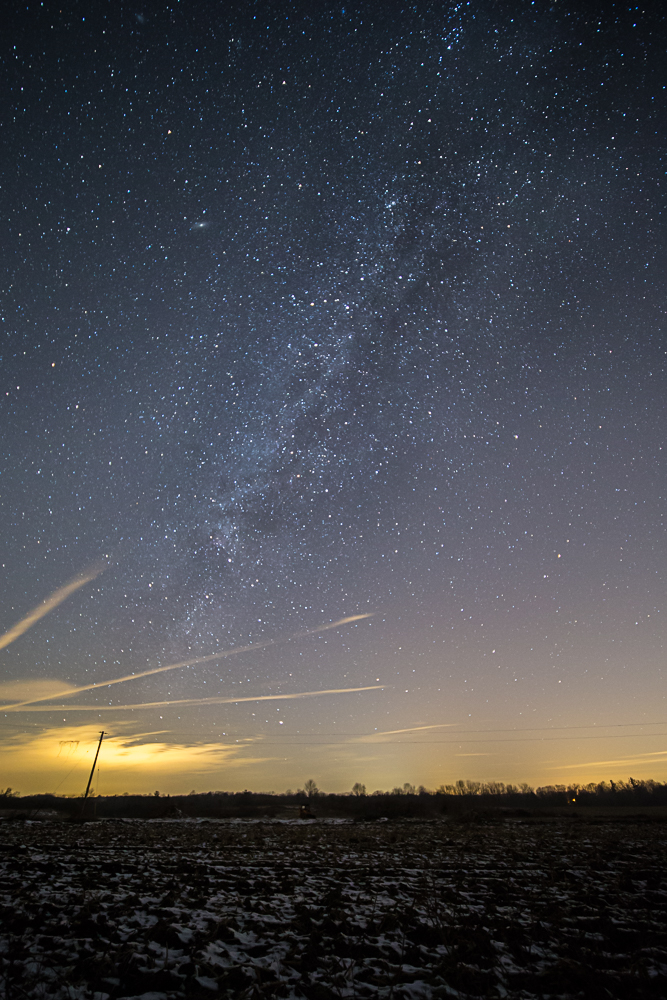
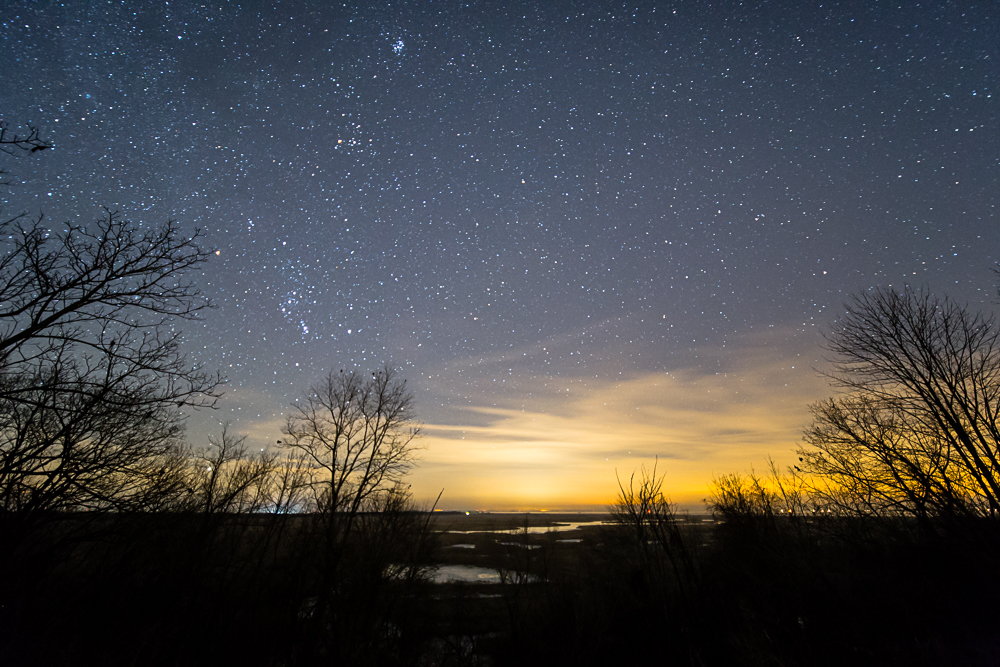
During the cooler months there are several easily identified, and visually striking constellations available for photography. The Constellations of Orion, along with Pleiades are two of the easiest to identify and both look great in an image. If you are able to find dark enough skies, our neighbour Andromeda and the Triangulum galaxies will easily be seen in your images. Also the thinner portion of the Milky Way will be visible.
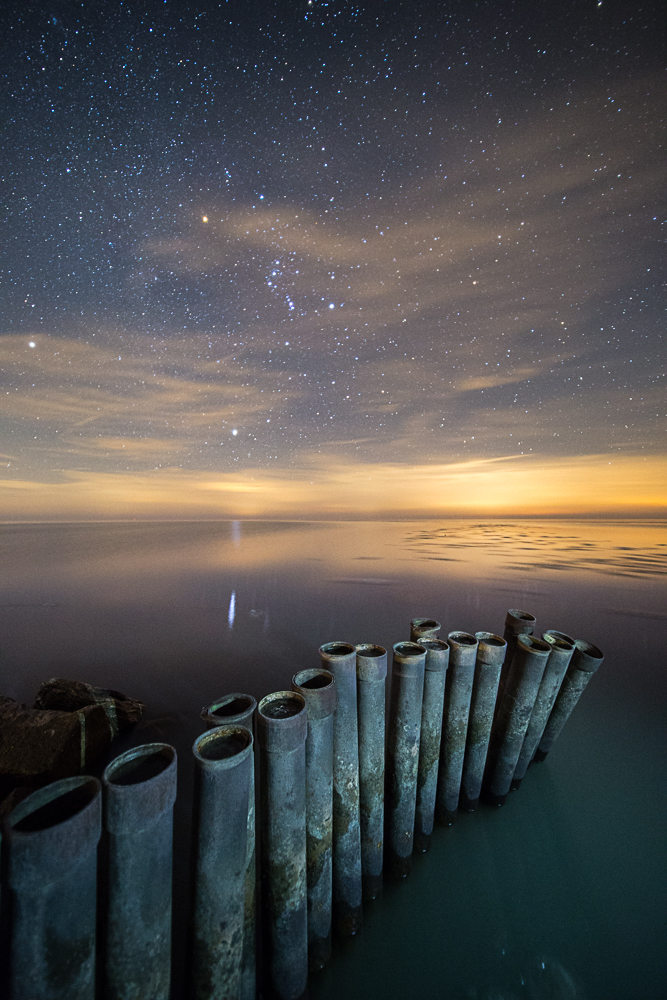
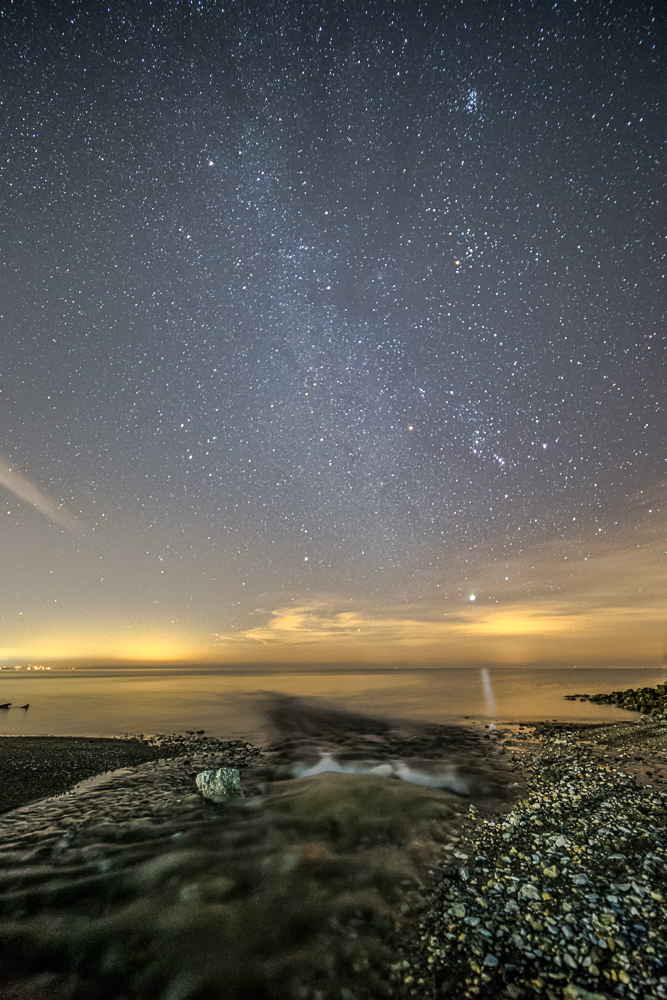
For this shoot, I decided to visit the shores of Lake Erie in Norfolk County, an area that has some of the darkest skies in Southern Ontario. From here, I have the ability to photograph in almost any direction and not be affected greatly by light pollution.
With Landscape Astrophotography, I have a personal preference to always try to capture the image in one shot and not to process my images too heavily. I find that this helps keep the “realism” in the image. Quite often I will opt to have a darker land portion of my image to aid in keeping focus on the sky. When I do want some details in the foreground I will use a diffused flashlight with as white of a light as I can find and carefully illuminate the foreground to bring out the details in the image. This technique is known as “Light Painting”. With a little practice you will quickly become a master of the technique.
When you are finished shooting, place into a small, insulated cooler so the air in the cooler will warm slowly warm the camera and not create dew on or inside the lens or camera.
As a last point I will suggest that you purchase some hand warmers to help prevent dew forming on the outside of your lens. This trick will work any time of year when dew forms on the outside of your lens during a shoot. Just shake the hand-warmer and use an elastic to wrap it around your camera lens. The science behind this trick can be found on the internet, but just knowing it works is good enough for most people.
Bundle up and get shooting!
About the Author
Darryl Van Gaal is an astro-photographer from Waterford, ON whose images have appeared on NASA APOD as well as on Google+, Facebook. See more of Darryl’s at www.darkclearskies.com


Hi Darryl,
Loved your article and found it encouraging. I have tried night photography of the skies and loved it. However my long exposures caused star trails. How do you get the stars to just be points of light?
Love your work by the way. I live near lake Erie and will try to do the same photos but in my area of the wood….or lake.
Thank you for your article. Loved the cooler tip.
Jana
Jana,
There is something called the “600” rule (some use 500 or even 400).
Basically it is how you keep from getting the star trails.
To figure it out you take 600 and divide it by your actual focal length.
If you are using a crop sensor (not a full frame) you have to multiply your focal length by the crop factor.
(most Nikons that are not full frame are 1.5, Most Canons that are not full frame are 1.6).
I shot those images with a Canon 6D which is a full frame camera. With the Laowa 12mm lens the formula would look like this:
600/12
= 50 seconds
If it were shot with a Canon 7D the formula would be:
600/(1.6×12)
= 600/19.2
= 31.25 seconds
If you require more assistance feel free to contact me through my website.