About the Author:
Dustin is a full time pastor/part time photographer from Pembroke, Ontario who shoots professionally but primarily for capturing beauty and sharing it with others. www.dustinabbott.net
Even the best of lenses cannot overcome the various lighting conditions that photographers encounter. In the perfect world, we would all be able to shoot in perfect “golden hour” light all the time. I love that soft, directional light that comes either in early morning or late evening. Everything looks better in those moments.
But this isn’t a perfect world.
Here in the real world photographers sometimes have to shoot in the harsher, flatter light of the mid-day sun, or face distracting reflections, or need some way of slowing shutter speed to provide long exposure blur of water or sky. The real world needs filters! The proper use of filters allows you to take (and make) images that you otherwise could not.
The most basic tool in the filter arsenal is a UV/Protection filter. Camera lenses tend to be very expensive, and one of the first things that I personally do after purchasing a new lens is to put a UV filter on it. This serves multiple purposes: first, it provides protection for that expensive front element. Secondly, the better UV filters (like the Rodenstock HR Digital Super MC I’m reviewing here) are specially coated to make them scratch resistant and to repel water and dirt. They are usually easier to clean than the front element of the lens. I have had a UV filter “sacrifice itself” to save my lens before! Not just any filter will do, though, as the cheaper ones can actually degrade image quality because of the poor quality of the glass.

With UV
My second priority in a filter is a good Circular Polarizer (CPL). I use one almost any time that I am shooting outdoors, and, in some cases, even when shooting indoors. A good CPL is helpful in almost any kind of light. When overcast, it helps to richen colors. When bright and sunny, it will help to keep the sky blue and will reduce harsh reflections and highlights. In almost all lighting conditions a CPL will help improve contrast and richness of color. When shooting near water, you can eliminate glare and reflections from the water and allow your shot to contain interesting details beneath the surface of the water. You can even use for the opposite effect of enhancing reflections! I also use a good CPL when indoors at a zoo or aquarium to reduce the glare of lights off the glass of enclosures.
A CPL takes a bit of practice. The front element rotates, giving you control over how much polarizing effect is achieved. This is a good thing, but it does take a little practice to learn how to properly utilize it. The good news is that the effect is visible through your viewfinder. This Rodenstock Digital Pro MC filter I’m reviewing has a slim ring (no vignetting), hardened optical glass to resist scratching and to allow for maximum light transmission, and it also has a threaded front element to allow for filter stacking.

Without CPL

with CPL
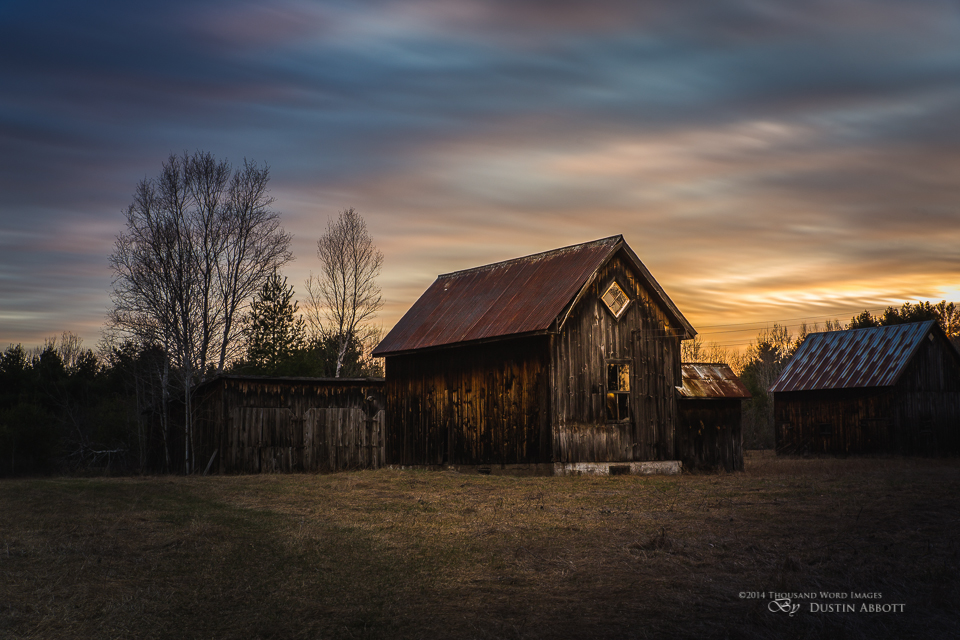
The final key tool to unleash your “filter creativity” is a Neutral Density (ND) filter. An ND filter serves several purposes, but the single most important is to give the photographer control over the amount of light that reaches the camera’s sensor. This might mean helping to reduce the shutter speed so that you can shoot a large aperture prime “wide open” during the day (and get that great shallow depth of field), or to allow a very low shutter speed for a long exposure shot to blur water or the sky. ND filters come in different strengths for different purposes. Even more valuable is a variable ND filter like the Rodenstock Vario-ND MC filter. This flexible filter allows you to choose between 1.5 to 5 stops of density, and even has a maximum mode that reduces light as much as 9 stops. This unleashes a lot of creative options for very long exposures that produce amazing effects. Some of my most stunning pictures have been taken while using such an ND filter for long exposures. All it takes is a turn of the outer element to dial in the amount of density you want. Think of this as a very flexible pair of sunglasses for your lens. ND filters are also valuable for increasing contrast and getting richer colors as well.

Without ND

With ND

ND + 1

ND Max
Learning to use filters is the key to taking your photography to the next level. A photographer’s task is not just to capture light; it is to control light. A good set of filters is the best way to accomplish that!