So you’ve seen some incredible star trails, you’ve booked a weekend to get out of the city, and you’re ready to throw your hat into the ring with the best of ’em.
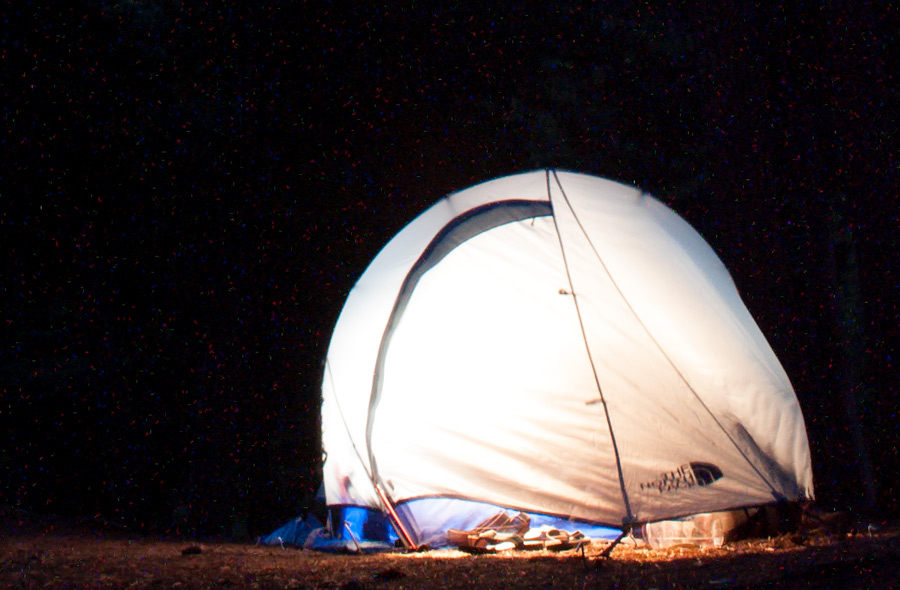
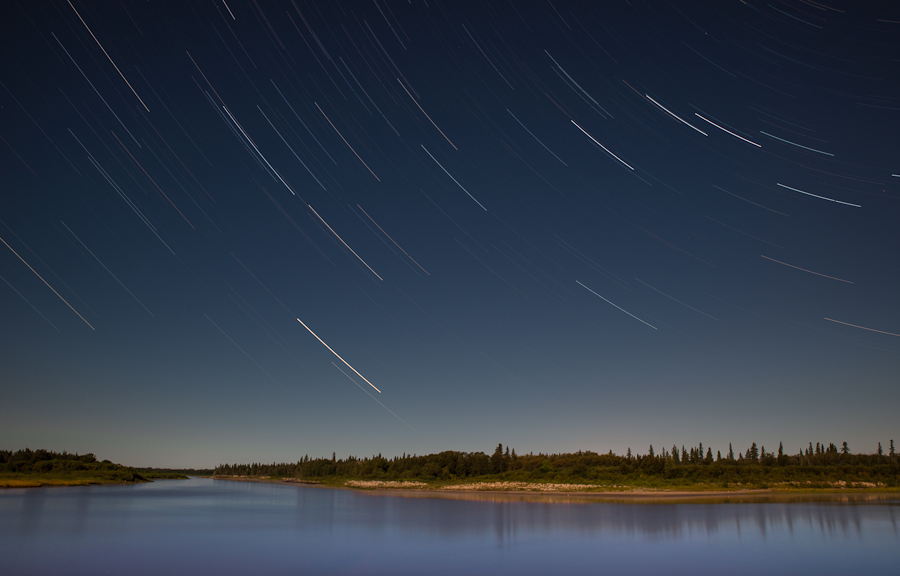 Our final image. Nikon D800 – Tamron 24-70mm F/2.8 VC – Gitzo 2540F Tripod. 180 secs @ F/9 – ISO 400
What You’ll Need to Get Started
- A DSLR capable of manual exposures
- A remote cable/shutter triggering device
- A solid tripod and tripod head combination
- Fresh batteries
- A copy of StarStax – Free Download
Picking a Location
For your star trails, you’re going to want to get away from the city and into the backcountry. The ambient light pollution from the city will cause your exposures to be too short, not allowing enough time to expose for the stars. Also, be sure to find a location with some good foreground interest (trees, lakes, mountains, buildings). It’s always good to check your calendar and the time of month you’ll be shooting. Try to avoid shooting on a full moon if possible, as it will shorten the duration of your exposures, causing you to shoot a lot more photos than you need, and possibly blowing your star trails altogether. You’ll also want to check which direction you’re facing with a compass and avoid facing east. You don’t want to be shooting directly into the moonlight for this. The best option is to face north. Facing north will allow you to focus on the “North Star”, which is the point all other stars rotate around.
I keep three apps on my iPhone to assist me in the field. The first is MoonPhase. It lets me see a calendar for the entire year and plan shoots according to the size of the moon in the sky. The second app is The Photographers Ephemeris. I can select any point on a world map to shoot from and track where the sun and moon will rise and set in the sky. Coupled with Google Maps’ Satellite and Streetview, I can get a sense of what my shot will look like before I’ve set out on a trip. The final app is Star Walk. It gives me an augmented reality of the night sky as I’m standing behind the camera, and I can scroll through time and see where the stars will move, as well as the position of the north star.
MoonPhase

Description: Thinking of shooting a full moon? Maybe shooting star trails? Know what stage the moon is at so you can plan your shoot accordingly.
Price: $1.99 | Compatible: iPhone, iPod Touch, iPad | Website | iTunes Website
The Photographers Ephemeris

Description: The Photographer’s Ephemeris (TPE) helps you plan your outdoor photography shoots, particularly landscape and urban scenes. It is a map-centric sun and moon calculator: see how the light will fall on the land, be it day or night, for any location on earth.
Price: $8.99 | Compatible: iPhone, iPod Touch, iPad | Website | iTunes Website
Star Walk

Description: Star Walk allows you to point your phone at the sky and augment reality with the stars. Flow through time and find where the stars will be at a specific point in time. Great for the timelapse photographer looking to track the Milky Way through the sky.
Price: $2.99 | Compatible: iPhone, iPod Touch, iPad | Website | iTunes Website
Setting Up the Shot
The key is stability. A good solid tripod and tripod head are 100% necessary to getting these shots. Any movement during or between exposures will throw off the entire shot. Some tripod heads will sag over a prolonged period with a heavy lens, so while it may look stable to start, ensure you have everything locked down solid. Also, try to avoid shooting in a windy area. Large amounts of wind will cause vibrations in the tripod legs, causing jagged streaks in the sky.
Ensure your batteries are fully charged. Long exposures leave the sensor charged for a prolonged period of time, causing a lot of stress on the cameras battery. If possible, use a battery grip with multiple battery slots to allow for lengthy exposures, especially in cold climates.
Set your focus to manual, focus at infinity, and tape down your focus ring. Again, the smallest adjustment to focus could ruin your shot, so avoid accidentally bumping the AF-On button by setting everything ahead of time.
Connect your intervalometer to the camera, ensuring it also has fresh batteries. You’ll want to set it for a 30-60 second exposure, depending on the amount of ambient light creeping in.
Two Schools of Trail
The One-Shot Trail
The one-shot trail is definitely how your dad shot star trails, and his grandfather before him, and so on from the dawn of photography. One long exposure, camera pointed to the sky, and the shutter held open allowing the stars to streak across the sky (and in-turn, the film) following the rotation of the earth. This is still possible in the digital age, but there is one BIG problem. Digital sensors show more noise during longer exposures. This could get into an entire physics tutorial, but the short of it is that the heat generated from the sensor being on for prolonged periods of time will amplify noise in the sensor. You will also see an increase in red dots across the image. These are called ‘stuck pixels’ and there is not much that can be done about them.
The image below was shot on a Nikon D700 for 30 minutes straight.
But if we get right into the pixels at 100%, you can clearly see some big issues with the pixels.
The Stacking Trail
The best way to combat the digital noise of long exposures is through stacking. A similar concept to our Macro stacking article from a couple months ago, we’re going to shoot multiple photos of the stars and lay them on top of each other. By doing this, we’re able to maintain a shorter exposure for the foreground, get less noise from the sensor, and we’re able to do a quick progress check along the way.
Find your location, setup your camera, and dial in your exposure. You’re going to want a shutter speed between 1-3 minutes. Aperture should be around F/5.6-F/11 depending on the night sky. ISO is variable depending on the location, but with the half-moon rising behind us, I was getting ISO 400. After dialing in our exposure and focus, everything was locked into manual. From here, the intervalometer was connected and set to shoot a 180 second exposure, and continuously fire as soon as it was done the exposure. I took a total of 15 exposures, for a total of 45 minutes of rotation. (180 seconds x 15 exposures = 2700. Divided by 60 gives us 45 minutes) Once you are done your sequence, put the lens cap on and shoot one more photo. This dark frame will measure the red/hot pixels on the sensor, and will be used as a ‘dark-frame subtraction’ in the digital darkroom.
Once back to the computer, our images were loaded in to Lightroom, adjustments were made to get the photo as close as possible to what we wanted in the end. Those settings were copied and pasted across all of the photos. This was done because StarTrax does not support RAW files for stitching, which is understandable for freeware, as RAW algorithms change every week.

Install and startup Star Trax on your computer. Using the icons in the top left, select your sequence of images. The next icon is to select the dark frame you shot earlier with the lens cap on. From there, just to the right-most icon and process the image. This will take a minute or so depending on your machine and image size. Finally, use the Save icon and save the final JPG to your computer.
Bonus Tip:
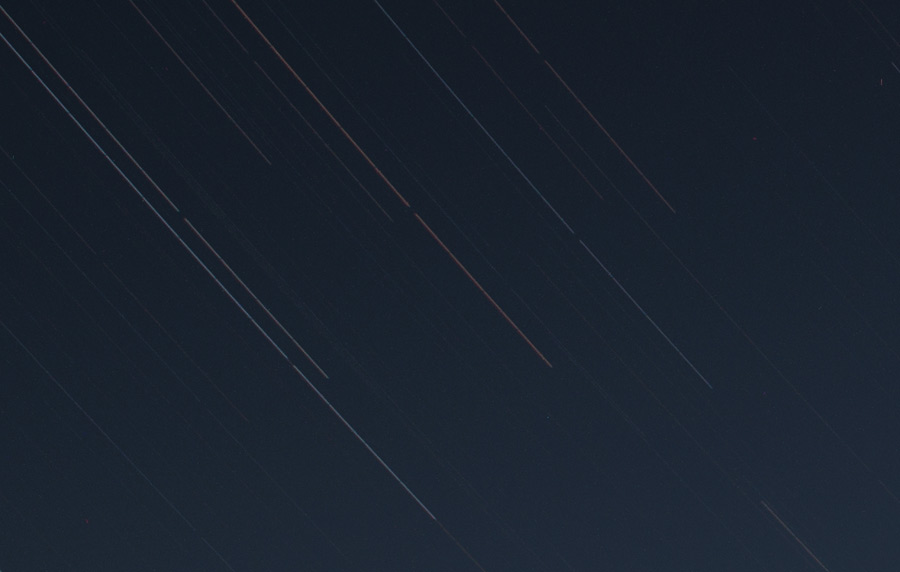
Don’t get greedy and check your images for too long. The stars can move quickly. This is the gap that formed in the trails from a 15 second scroll of some photos. If you have to check at all, just check for a split second and get back to the exposures, the exposure should be staying the same between frames from your initial setup tests.